
Welcome to the Weekend Workshop, a place where you can save some cash by getting your hands dirty. These tech guides aim to arm you with the necessary info and knowledge to get out there and give it a go yourself, with no professionals needed, and at a price tag that won’t break the bank.
This month, we delve into LSD shimming, focusing on a Hilux clutch-style LSD, as it’s a common upgrade for many cars and also a notoriously lazy LSD, usually having travelled millions of kilometres serving as a workhorse before arriving at its new home.
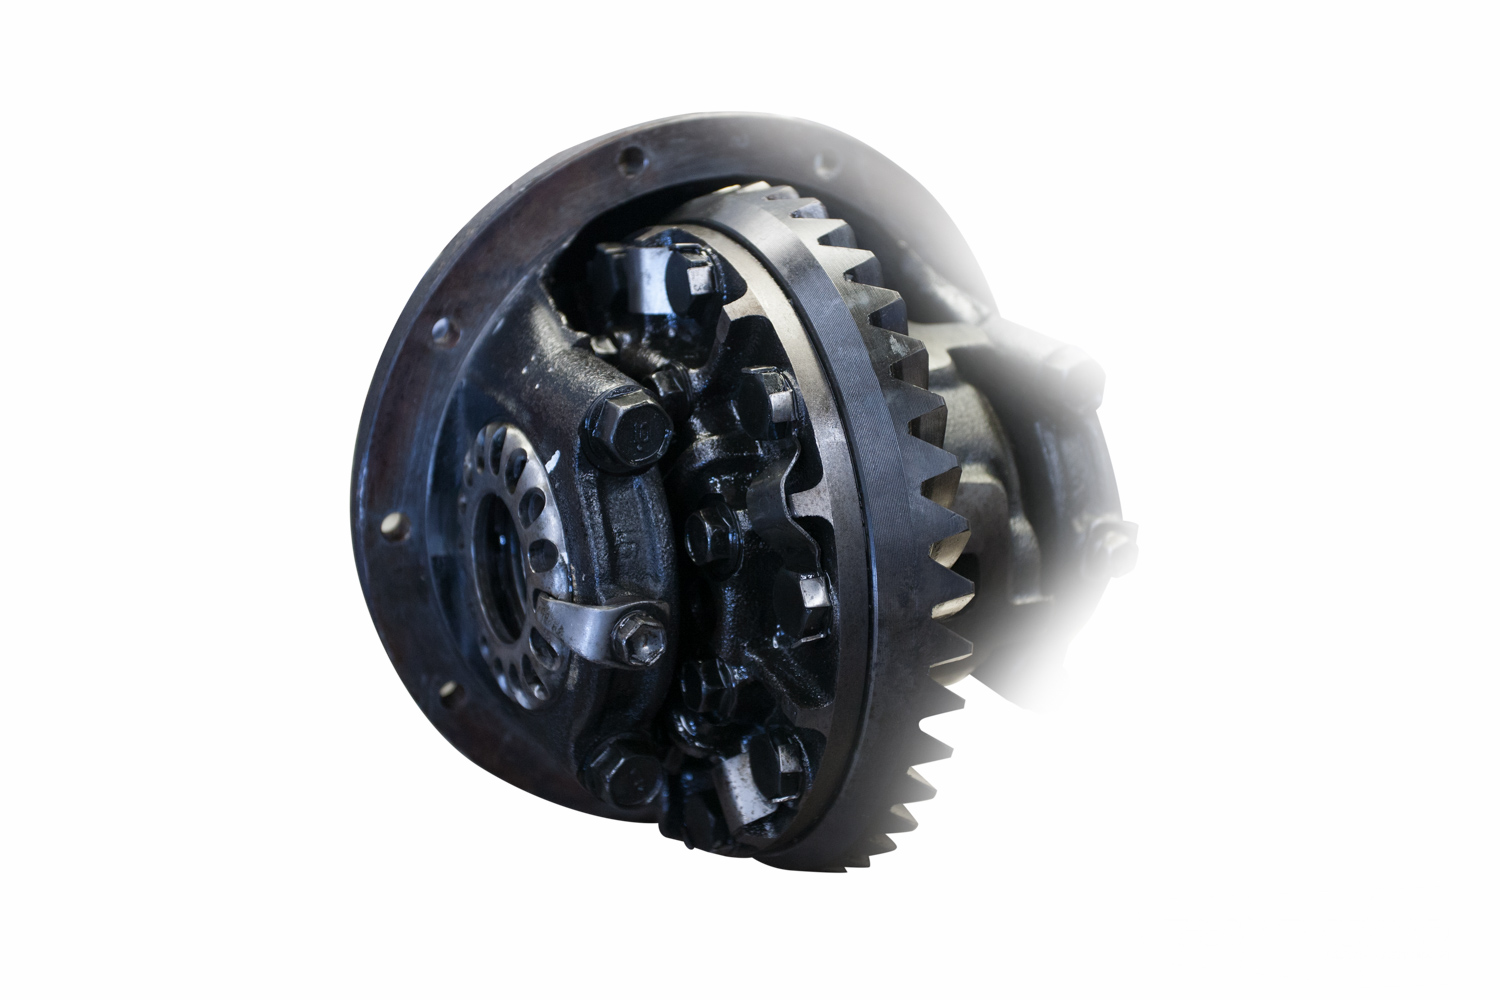
The unit we are working on travelled some 350,000km before finding its way into a rotary-powered ’70s Mazda. The Hilux LSD is a clutch-pack LSD, and works by passing gear oil between the clutch and intermediate plates, causing friction. Over the years, the effectiveness of this function has worn, thus giving the unit more of an open diff characteristic. Bringing it back to life is an easy task, one that most people handy in the garage should be able to cope with. The idea is to add a shim to each clutch pack to decrease the size of these oil passages. The smaller the passage, the less heat expansion of the fluid is needed to activate the LSD. There are a few ways to perform this task, but we have chosen to show you the most basic way to keep costs down, and, in the spirit of the weekend workshops, requiring the least number of tools, but we will explain the differences as we go along. We have roped in Steven Dean from his Henderson-based workshop SD Performance to show us how it’s done.
Tools
Sockets or spanners of 12mm, 14mm, and 17mm; torque wrench; verniers; dial gauge; dot punch; hammer; soft-face hammer; hole saw; drill; tin snips or jigsaw; some rags; brake cleaner; plus a permanent marker and/or Twink pen
Time
There are three stages to this project, and while we only show the shimming, which took around 45 minutes, you will also need to remove and refit the head, tasks that also take about 45 minutes each. So, total time from start to finish comes in around 135 minutes.
Cost
Retail at Toyota for OEM shims is around $30 per side; it really depends on the thickness. Stainless shim packs from the likes of apstools.co.nz are $53, or $6 for a piece big enough to make a single shim from.
Step one
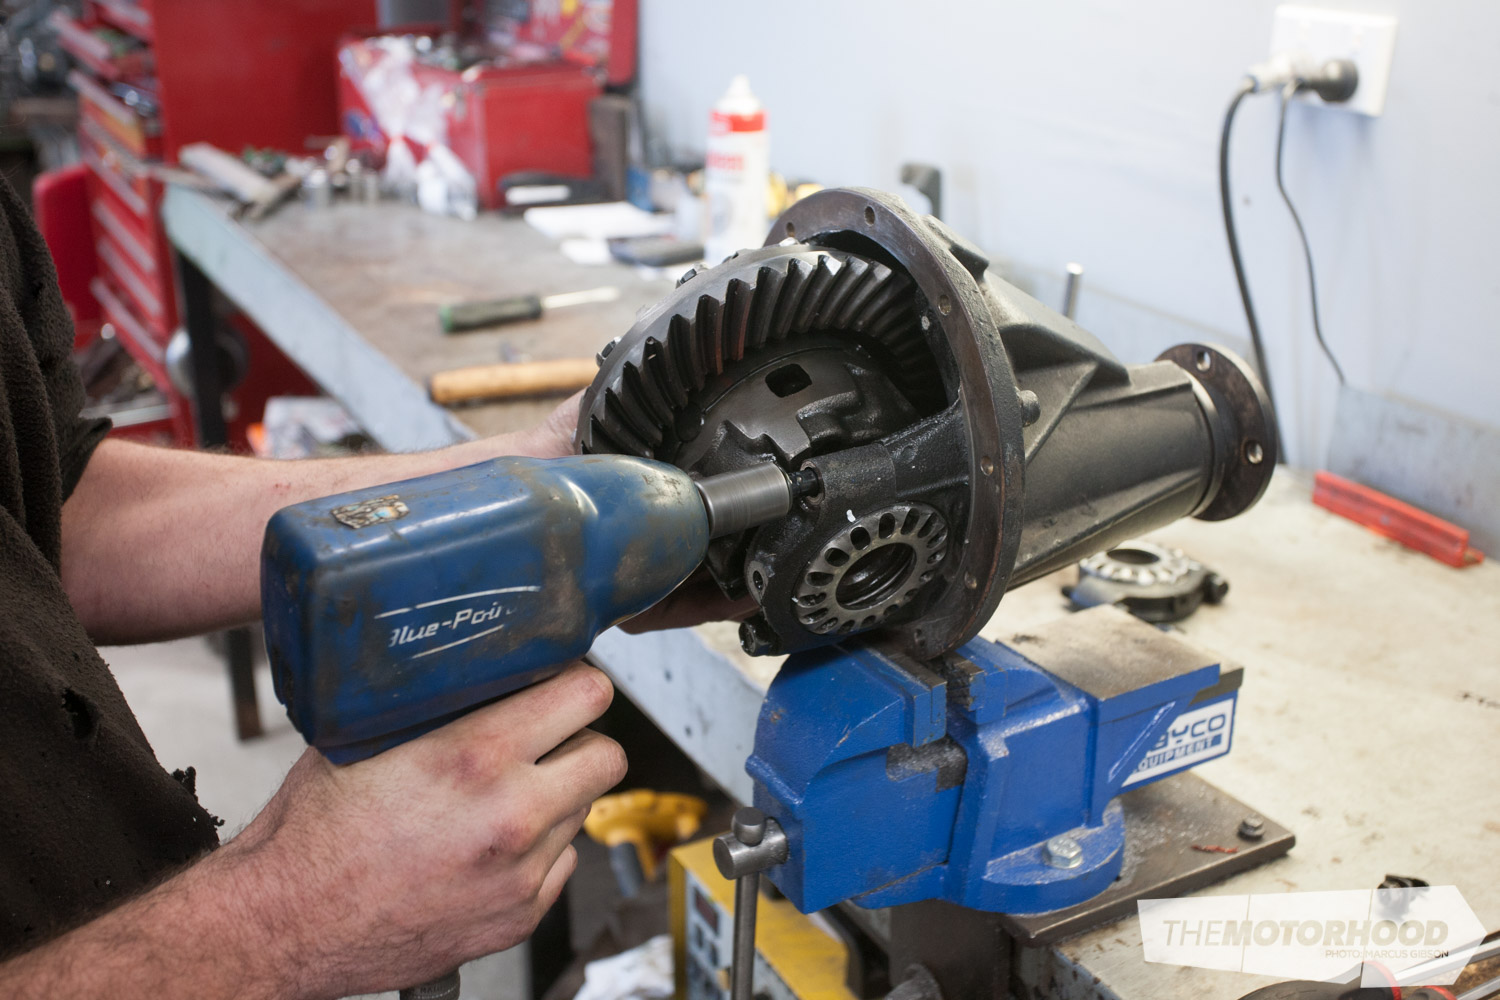
You will need to remove the driveshaft and both axles before the head will come out. Make sure you drain out the fluid before cracking the head seal. Once you have the head out, give it a decent clean with brake cleaner before beginning the backyard surgery.
Step two — marked up
Before splitting the unit, you will want to mark the bearing caps to ensure that when you reassemble everything, you won’t mix up the left and right sides. Steven simply put a dot with a punch on each of the two halves, and also on the two halves of the LSD casing itself. The same thing goes for the outer bearing adjusters: mark this with a Twink pen to give you a reference point when reassembling the unit.
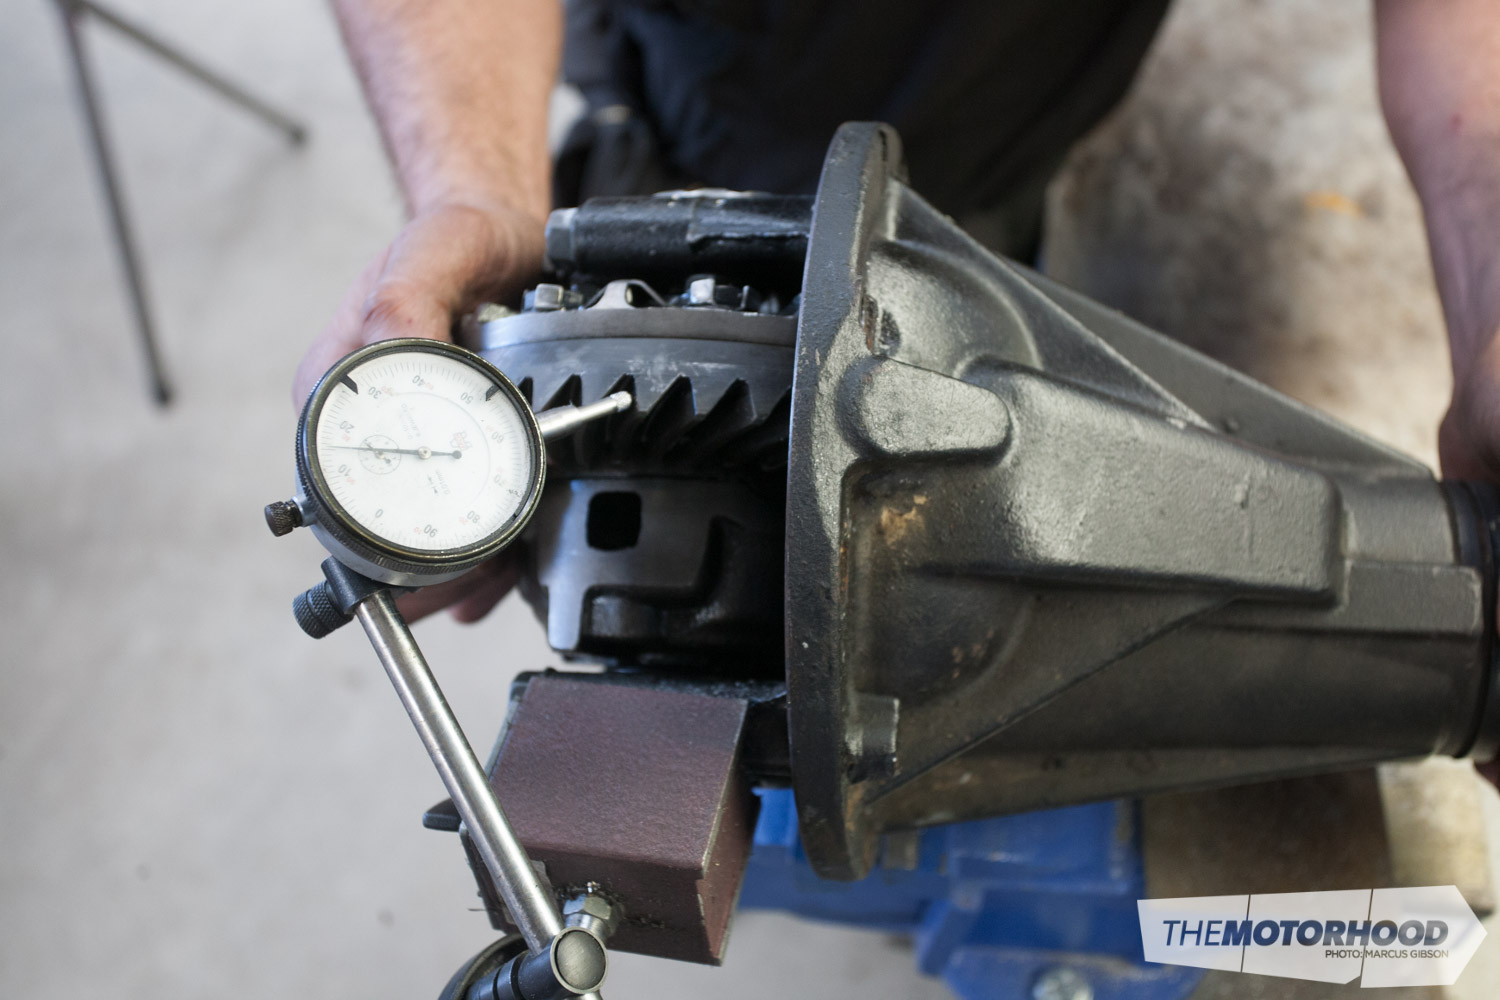
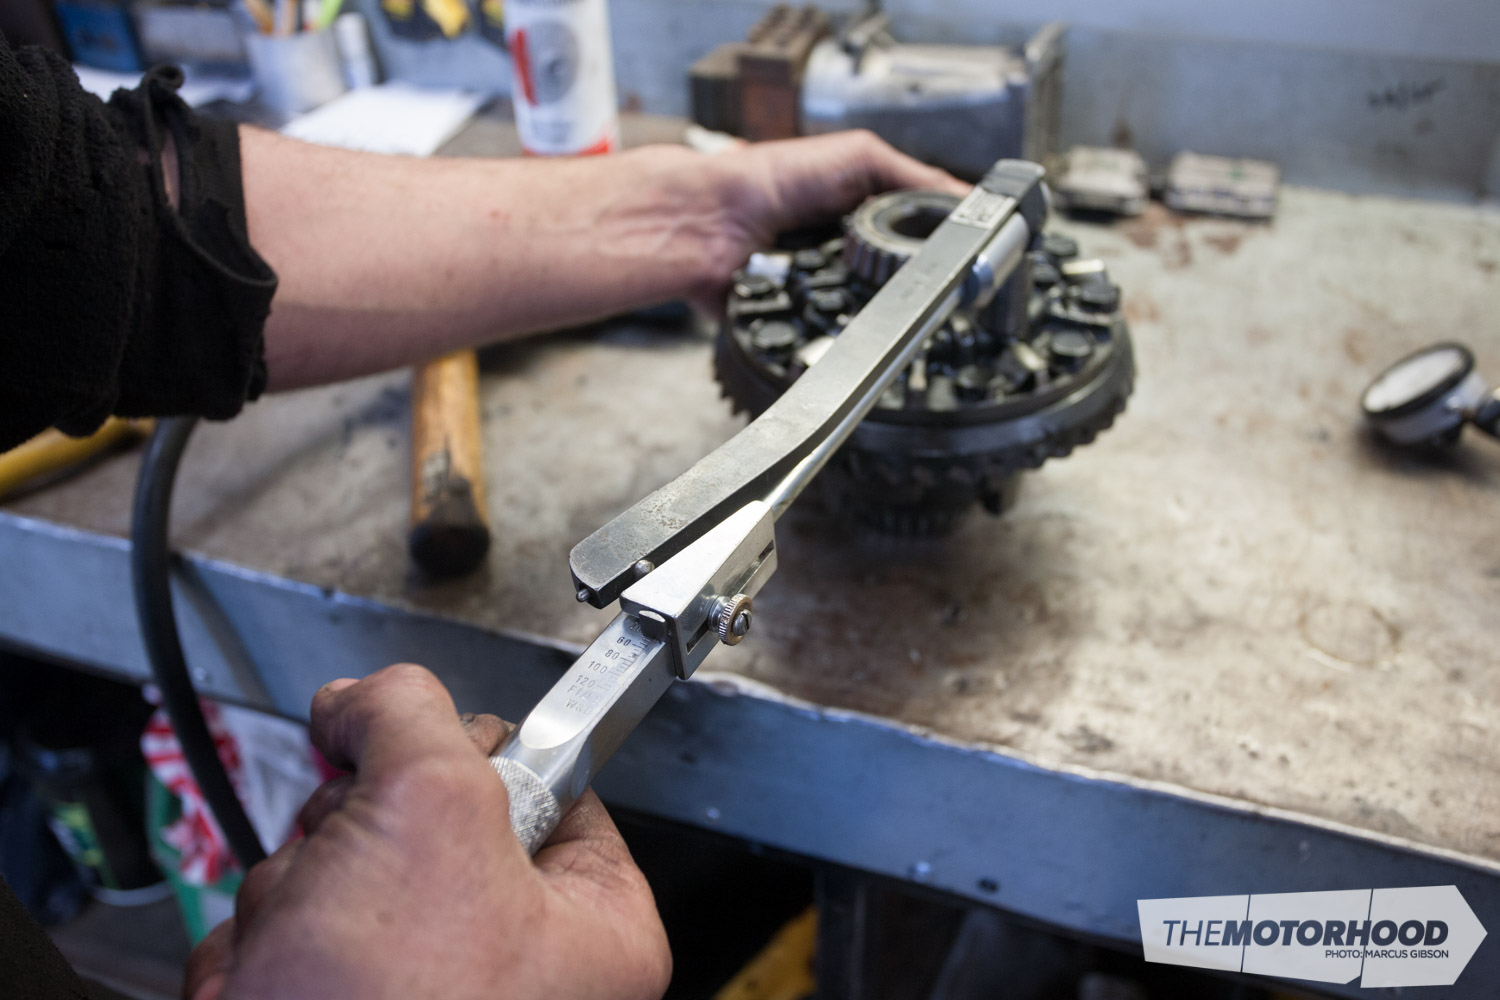
Step three — dialled in
Sing a dial gauge, measure the backlash of the crown gear versus pinion gear. On this particular unit, it was 0.15mm, and, as it was working fine, we decided to replicate this when reassembling. So, grab a pen a paper and take note. If you have a Haynes manual, it will state the factory spec and you can return to this if the diff is clunky due to excessive play/backlash.
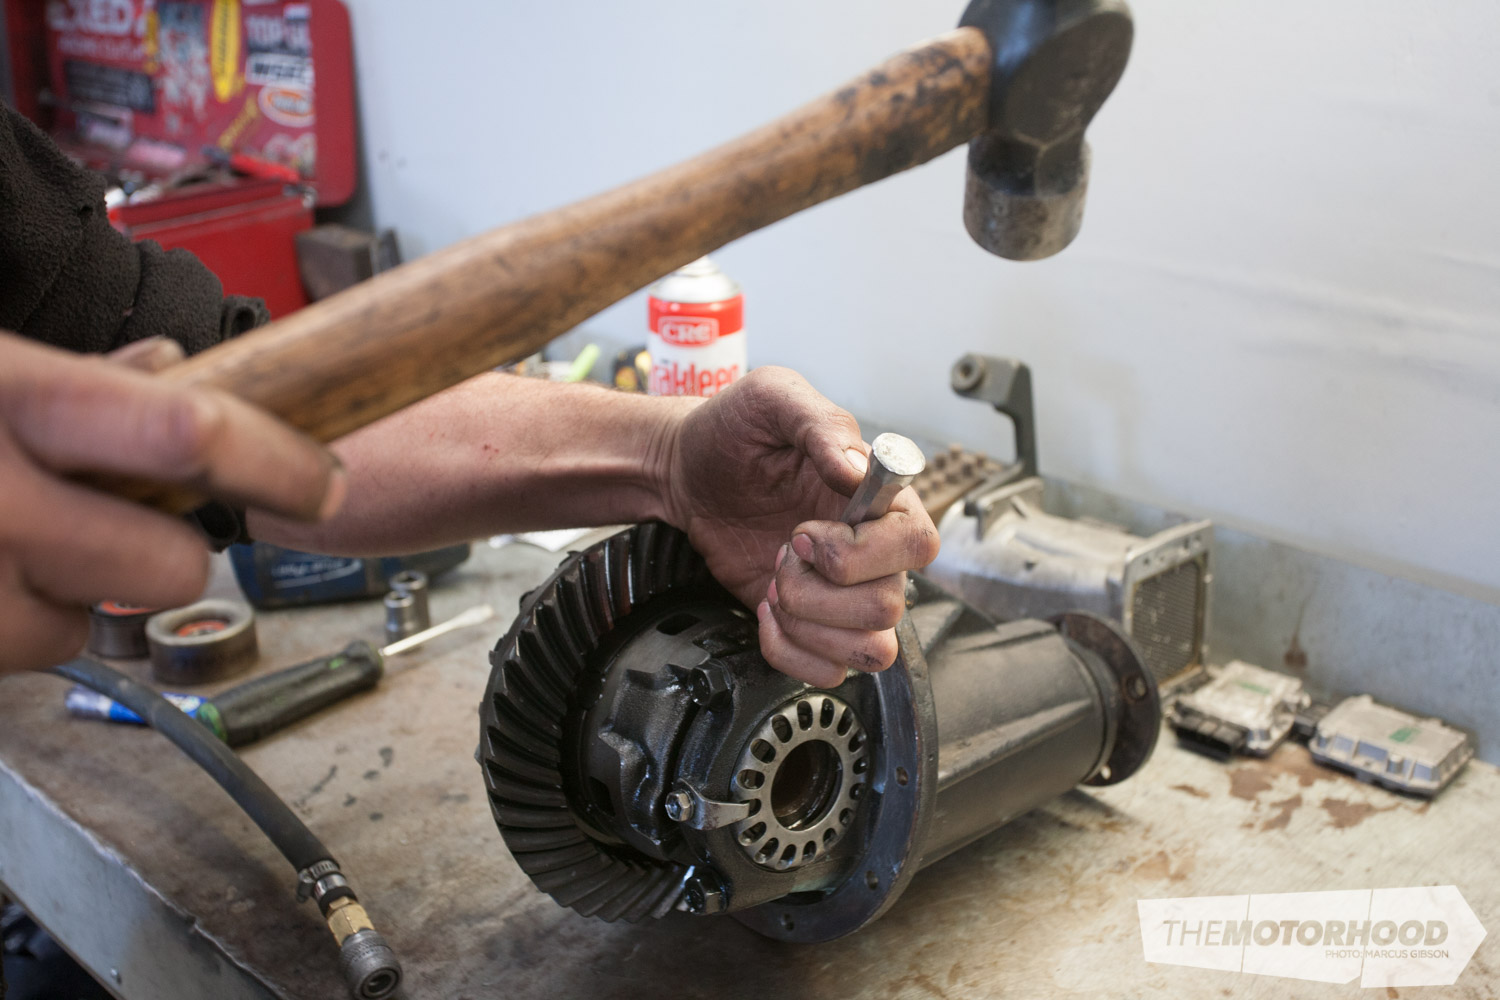
Step four — removal
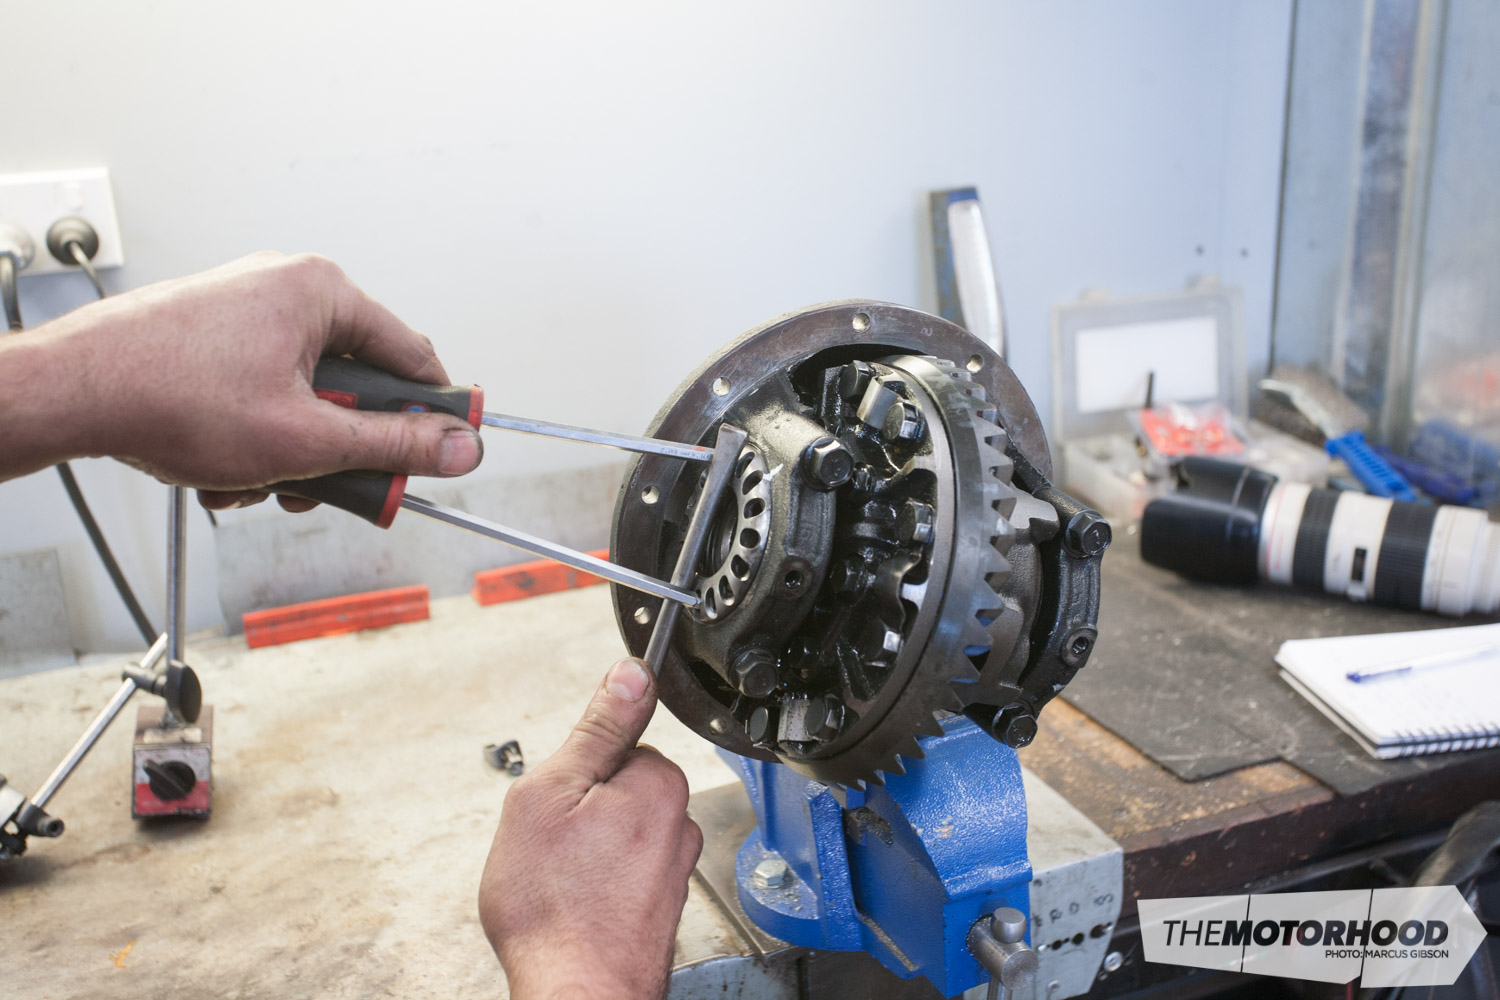
Using a 12mm socket or spanner, remove the two locking tab bolts, and with them the locking tabs on each threaded bearing adjuster. With these removed, you can now back the bearing adjusters off a quarter turn. There are a few ways to do this, but the three-screwdriver manoeuvre Steven is demonstrating is fast and simple and doesn’t require any specialist tools or brute force.
Step five — caps
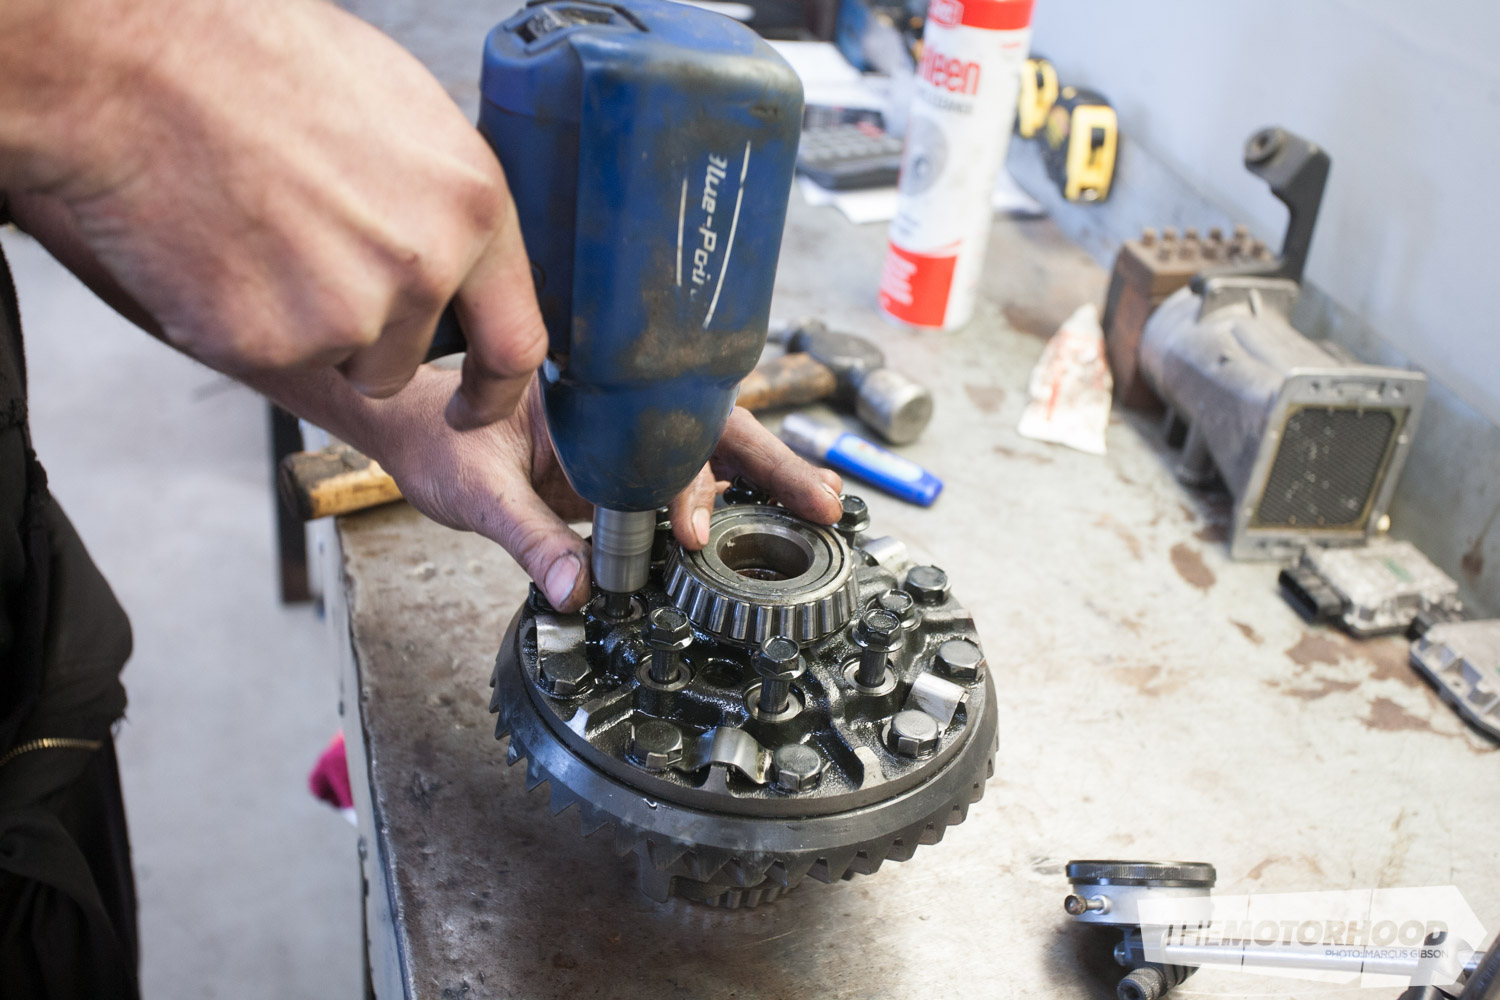
With the adjusters loosened, you will now be able to remove the two bearing caps. You will need a 17mm spanner or socket to remove the four bolts, two on each cap. The caps might be a little stubborn to remove, so a blow with a soft-face hammer will help loosen them. If possible, when removing the cap, remove it with the bearing adjuster and keep it in the position you removed it, this will help you later during reassembly.
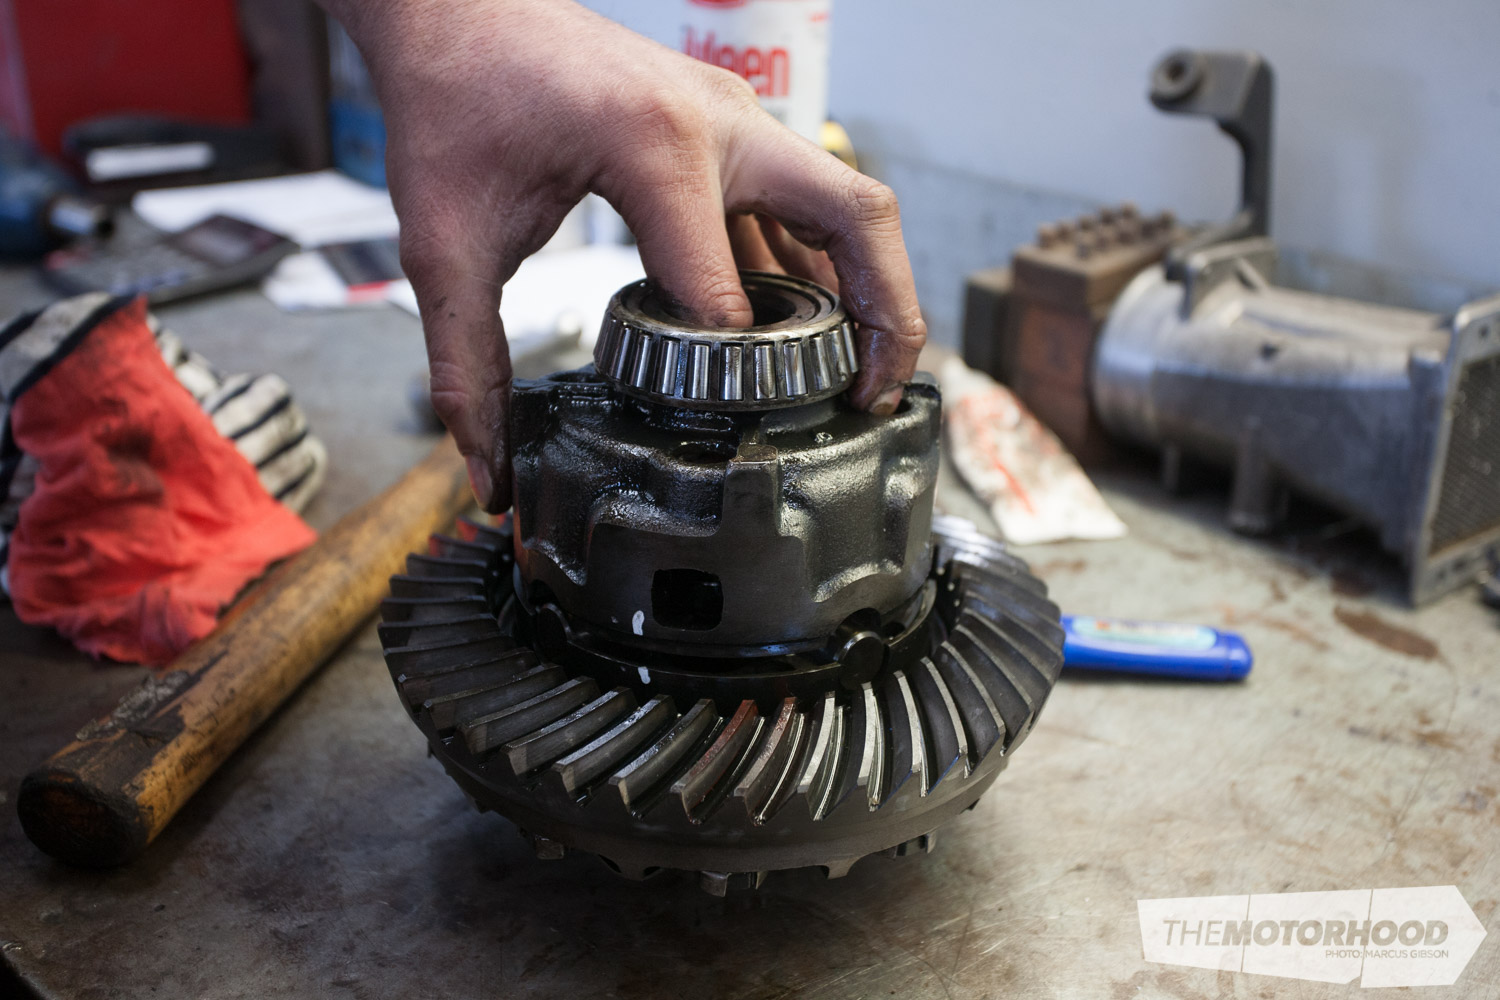
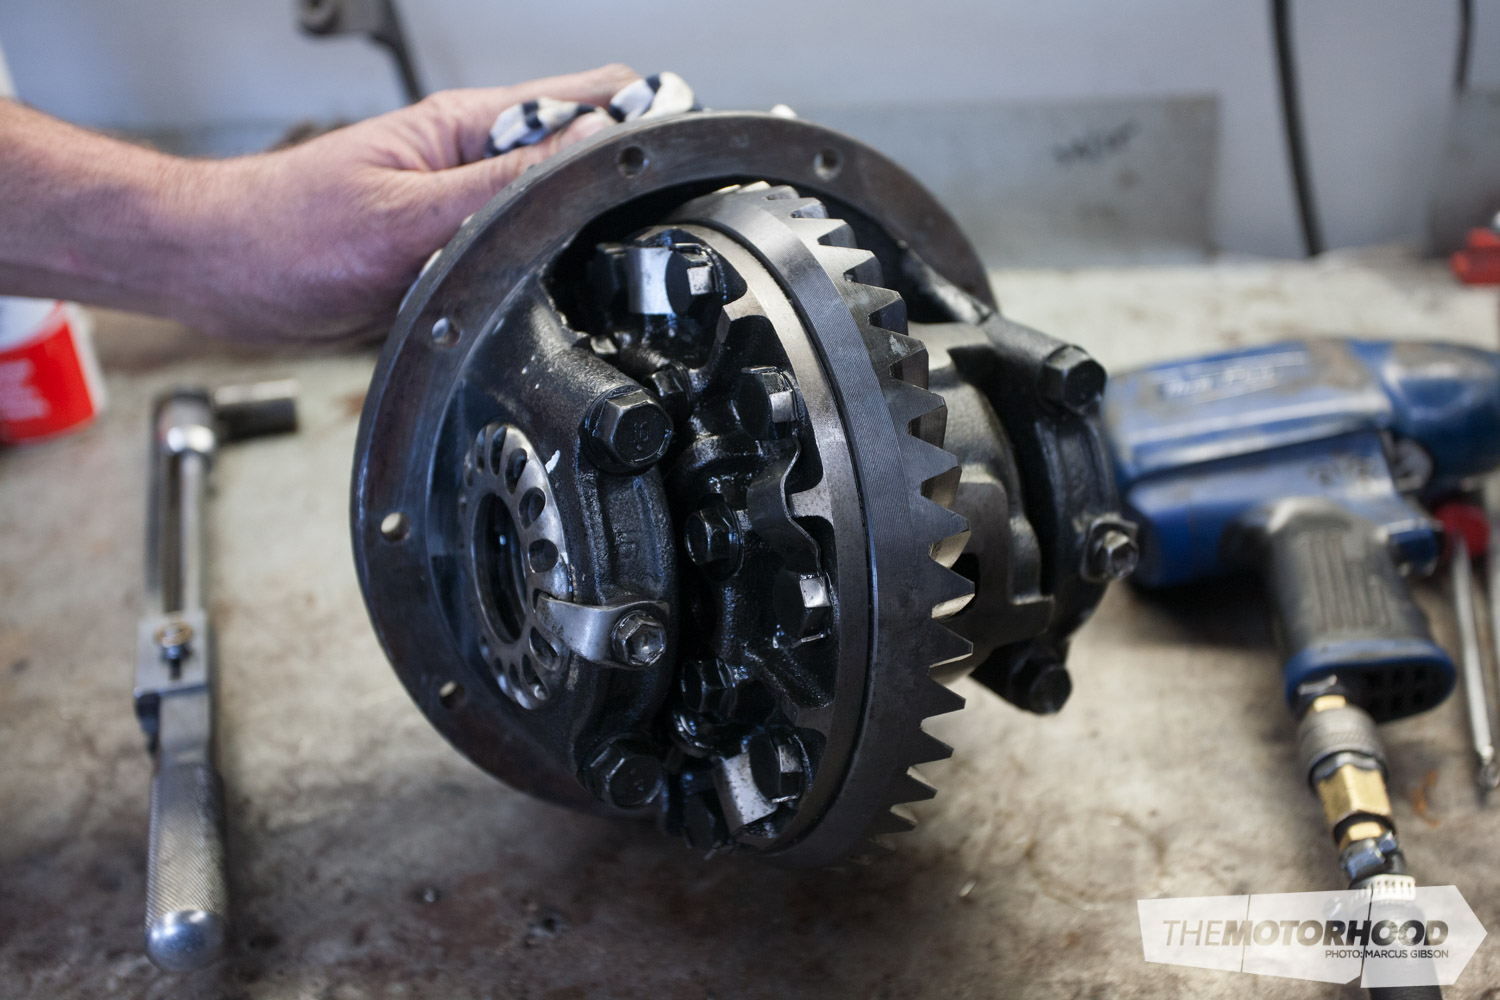
Step six — LSD casing
You will now be able to lift the LSD unit from the diff head. The outer bearing shells will drop off and expose the rollers — don’t worry, this is perfectly fine. Place the unit on your bench with the toothed face of the crown gear towards the bench. Now remove the eight 17mm through bolts — we used a rattle gun for ease and speed, but a power bar and socket will work fine.
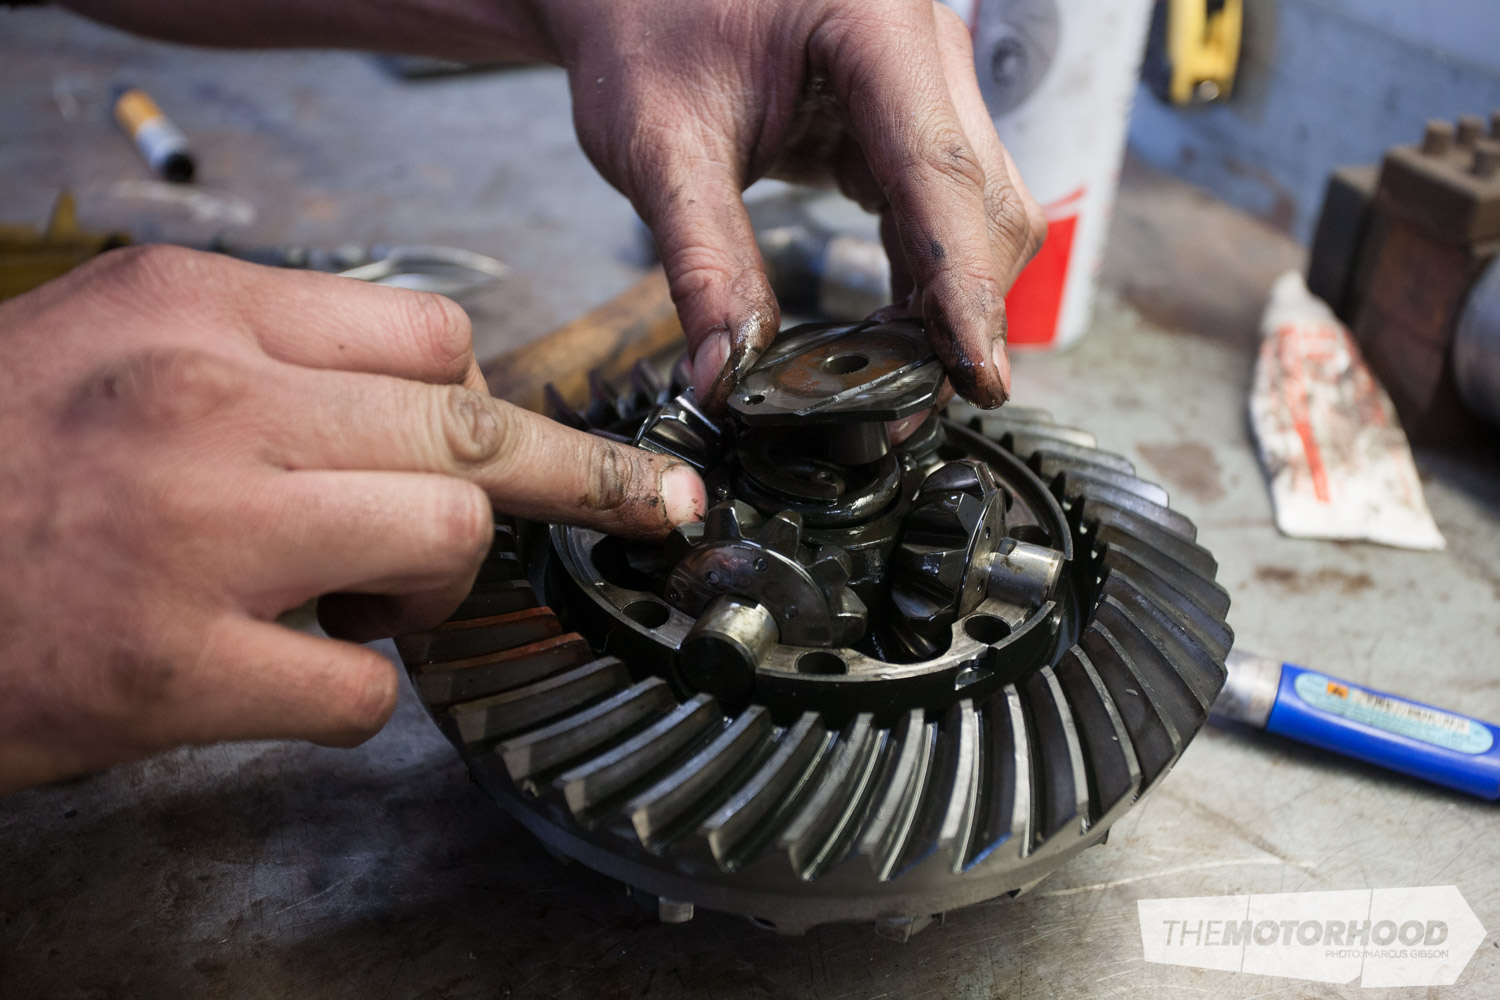
Step seven — split it
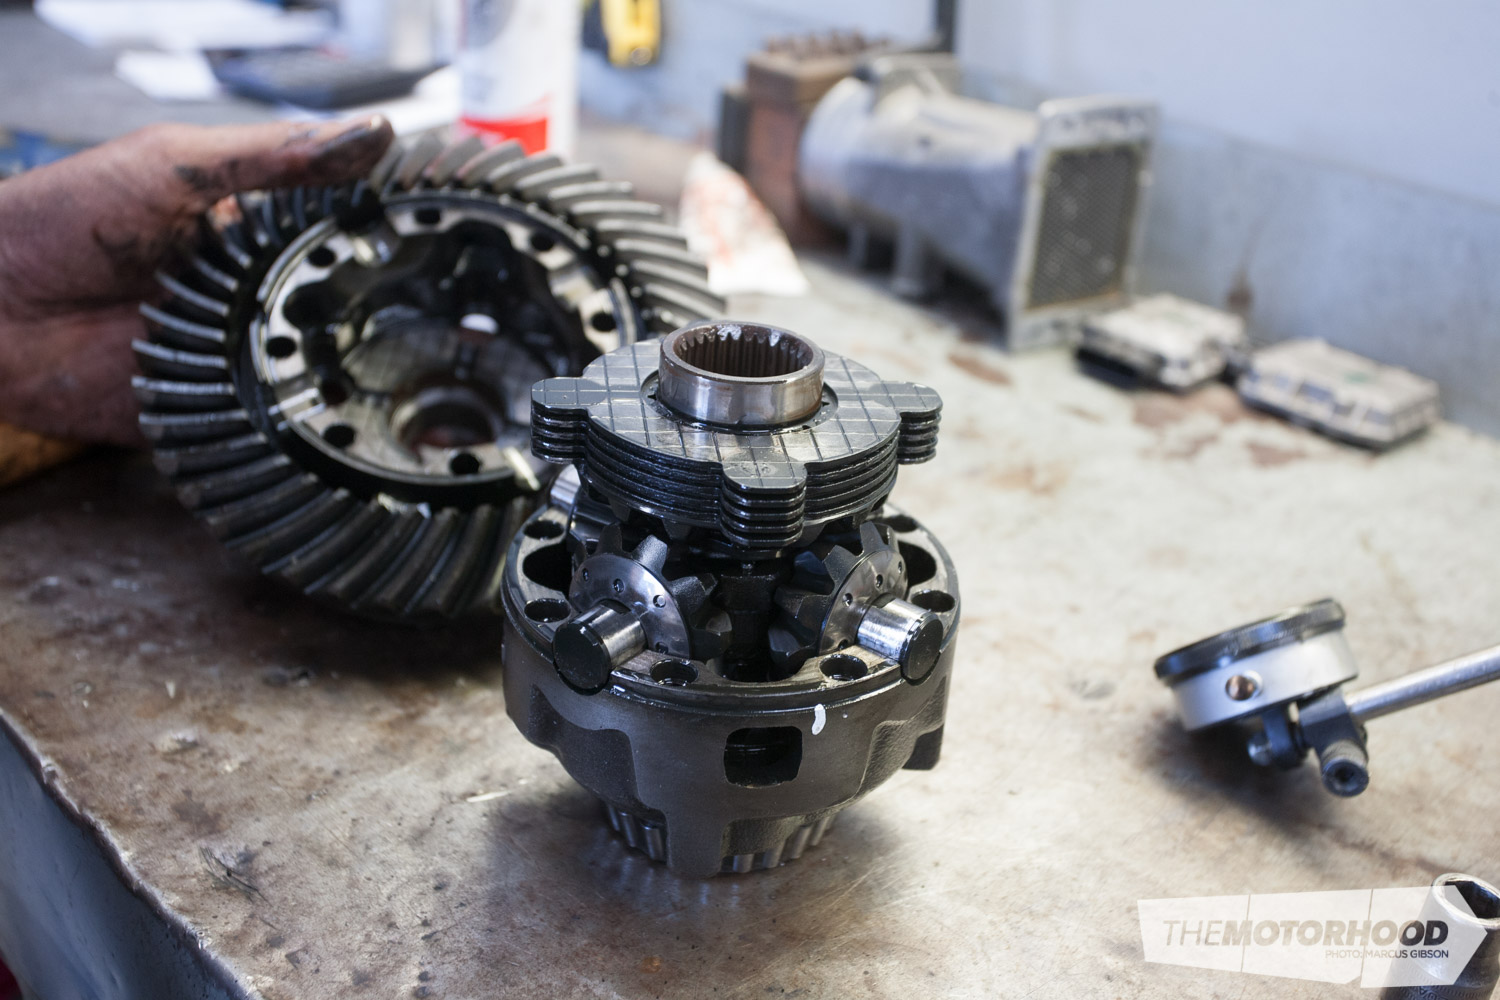
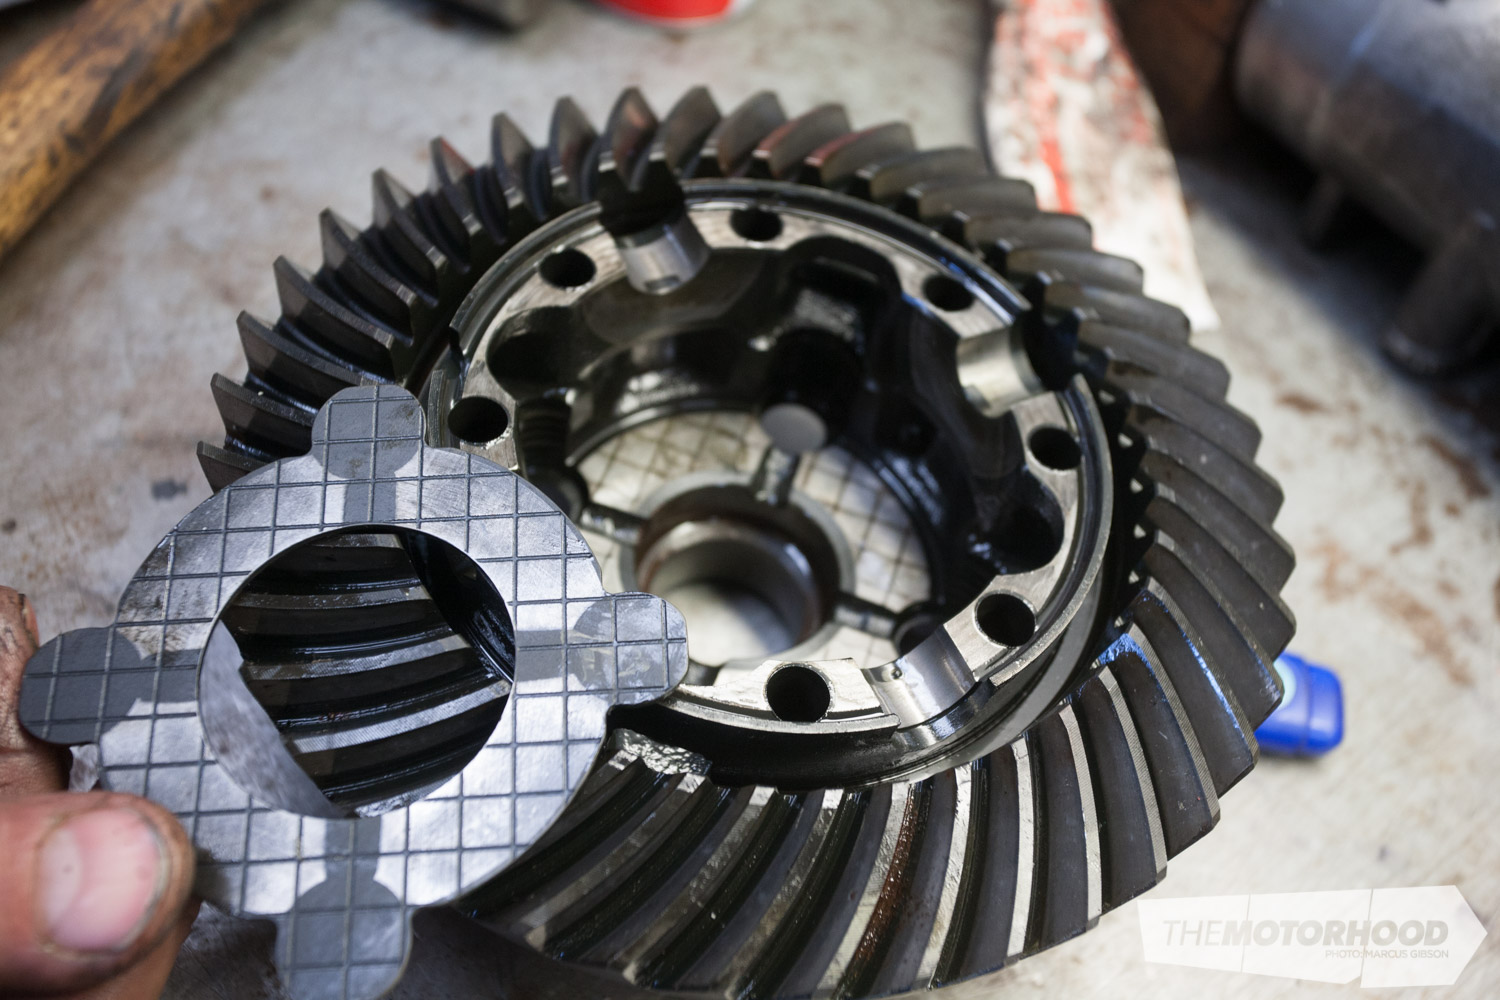
Once these have been removed, use two of the bolts on the central holes to push on and separate the casing. This will reveal one side of the clutch plates — keep these together. Pull out the spider gears and then the other side of the clutch packs. It is worth noting here that the cross pattern is on the outer-facing clutch disc, which faces the housing, and must be placed back in this position.
Step eight — measure the wear
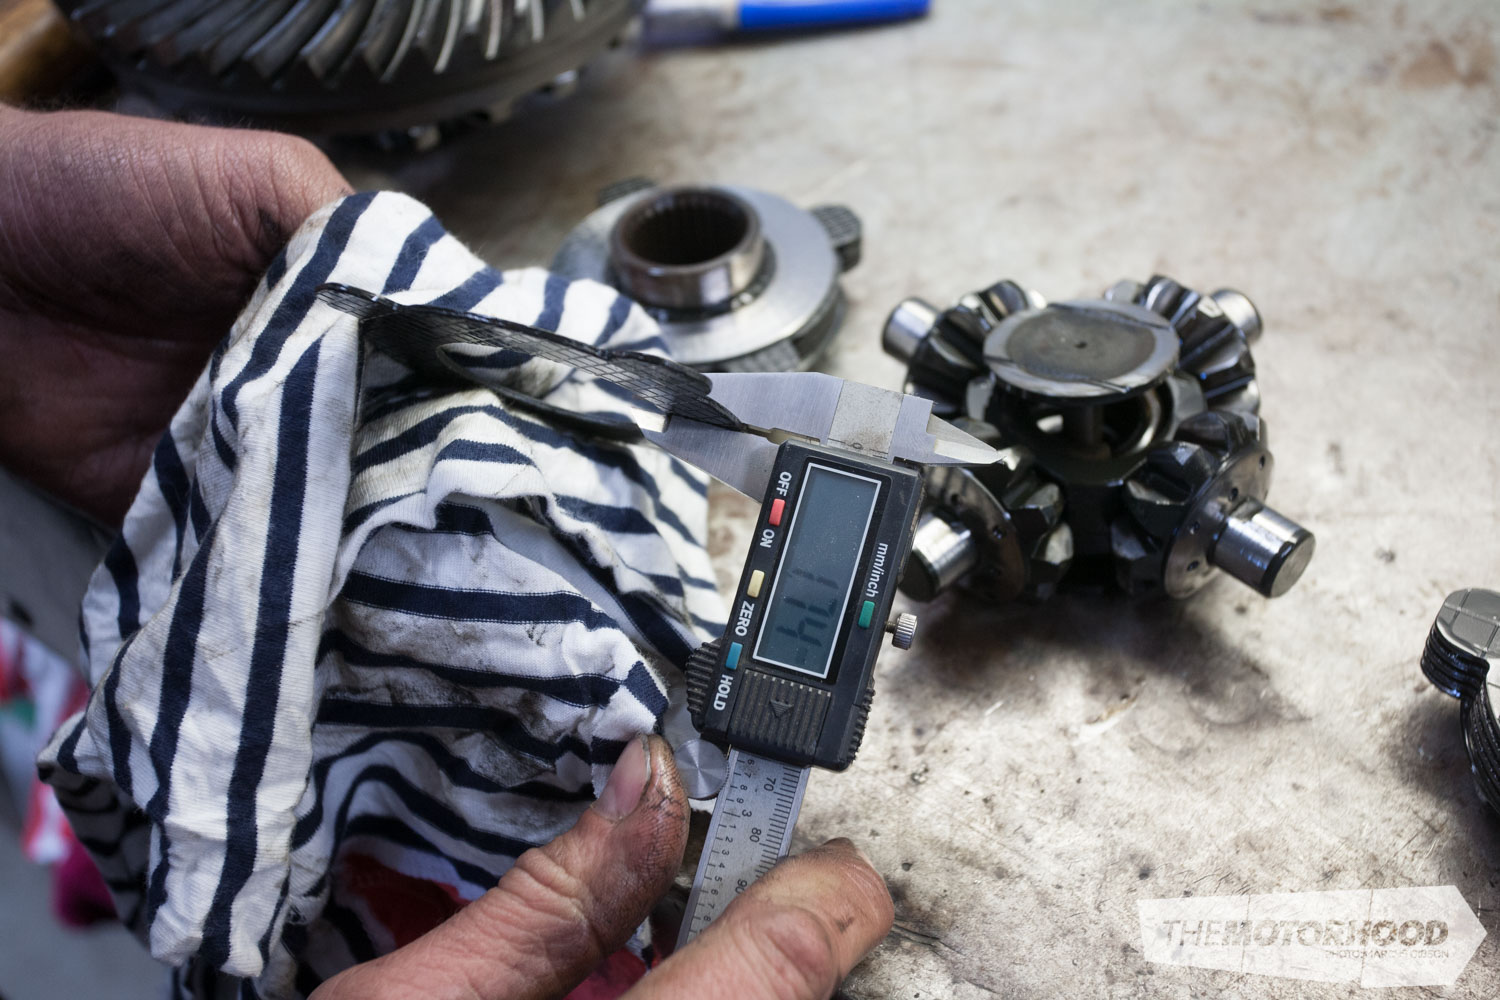
To know what size shims are required, we did it the simple way by measuring the clutch plates in two places with digital verniers: first, where the friction had occurred, and then out on the location tab, which does not come into contact with anything. Again, if you have a Haynes manual or similar, you can measure the plates against the factory specs listed there.
Step nine — crunch numbers
In this case, the difference between the two spots was 0.05mm. You simply multiply this by the amount of plates (five), and that gives you 0.25mm per side of shim needed to bring the diff back to factory specs. But as this isn’t going back into a stock Hilux, Steven added some extra as per the owner’s request, making the diff nice and tight. We opted for a total of 0.5mm each side. You really don’t want to push it too hard, as that would put added strain on the casing and can lead to cracking, a common issue with over-tightened Hilux LSDs.
Step 10 — shim time
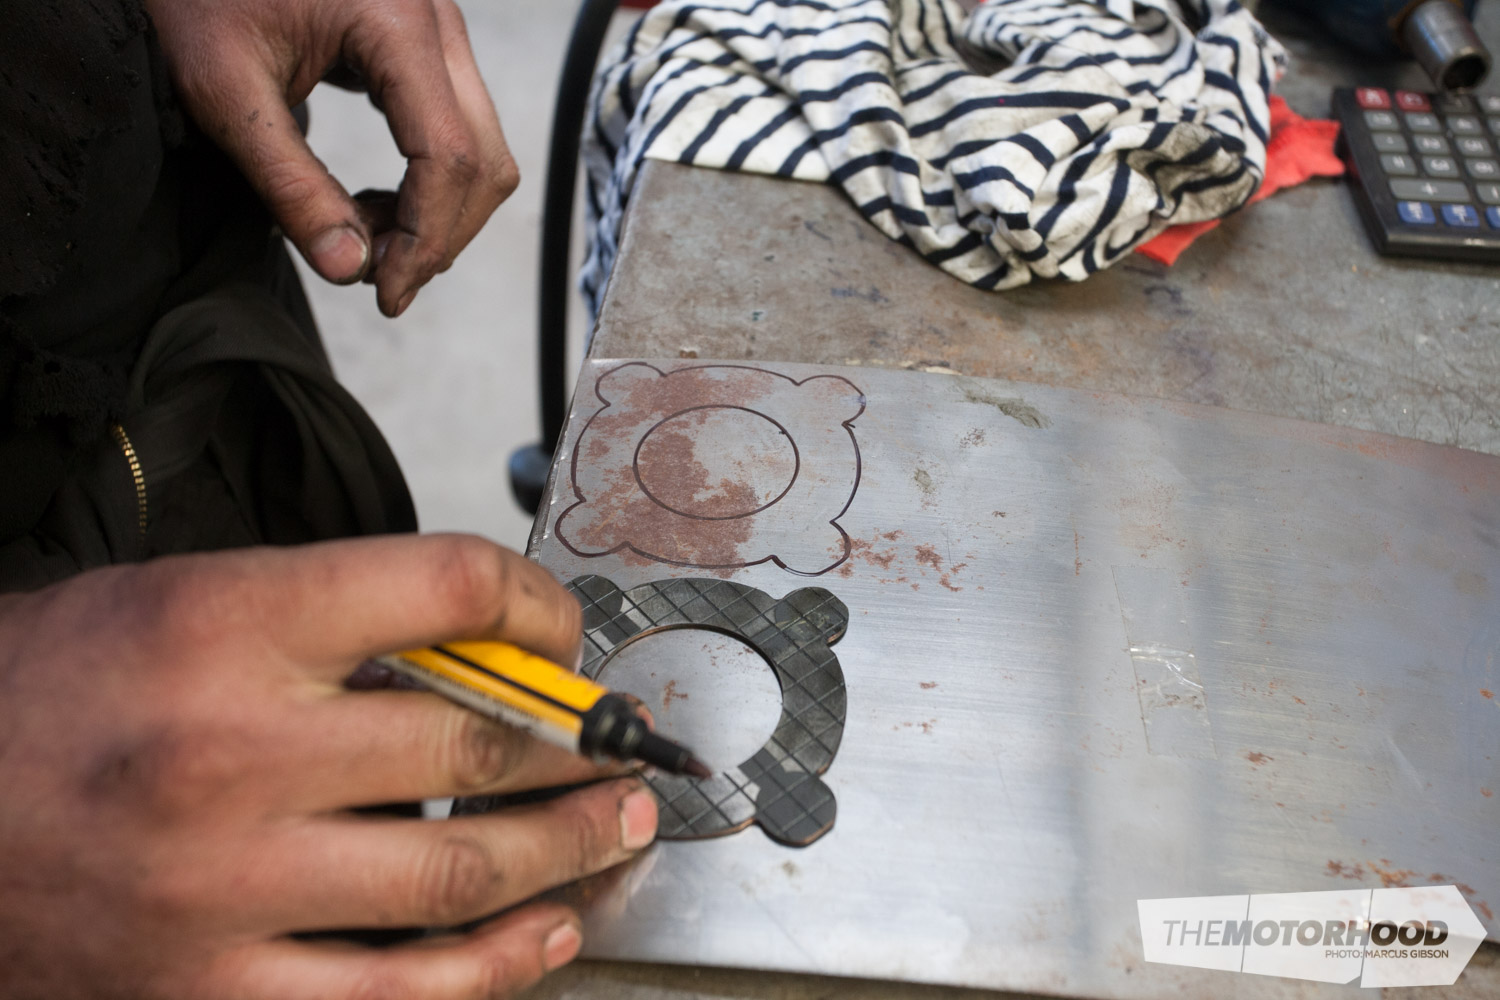
As mentioned earlier, you have two options here: purchase off-the-shelf shims from Toyota (the retail on these is around $30 each) or, to save some more money, grab some shim steel. The cheapest place we found was APS Tooling, which sells single pieces for $6 or packs for $53. At only $6 a side, we decided to make our own. Taking one of the clutch plates, mark out the pattern — you’ll need two shims, so repeat.
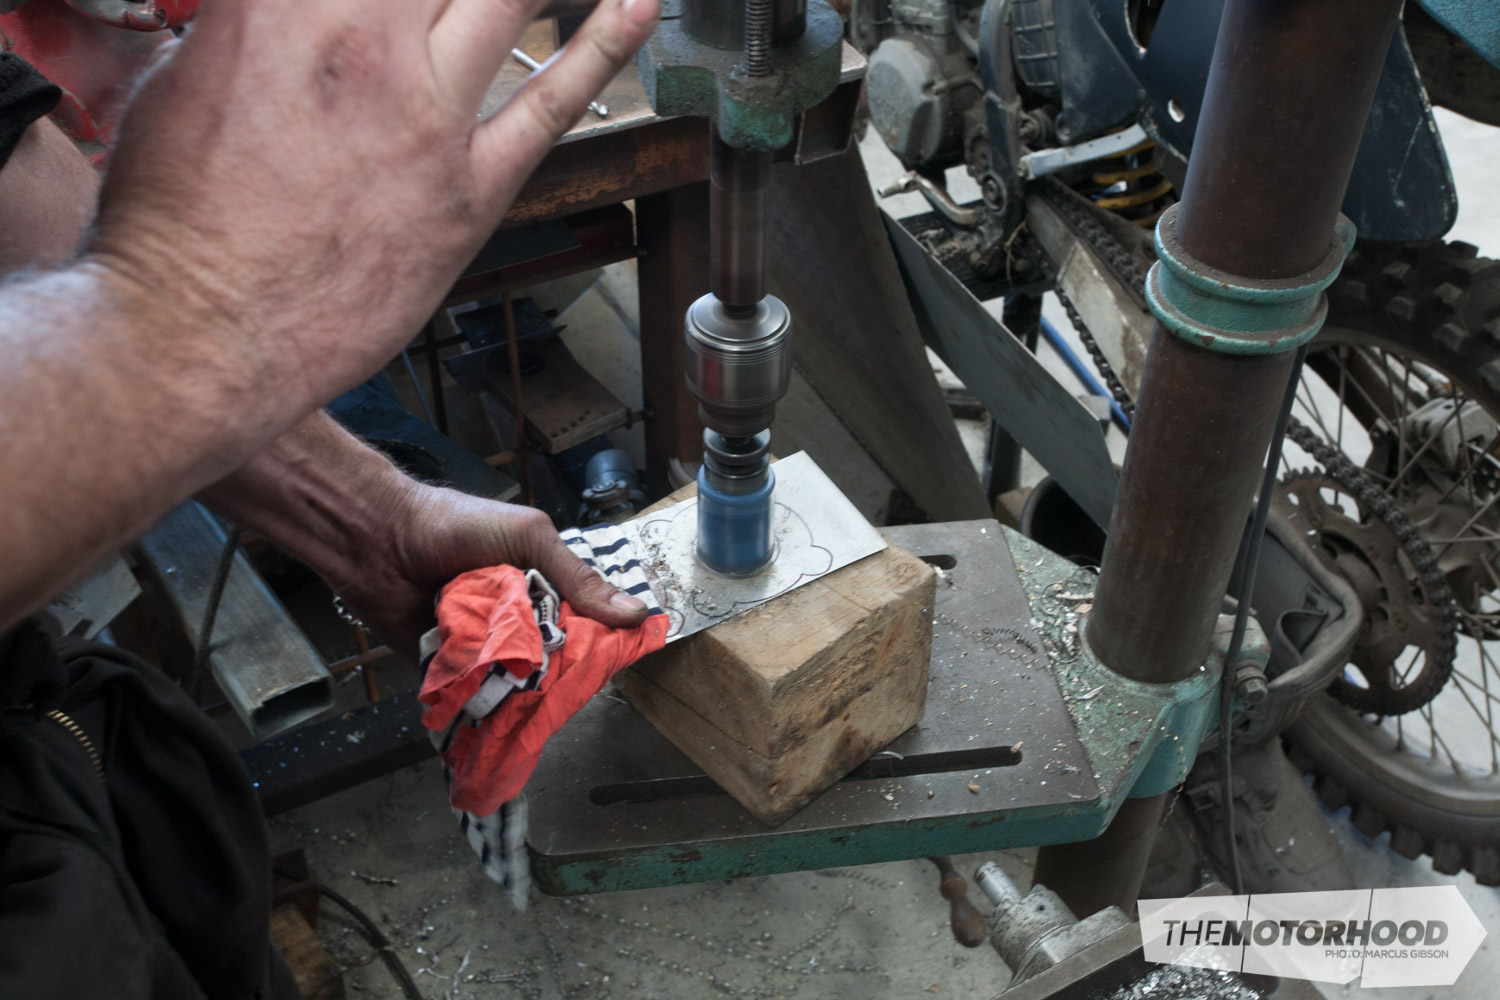
Step 11 — cut time
While you can use whatever tools you have available, we made life easy by using a hole saw for the 50mm centre bore, and then left and right tin snips for the shape. It took a few test fits into the casings to get everything perfect, but eventually they both fitted nice and tight.
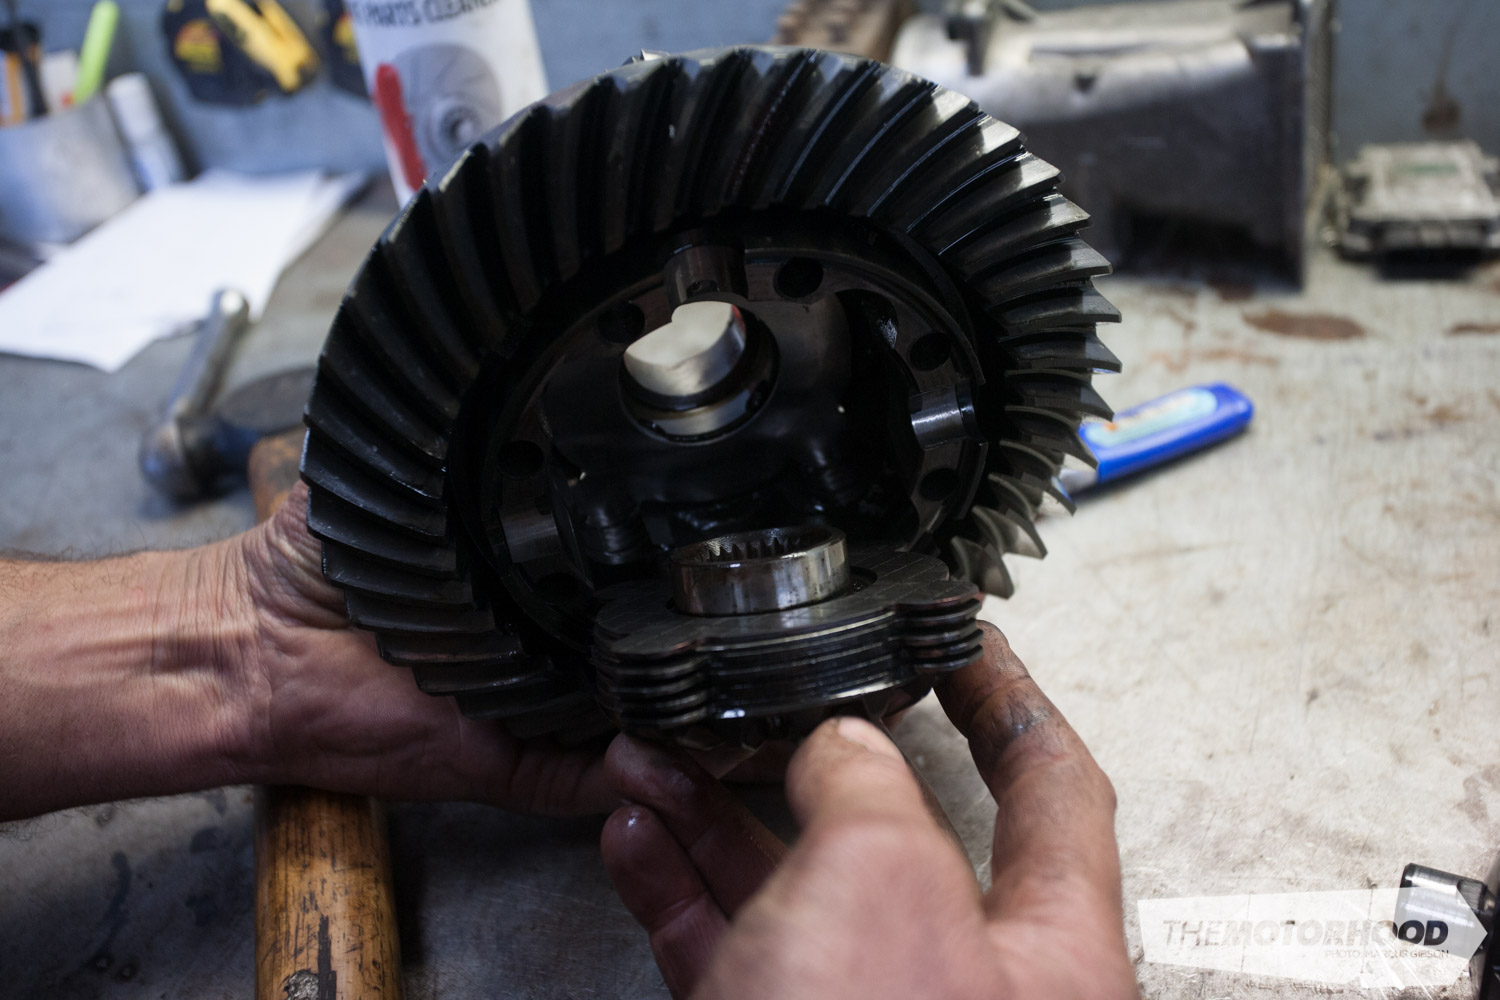
Step 12.1 — reassembly-one
Leave the two shims in the housings and replace the clutches, making sure you put them back in with the single-sided friction plate on the outside, so as to press against the shim. Lift the crown onto its side and slide the packs into place.
Step 12.2 — reassembly-two
Then piece-on the drive gear for the spider gears, followed by the two spider gears, the large centre spring, and cover, ensuring this goes onto the two locating pins.
Step 12.3 — reassembly-three
Take the small casing and insert the other pack of clutches. Place your finger through the centre hole from the outside to hold the clutch plates in place while you lower it on to the crown-wheel assembly.
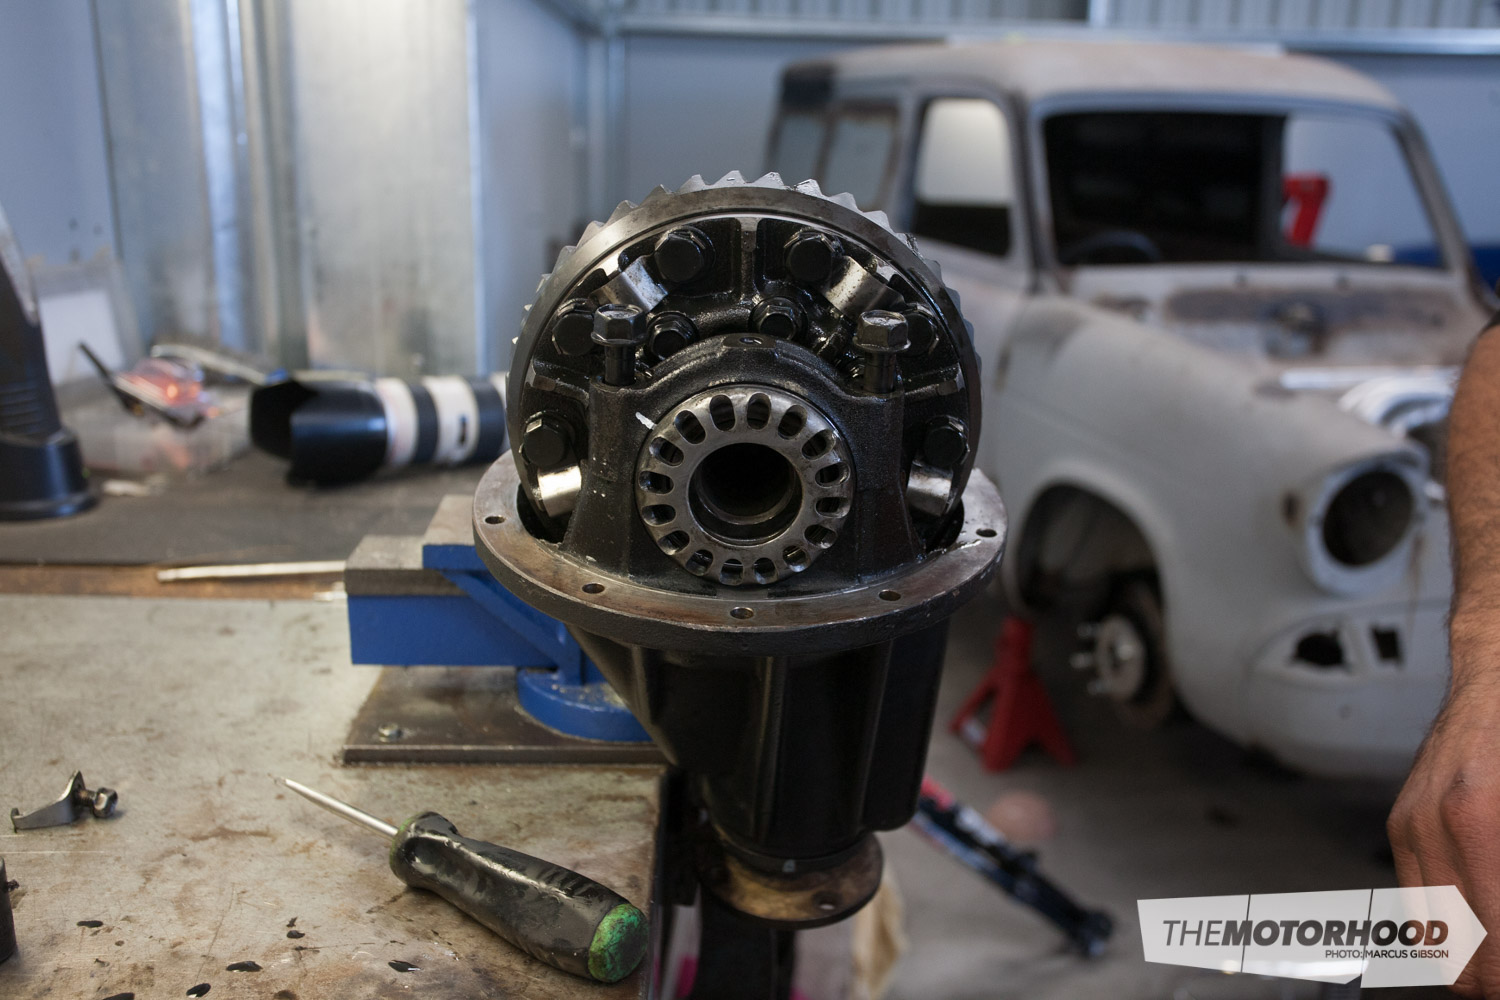
Step 13 — locked and loaded
Hold the carrier together while flipping so you can install the through bolts. Softly tighten these using a crossing motion similar to what you would do on a wheel. Take your torque wrench and torque to 45–50 pound-foot (61–68Nm) of torque, again in a cross pattern.
Step 14 — back in you go
Place the unit back into the diff head and seat it down with the bearing cases that fell off earlier. Place the bearing caps back on the correct side, matching up the dots on the housing. Place the through bolts on to hold in place while you check the bearing adjusters are seated properly and can turn freely back and forth. Once you’re happy, torque the caps down to 75 pound-foot (101.6Nm) using a torque wrench.
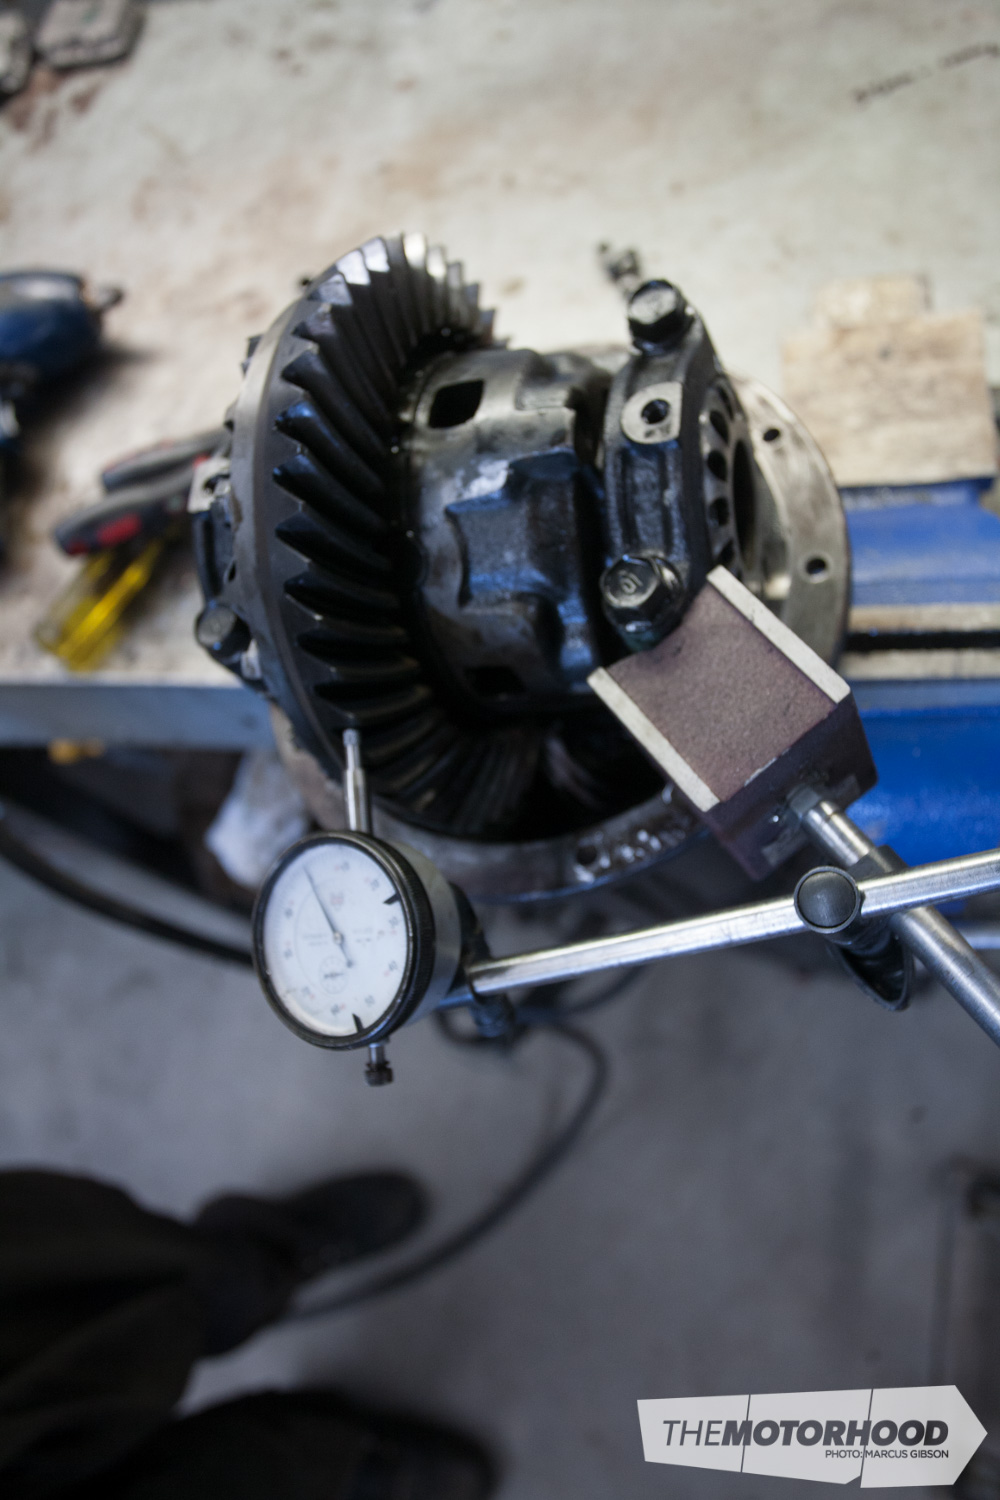
Step 15 — backlash
This is a bit of a touchy-feely moment. Wind in the crown side-bearing adjuster until you have almost zero backlash. Wind up the other side until it meets the markings you made earlier. Using your dial gauge, check the backlash — we had 0.22mm, which is too much. To adjust this, we backed off the adjuster that would let the crown wheel move closer to the pinion. We worked at this until we reached the desired 0.15mm that we started with. If your cap and adjuster don’t part ways on the bench, it should be pretty pain-free.

Step 16 — locked up
Once you are happy that the backlash and both adjusters are matching the markings you made at the beginning (this is important, as incorrect preload on the bearings can cause premature failure), reinstall the two locking tabs and 12mm bolts. Now give the diff a test spin to ensure things are spinning freely.
Step 17 — completing the job
The next step is bolting the unit back into the car. We opted for high-quality ThreeBond sealant on the diff-to-head joint. We also noted the outer seals on both axle housings were shot and leaking, so these were replaced before we slotted the axles back into their holes.