
Welcome to the Weekend Workshop, a place where you can save some cash by getting your hands dirty
These tech guides aim to arm you with the necessary info and knowledge to get out there and give it a go yourself, with no professionals needed, and at a price tag that won’t break the bank. This month we delve into a bit of weight reduction, with the goal of removing sound deadening from a KE70 sedan destined for a bit of weekend track work.
The removal of sound deadening is one of the easiest and cheapest ways to lose weight from your ride, thanks to the smart cookies who figured dry ice would freeze it off. Coming in at around 78 degrees Celsius below freezing, ‘dry ice’ is the solid-state form of the gas carbon dioxide. The best bit about the frozen gas is the lack of residue left behind — it simply melts and returns to its natural gas state, unlike its H2O counterpart. Dry ice comes in the form of pellets about the size of AA batteries.
Due to the 78-below temperature, extreme care must be taken when handling dry ice, as it will burn upon contact with the skin, causing frostbite (not that you will need to cut off a limb straight away, but it will hurt — a lot). This is easily something you can carry out at home, but for demonstration purposes, we have enlisted the help of Keg at DKM Fabrication, on Auckland’s North Shore.
The Basics:
Tools of the trade:
Chilly bin full of dry ice, available from BOC Gases per kilo — we got 5kg and had 2kg left over. Mallet or small hammer, cold chisel, small pry bar, or large screwdriver, gloves — welding or snow ones would be ideal, eye protection, small shovel or spade.
Time:
It took under an hour to remove all the sound deadening from the floor of the KE70, but this will vary depending on the car, the type of sound deadening, and how much interior you need to strip first. Luckily for us (mainly Keg), the DX was already stripped on delivery.
Cost:
Dry ice is available in bulk from places like BOC Gases. For a 5kg bin, which is enough to do an entire car, the cost is around $50 retail.
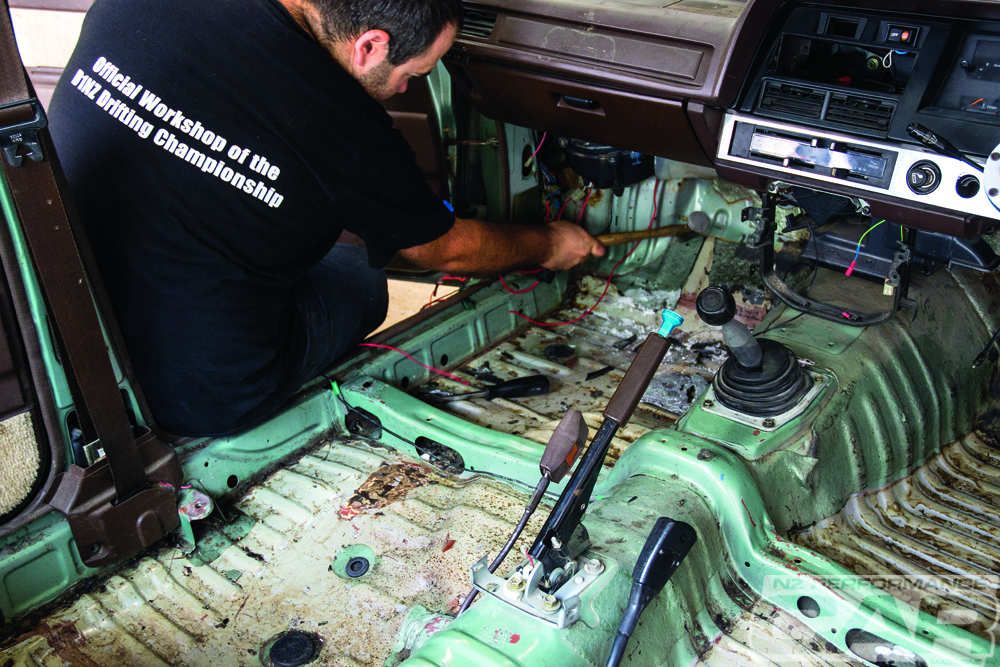
Step one: Strip down
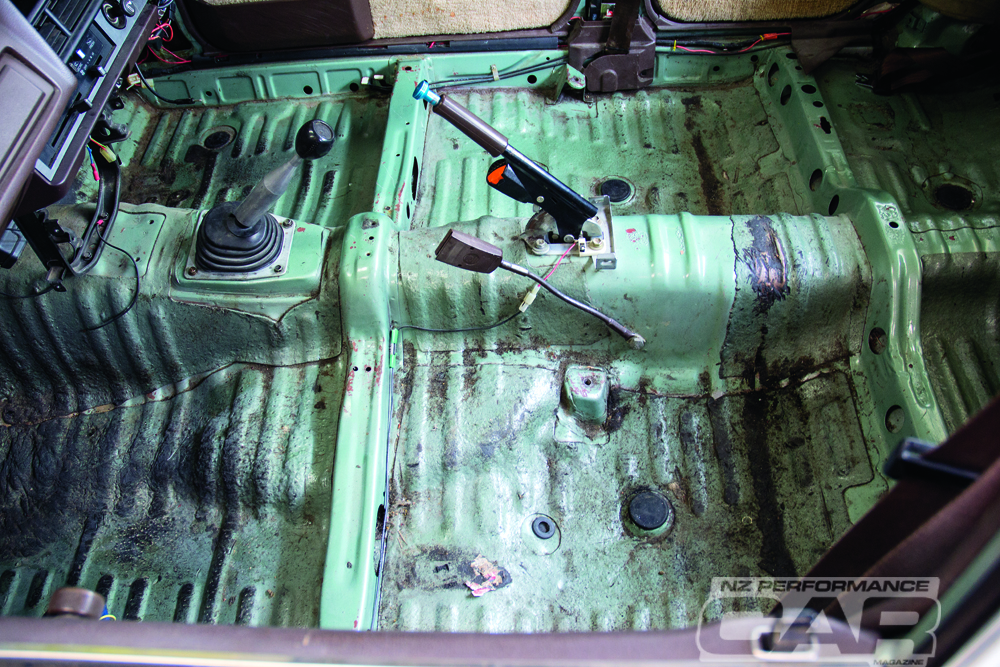
Remove all interior trim, seats, carpet, wiring, and random rubbish from the floor pan. Basically, clear away as much as possible, as you want to avoid letting the ice touch anything it shouldn’t, as it will likely freeze it.
Step two: Play it safe
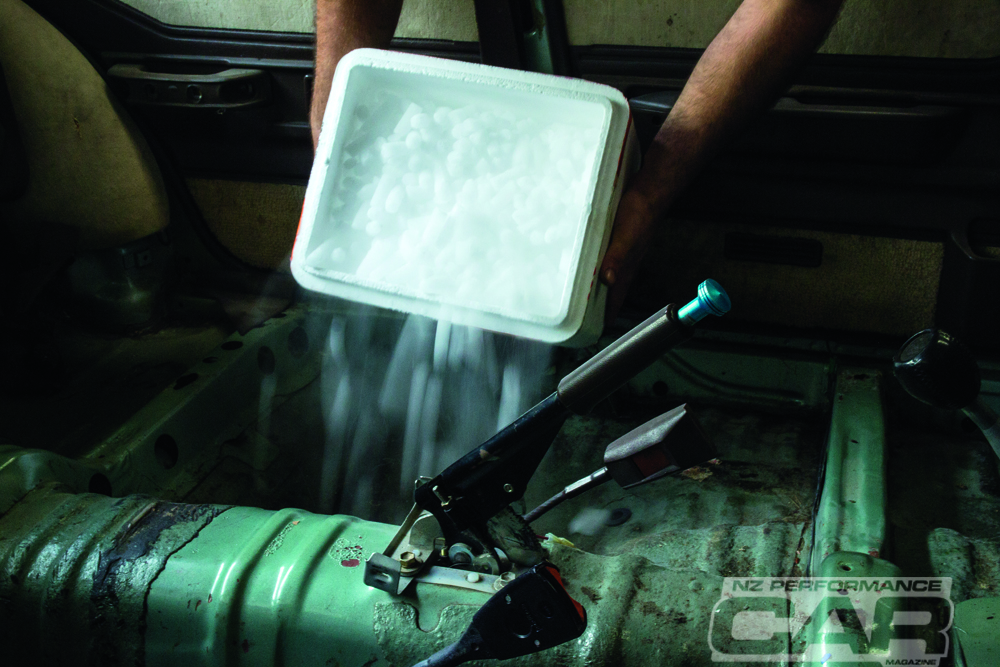
Grab some dry ice and place on the sound deadening in an even layer, one chunk thick. It is important you don’t let the ice touch your skin as you will end up like the dog in Joe Dirt, or the guy in Dumb and Dumber — basically, it will stick and give you frostbite. Yes, we know Keg isn’t wearing gloves, but his iron-like hands are battle hardened. Kids, don’t try this at home, as it will burn.
Weekend Workshop: Removing sound deadening
We split the car up into a few areas and worked on each part separately. It’s also worth pointing out that carbon dioxide can be deadly in big enough doses, so make sure you do it in a ventilated area.
Step three: Wait for it!

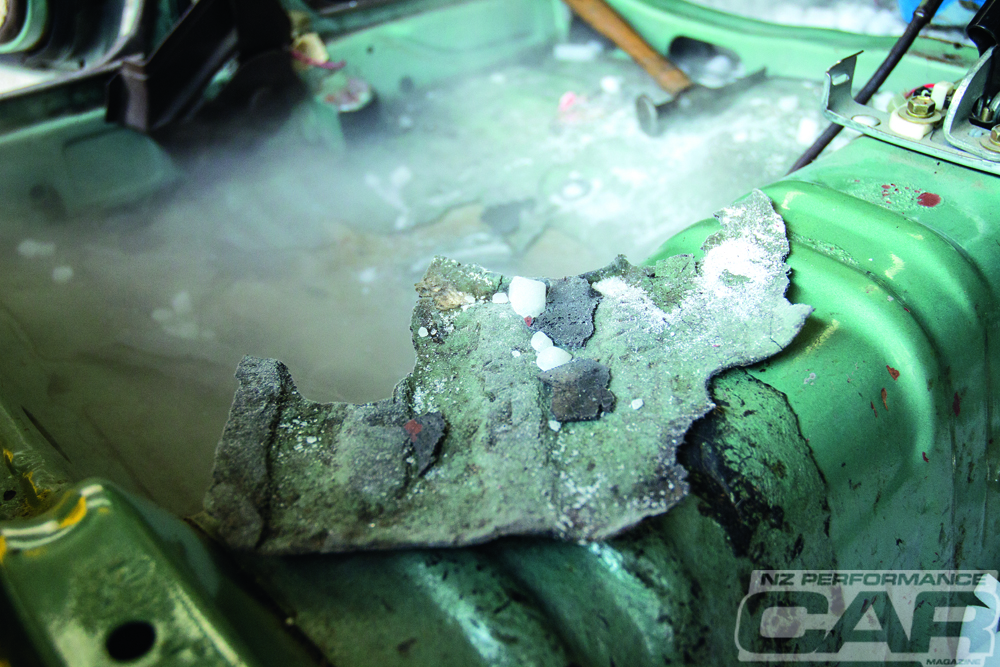
With your ice all laid out, now it’s time for the waiting game. If you don’t give it long enough, it simply won’t work, but applying a little patience will make the whole process extremely easy. You will be able to tell when it’s nearly there by the popping and creaking noises coming from the chassis. This is caused by the body moving under the extreme cold, and also the sound deadening separating away from the chassis. Some people opt to place the ice in bags and not directly onto the sound deadening, which makes it easier to move around and position, but it will take longer to do its job this way.
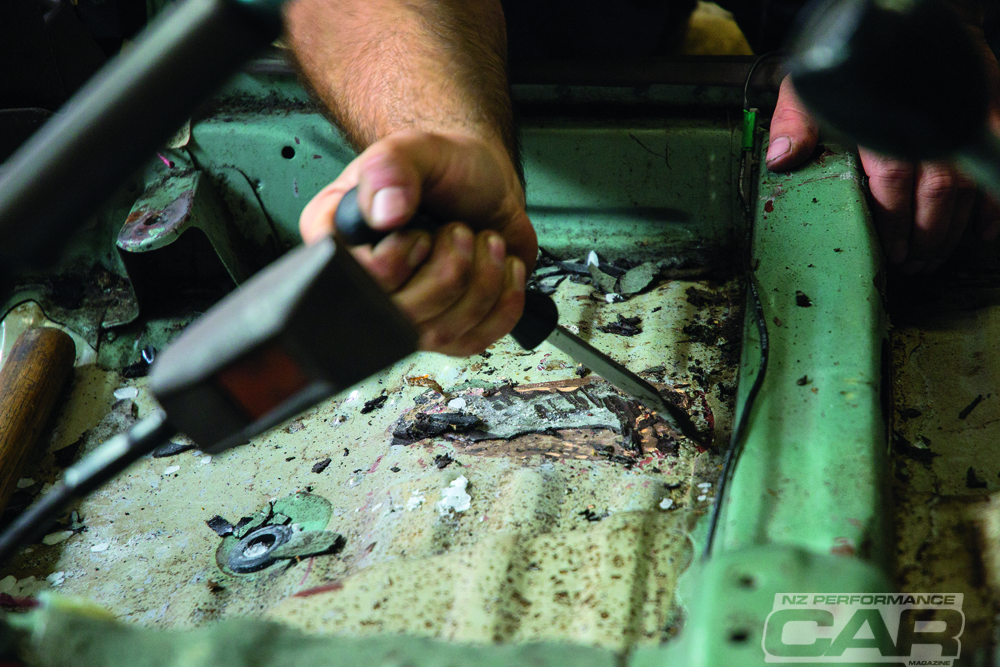
Step four: Strike a blow
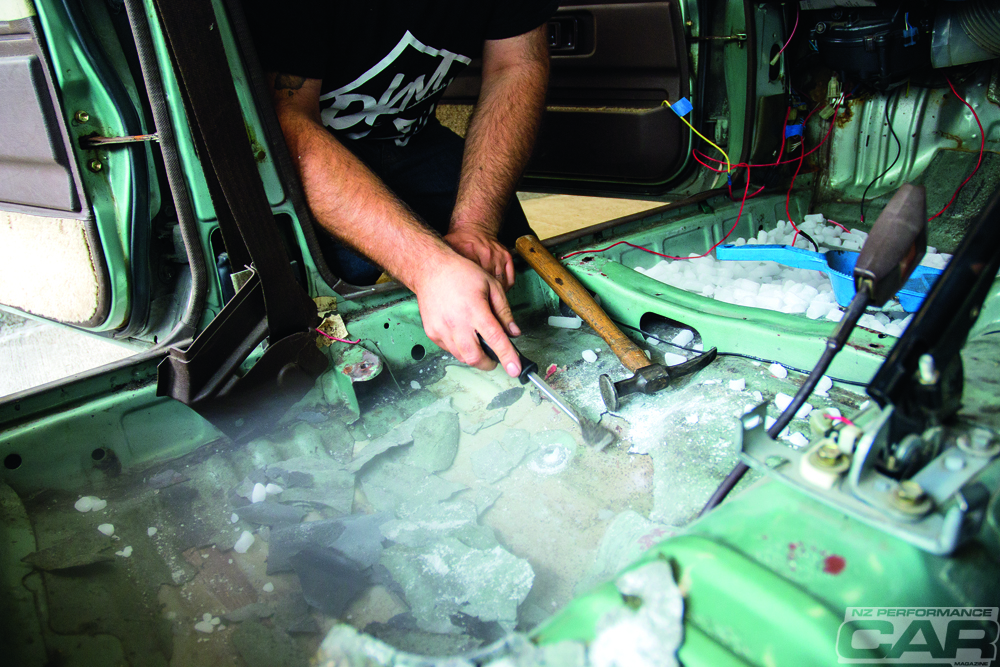
When you think it’s ready (between five and 10 minutes), scoop off all the dry ice and shift it to the next area of the floorpan to begin the freezing process again, while you remove the frozen tar from the first area. Grab your hammer and strike the frozen tar. In this case, bigger is not better — use a small hammer and strike the tar in a few places. It should start to crack, allowing you to simply lift it out. Some modern vehicles have fibre included in the tar, and that will be harder to remove than the more common old style, like in the KE70 we worked on. Simply repeat the process, shifting the dry ice around the cabin as necessary.
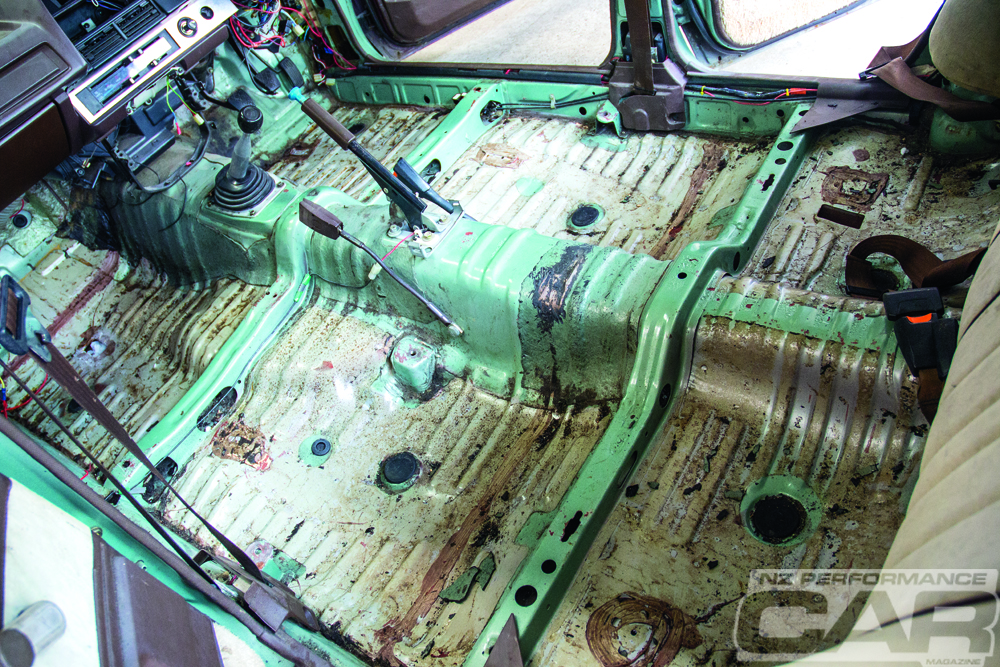
Step five: Those hard-to-reach spots
Once all the easy bits have been done, it will be onto the sides of the tunnel and any other more vertical locations. There are a few different techniques here. Some prefer to bag the ice in an old pillowcase, while others use a sheet of scrap to bank up against, or if you’re really skilful and have excess pellets, just build them up in the area. But be careful when striking places like the top of the tunnel, as this is the most on-show piece of the floor, and it will be very hard to hide a mistake.
Step six: Bits ya missed
Unless you were really taking your time, there are likely to be little bits of tar around the place that you missed. Go over these using the same process, but this time it should take a lot less to freeze, as the chassis will be stone cold by this point — go on, touch it and see. If the tar’s a little stubborn, use the chisel and hammer to chip it off.
Step seven: Clean up
Once you have removed all the tar, place the remaining ice back into the bin and let it melt away. Don’t put it anywhere in a confined area, as it can kill humans and pets by asphyxiation. You can then sweep out or vacuum the remaining debris from the car. If you plan to paint the surface, you will need to clean away the remaining tar residue left behind. Depending on how bad it is, a little thinner with a Scotch-Brite will get the surface ready to prime, or you may need to run over it with a wire wheel on a drill. If using the wire wheel, etch primer will need to be applied to any bare metal before you prime and then paint.
Step eight: Reap the rewards
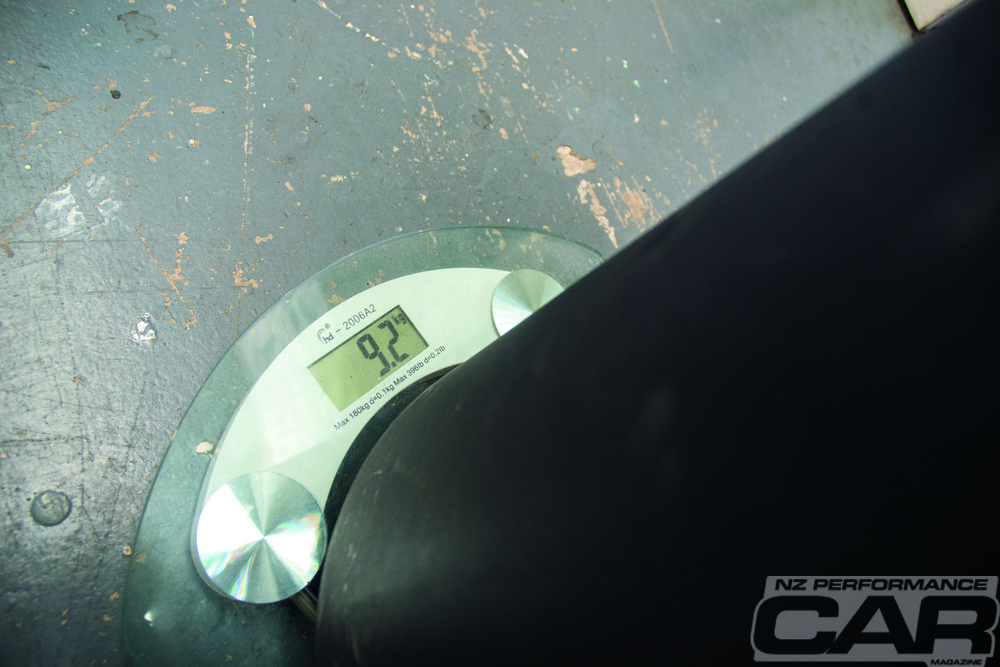
We saved a total of 9.2kg by only removing the sound deadening from the floor in the KE, and would have nearly doubled that had we removed the stuff on the tunnel!