
data-animation-override>
“We tap into the wealth of knowledge that PPRE’s head honcho Warren Overton has accumulated; in his 20 years of working within the rotary industry, this man has seen it all. If you are looking to purchase second-hand rotary engine parts, this is the article you need to read”
Complete engines
Buying an engine that is in a running car is by far the best option, as you can be sure it starts, runs and performs as you would like it to once it’s in your own vehicle. This also allows a compression test to be easily carried out. Unfortunately that isn’t often the situation people encounter, more often than not it’s an engine block sitting on the floor in someone’s garage with a few dirty rags stuffed in the ports.
Before you commit to travelling the country to view an engine, be sure to find out its history first. Who built it and how long ago? New Zealand is a small world when it comes to rotors, and there really is only a handful of reputable engine builders. So if the answer to this is, “My mate’s cousin built it using a DIY video,” you may want to ask a lot more questions. Generally with a second-hand engine the old saying ‘you get what you pay for’ is a good guideline; sure, there are bargains and rip-offs every now and then, but if the price is high this is usually an indication the quality of the parts is good. So often I see engines advertised as ‘new’ or a ‘fresh rebuild’. A new 13B engine costs around $11,000 in parts, and that’s just a bunch of pieces sitting on the bench in boxes, so it just doesn’t add up if someone is selling a new engine for $3000. If the engine is a fresh rebuild the seller should happily produce receipts as proof of the engine build. Buying an engine that has been pulled apart is, in my opinion, a better option, with much less risk than one that’s together. You know exactly what you are getting!
Checking over a complete block
If it has spark plugs in it, take them out and see they are all the same colour and not coated in oil. Shine a torch into the exhaust ports (if there is a manifold or a set of extractors fitted, don’t be shy, and ask to remove them). Turn the engine over by hand in a clockwise direction (looking from the front), using either the flywheel or a 19mm socket on the main front nut (32mm if it’s a 20B) until you can see the bottom of the rotor housing. This is the area of the housing that commonly wears on the edges. A good engine will have none of the chrome surface missing or chipped, but a continuous surface across the entire face.
Also check what you can see of the side plates, watching out for any visible signs of corrosion/rust. Check this in all the exhaust ports and also turn the engine to check all the apex seals are intact. Give them a push with your finger to be sure they have good spring tension. Take note of any signs of water or oil leaks. It is common to find motors that have been overheated have shrunken housings causing internal water leaks, evident with water sitting in the bottom of the housing. Lastly be sure the engine has a rear counterweight or flywheel, as this is important for ensuring the engine has a balanced rotating assembly.
Hard-to-source parts
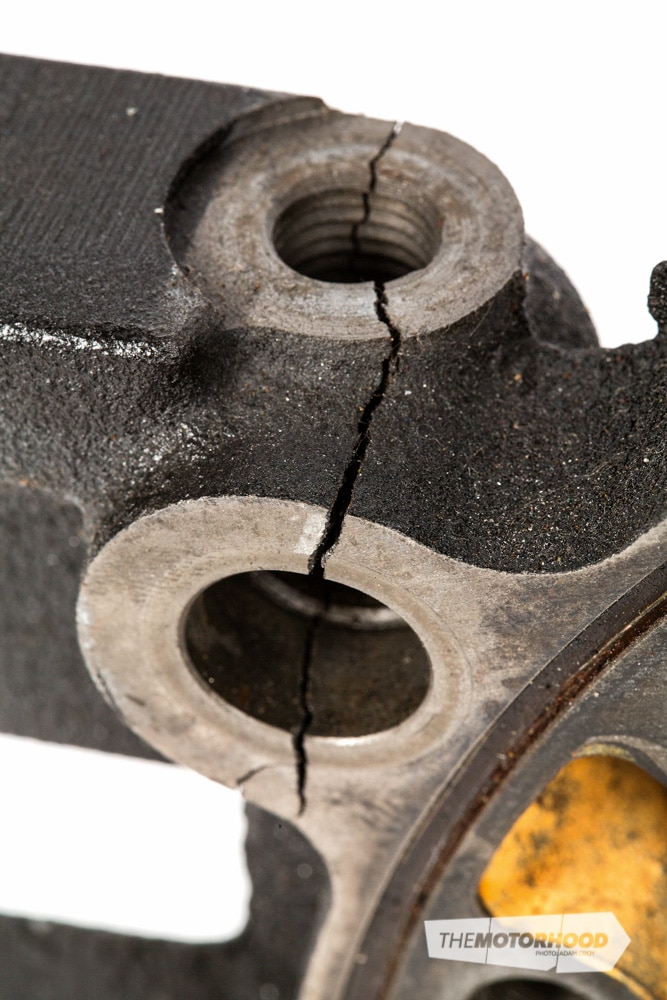
It’s now getting very hard to find good-condition parts for 12A engines, as some major components, such as rotor housings, are no longer available new from Mazda. This is something you should factor in when deciding to purchase a new engine. If later down the track you need to replace a housing, finding one in good nick will be hard, and the cost for these parts will only go up. This is also the case for 20B centre plates and crankshafts, these are common weak points and finding replacements is a nightmare. You can repair cracked centre plates, but it is expensive to get the job done correctly. There are now aftermarket replacements, although these are not cheap.
Bearings
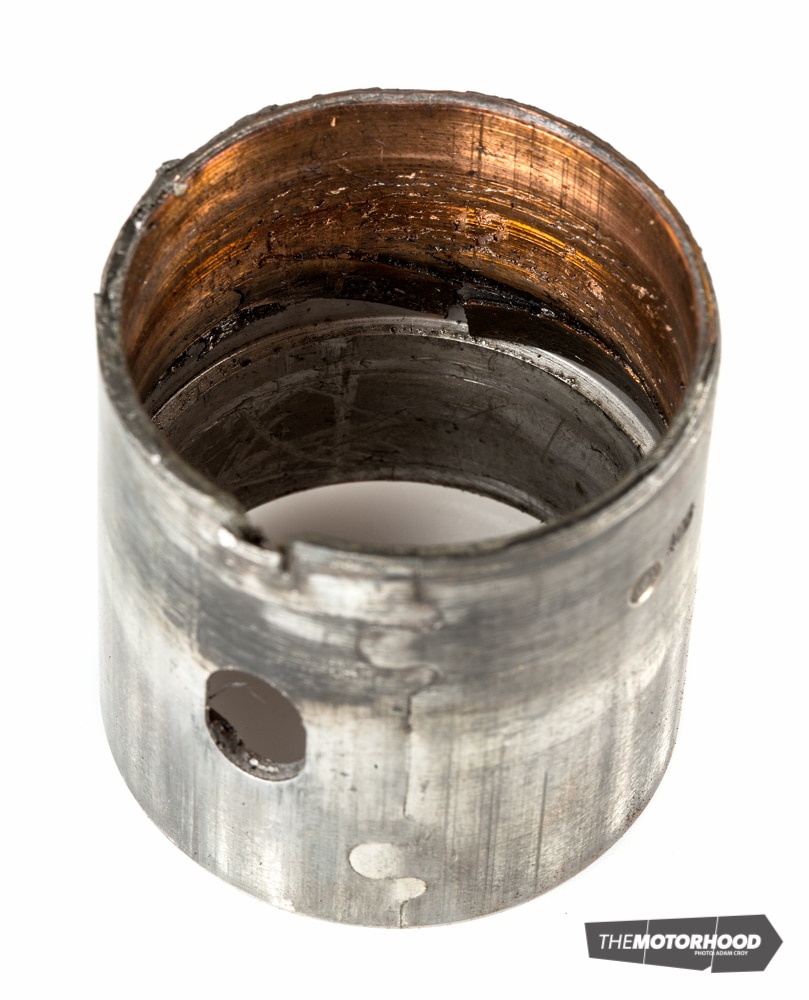
The bearing surfaces in both the rotors and the stationary gears should be smooth and scratch free. Any signs of copper showing means these are no longer of any use, and they will require replacing using specialized procedures.
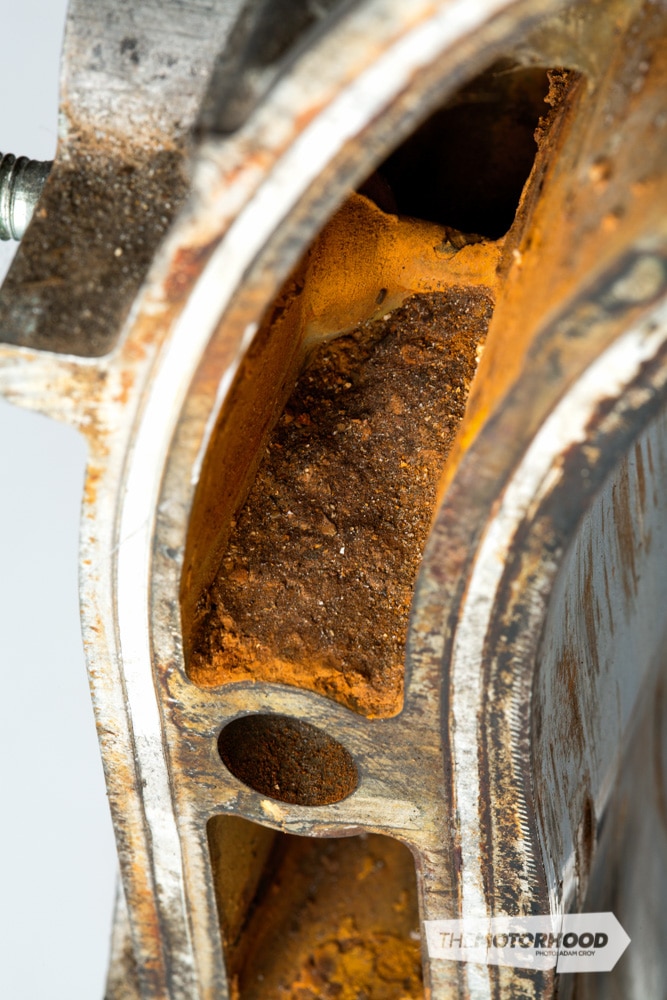
Corrosion

Corrosion is the number-one killer of rotary engines (right next to backyard builds and tuning) so whether you’re looking to buy a running vehicle, an engine or just components, evidence of coolant additive is a must. It’s obvious thanks to the green colouring of the coolant. If the engine is stripped, pay special attention to the water-seal grooves in the side plates, making sure they are complete and intact with no corrosion. This is a common problem area in FD RX-7 engines, and if the grooves are not in good condition there’s a chance of an internal water-leak problem (similar to a blown head gasket in a piston engine).
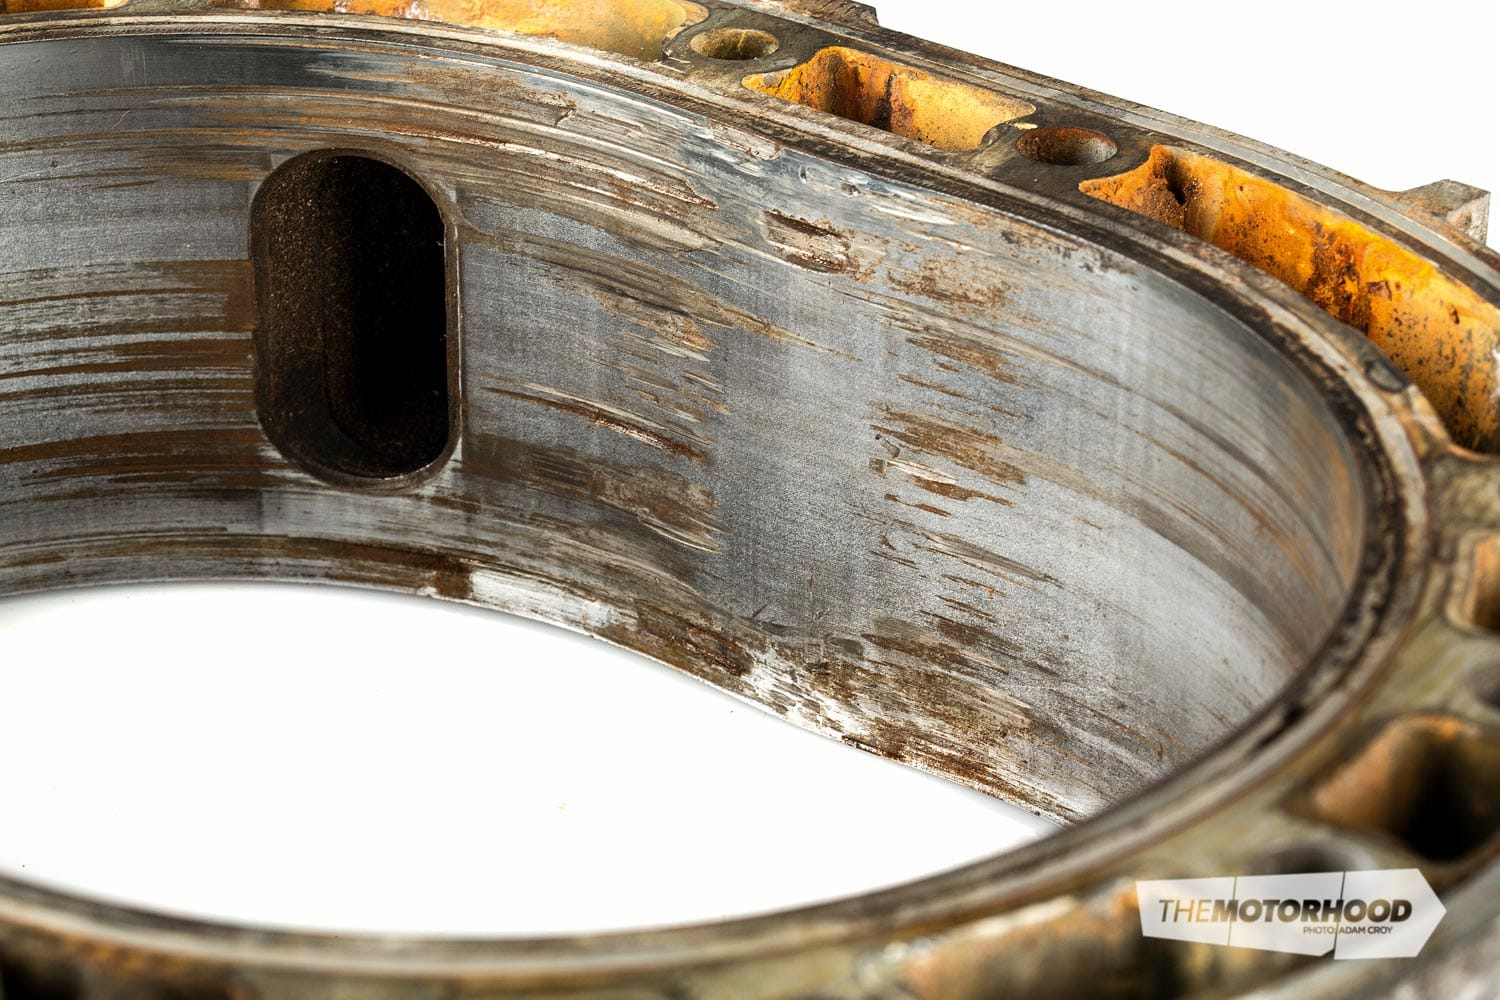
Plates

The side plates along with the housings are very comparable to the bore on a piston engine, so all those surfaces need to be free of scratches, damage and corrosion/wear.
Any surface wear on the face where the rotors run needs to be measured with a flat bar or ruler and a feeler gauge to ensure it doesn’t exceed 0.10mm. These plates can be repaired if machined by some specialized equipment, but will also require re-nitride hardening as the machining removes the factory hardening process. In many instances it works out cheaper to buy new plates.
Check that any porting that has been performed hasn’t been overdone. So often I see bridge ports that have been done incorrectly and too large, to the point where the water seal in the side plate is not captive, and can get sucked into the port causing an internal water leak (there’s no fix for this so be aware!).
Rotors

Check the rotors for damage and corrosion. If they are coated in black carbon, this is OK, it usually means they will clean up well. Check there are no seals rusted or heat damaged into their grooves, and that the apex seal slots aren’t flared open at the tips or ends. The bearing surface should be smooth and scratch free. If there is a bearing still in place it must have no copper showing through, otherwise it will need replacing with a specialized pressing tool procedure (PPRE charges $60 per bearing change).
Eccentric shaft
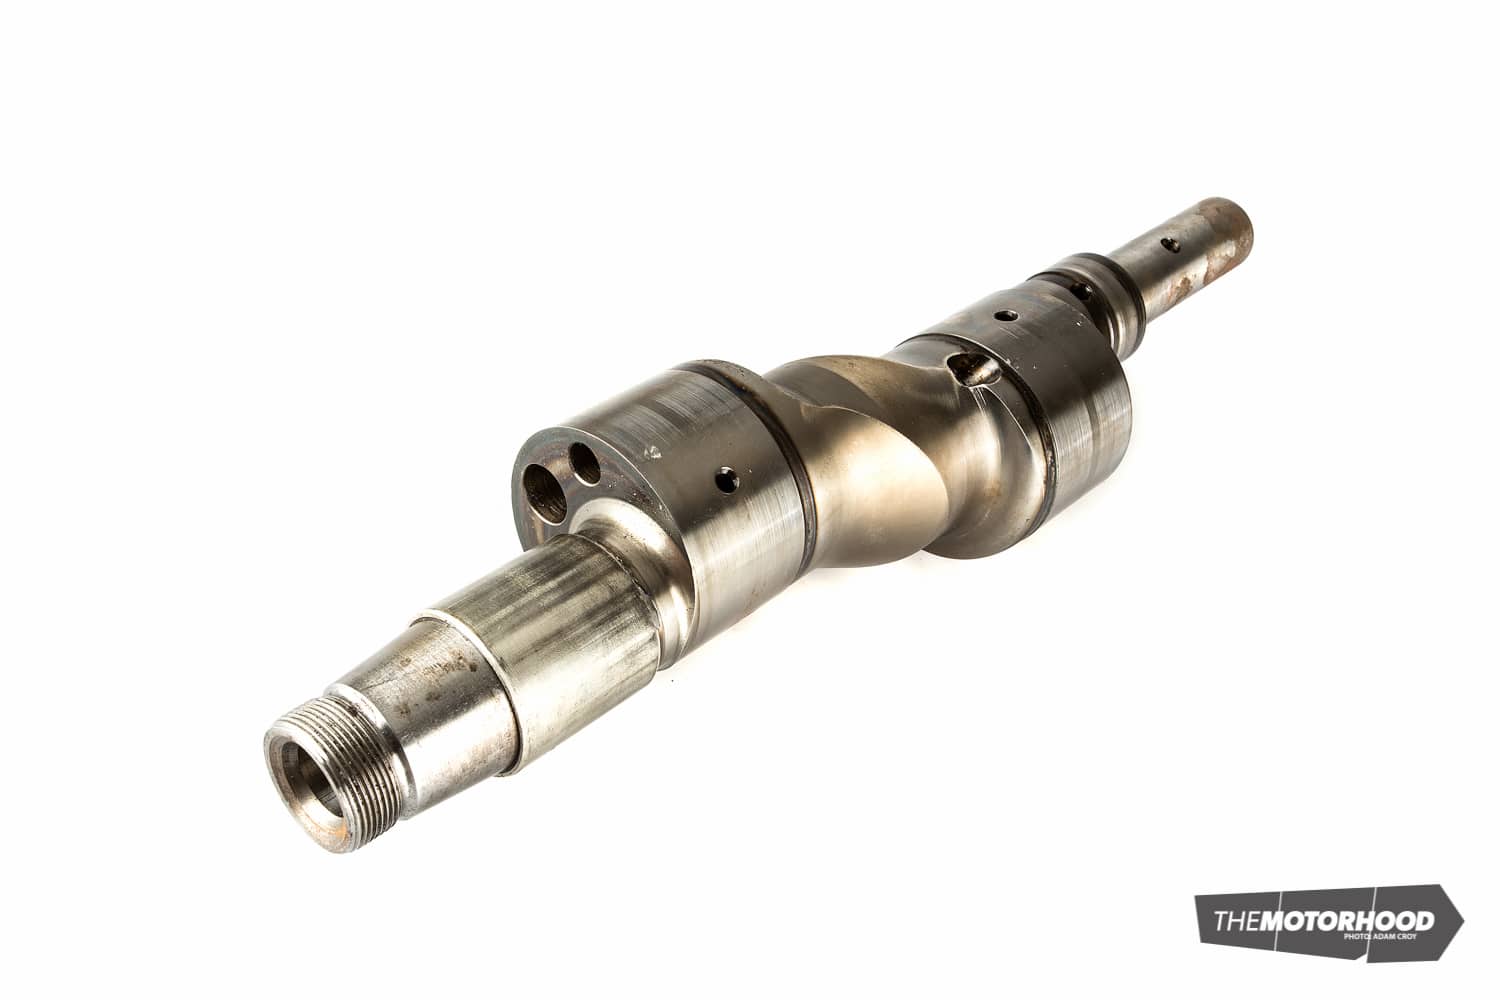
The eccentric shaft needs to be completely free of corrosion, even the slightest surface rust on any of the bearing journals renders it unusable.
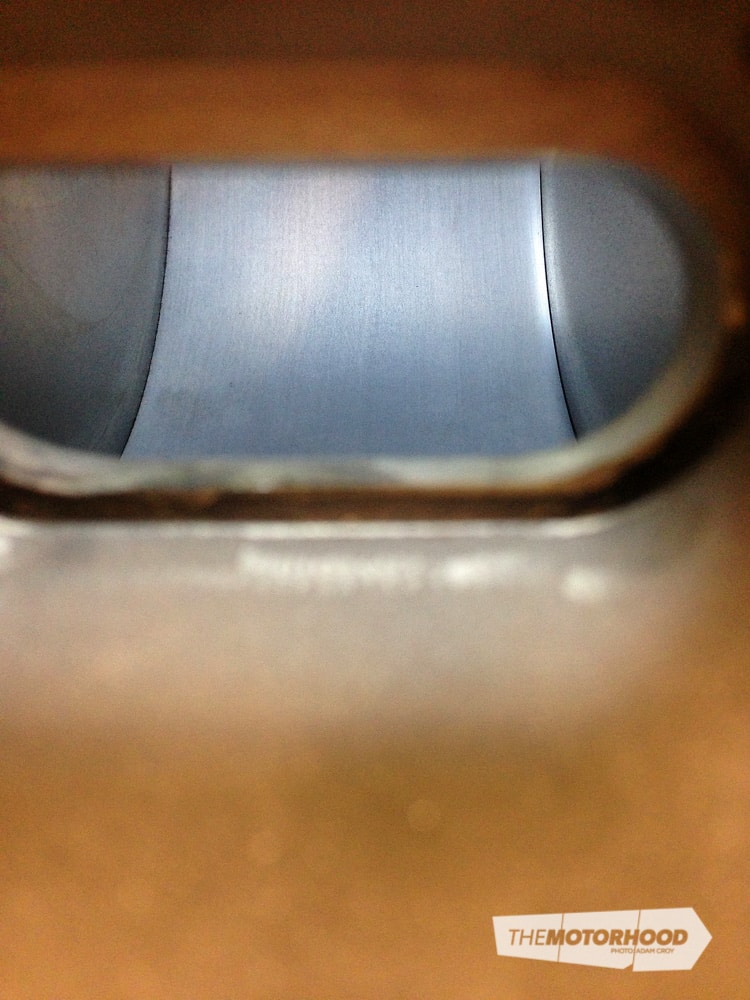
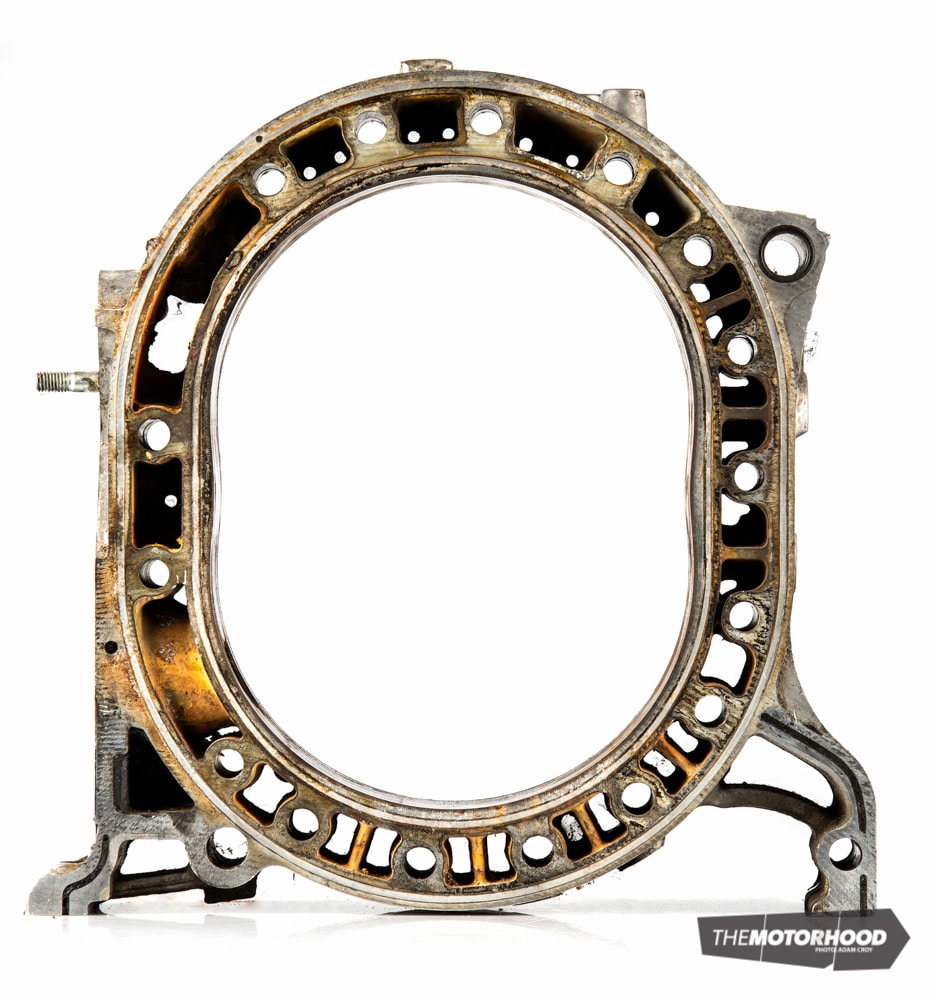
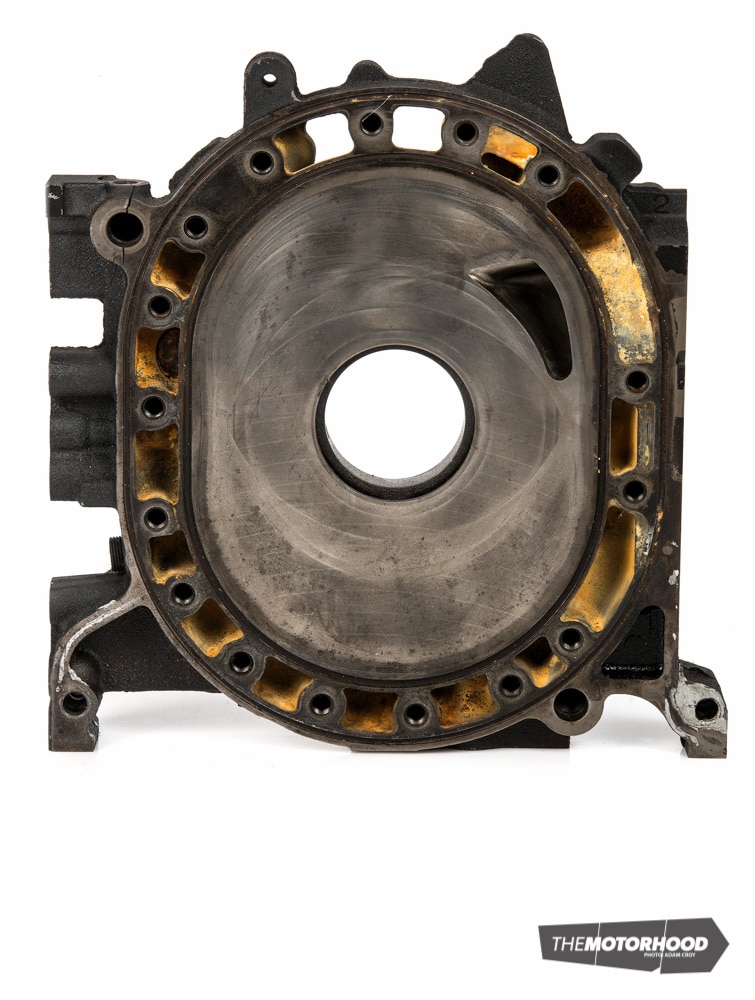
Housings

Check for obvious damage on the surface where the apex seals run. This chromium surface needs to be smooth and fully intact with no chipping or wear, as that can cause lost compression and in some cases pre-ignition. Look around the spark ports for heat cracks in the surface of the chrome. Check the sides where the water seals contact for damage and corrosion. If you have a micrometer, measure the width of the housing at the chrome edge. It should be no less than 79.95mm the entire way around for 13B and 20B. Housings that have been overheated often shrink around the spark plugs, and will cause an internal water leak.
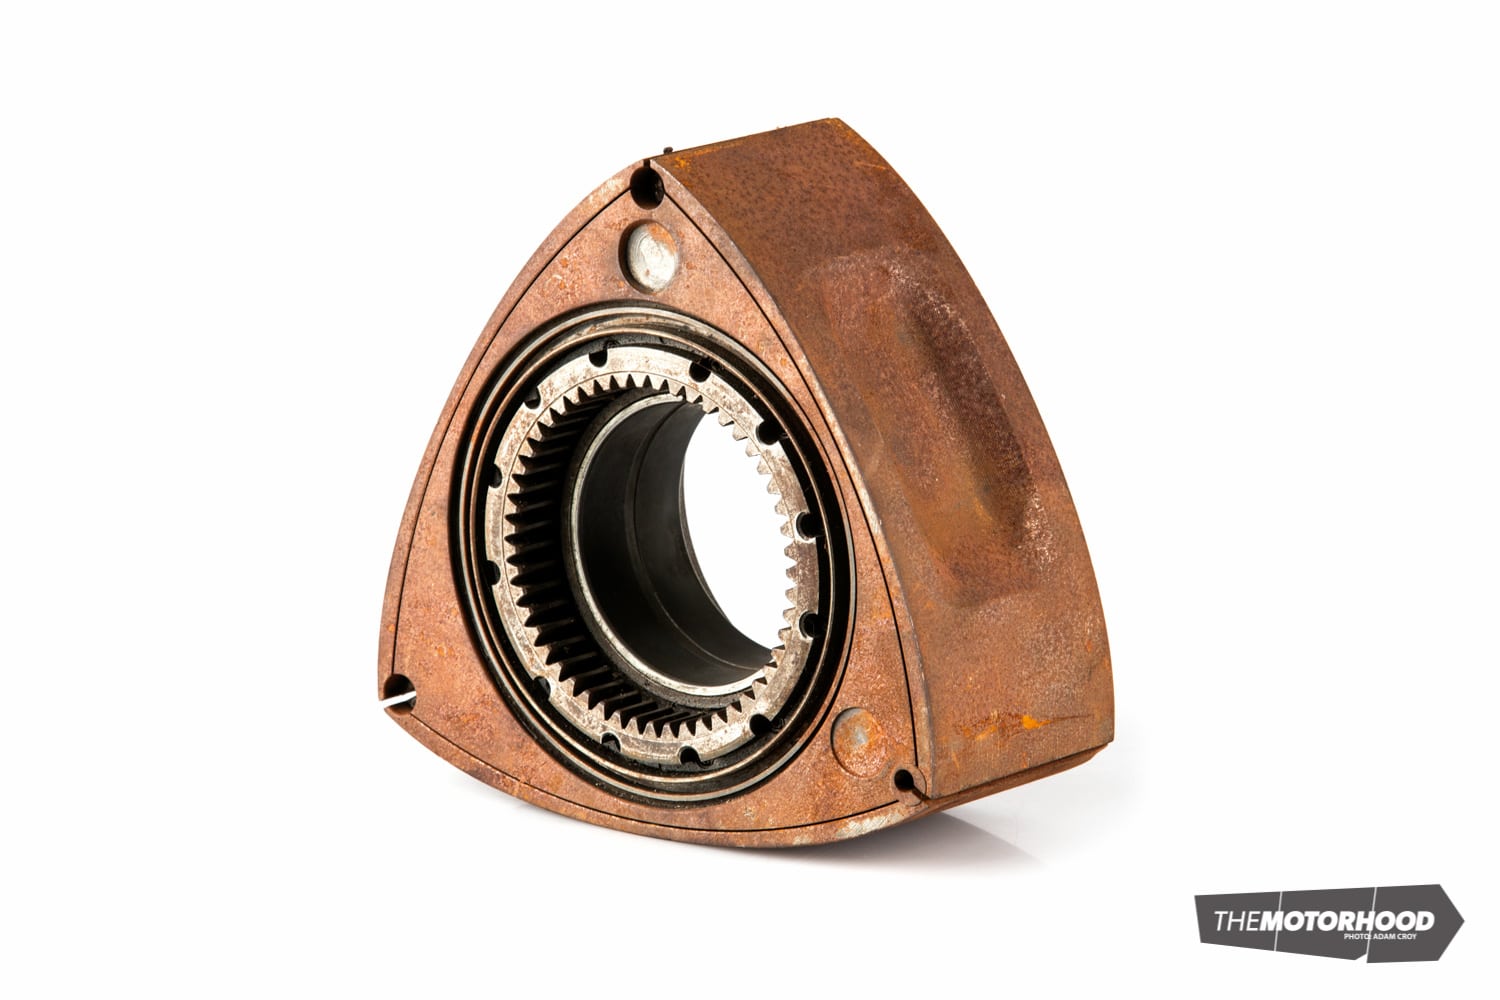
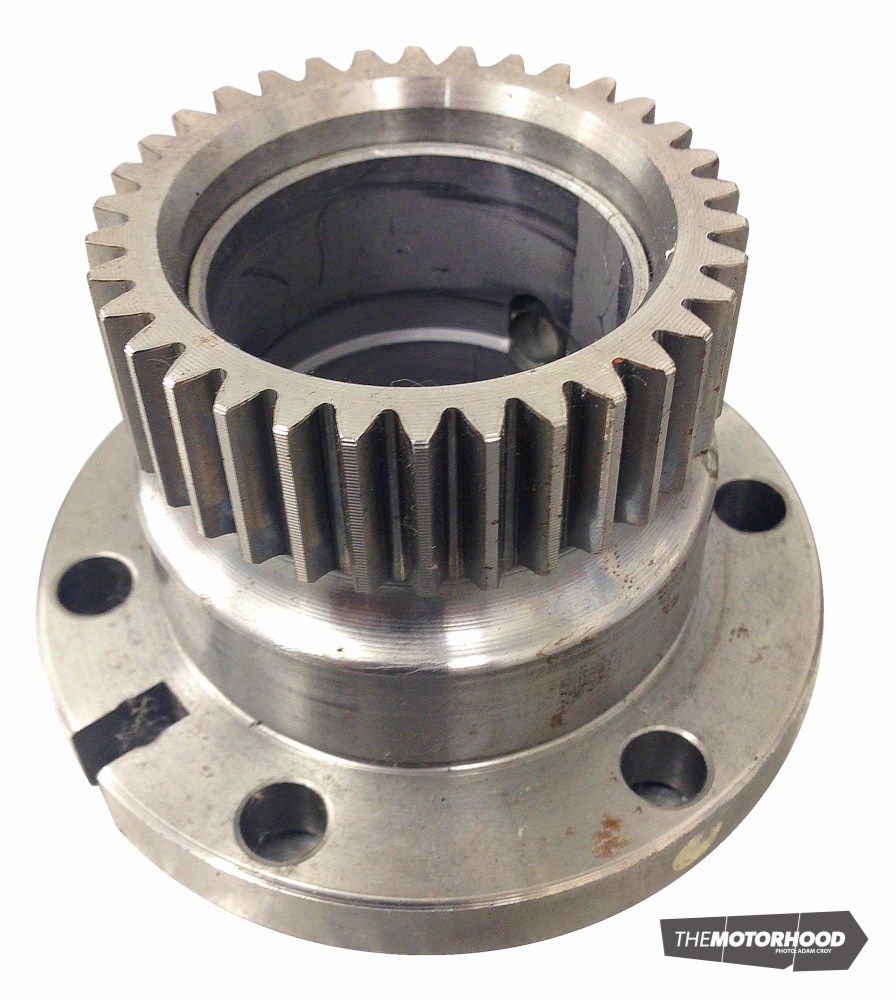
Stationary gears

Stationary gears are actually very hardy and last a long time, however, be sure to check the gear teeth for excessive wear and burring (marking).
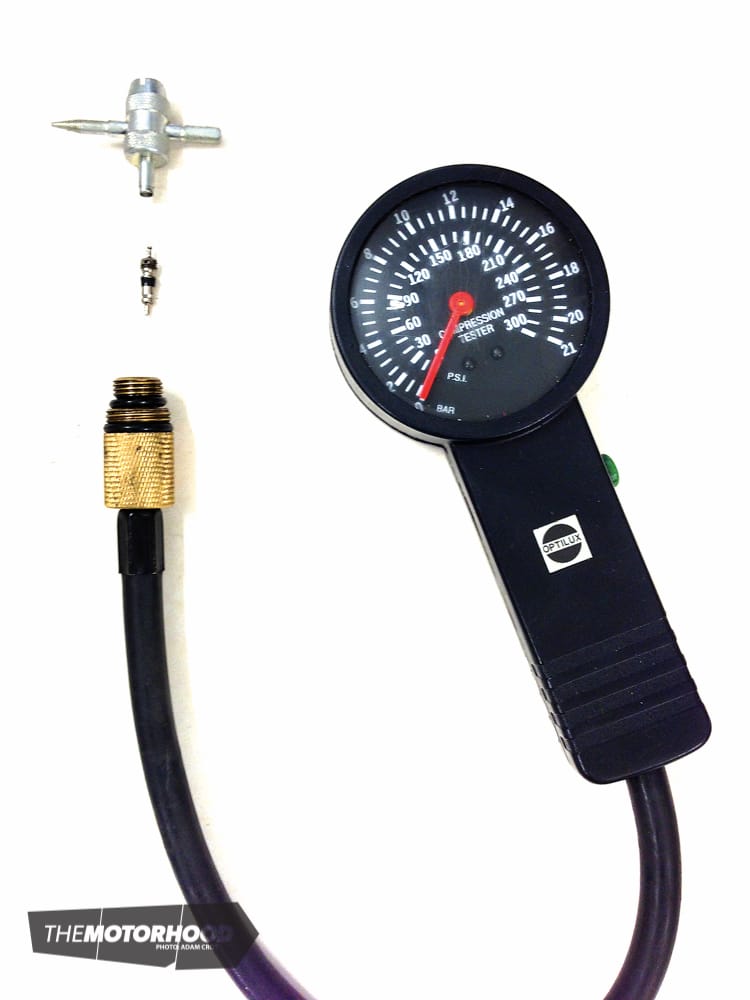
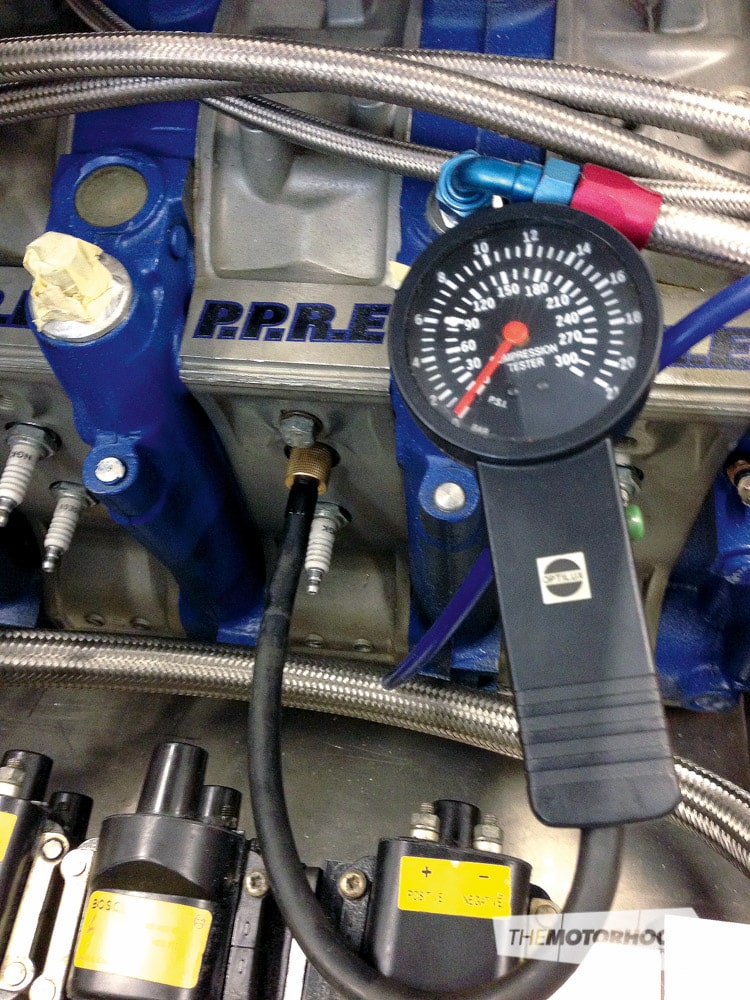
Compression-testing a rotary engine

Firstly, a quick rundown of the fundamentals of the rotary engine. A two-rotor engine, be it a 12A or 13B, has six compression cavities (three on each rotor) that rotate around and seal in the same location on each cycle. These compression pressures can be measured at the trailing spark plug location. This allows the diagnosis that the three surfaces of the rotor are sealing correctly. Your standard piston-engine compression tester will ‘pump up’ with each compression stroke due to the one-way valve that is almost identical to a standard wheel’s tyre valve. This is normally located in the very end of the remote part of the gauge which is screwed into where the spark plugs go. The valve needs to be removed to be used on a rotary engine. You can use a tyre-valve tool for the removal of this.
Step one
You will need to disable the ignition system. If the vehicle is equipped with an ECU the best way to do this is to unclip the crank angle sender if it is a Series 4/5 type, or unclip the plugs to the reference senders on the front pulley if it is a Series 6. If the engine is running a carburettor with a distributor you can simply unplug the wiring to the igniters located on the side of the distributor, or remove the positive feed to the coils. Now when you crank the engine it should not start, as it will have no spark.
Step two
Remove all trailing (the upper located) spark plugs only, and screw your compression gauge into the front-trailing spark plug port.
Step three
Have a second person sit in the driver seat, and be sure the vehicle isn’t in gear and the handbrake is fully engaged. Have them press the accelerator completely to the floor before cranking the engine over upon your instruction. As the engine cranks over the compression gauge needle should flick up on each stroke of the rotor’s three compression surfaces. This can be difficult to see as it happens rather quickly. Note down each compression peak figure.
Step four
Repeat on the rear-rotor trailing plug hole, and then on the third trailing plug should it be a 20B. The three peak figures reached on each rotor should all be even (within +/- 5psi) and should read over 85psi on each pulse of each rotor. Your local rotary specialist can help diagnose any inconsistencies that you find.


This article was originally featured in a previous issue of NZ Performance Car. Pick up a copy of the edition here: