

data-animation-override>
“You’ll read about them in just about every issue, but what actually goes into a four-link rear end? We take a closer look at the holy grail of tough rear ends”
The four-link suspension design has long been the go-to for diff set-ups; hell, it’s been around so long that we’re pretty sure Jesus had the same set-up on his wooden cart. Here, Nick Mitchell from Mitchell Race Xtreme gives us the low-down on designing and tuning your four-link. Those of you with independent rear ends, look away now — this piece is not for you.
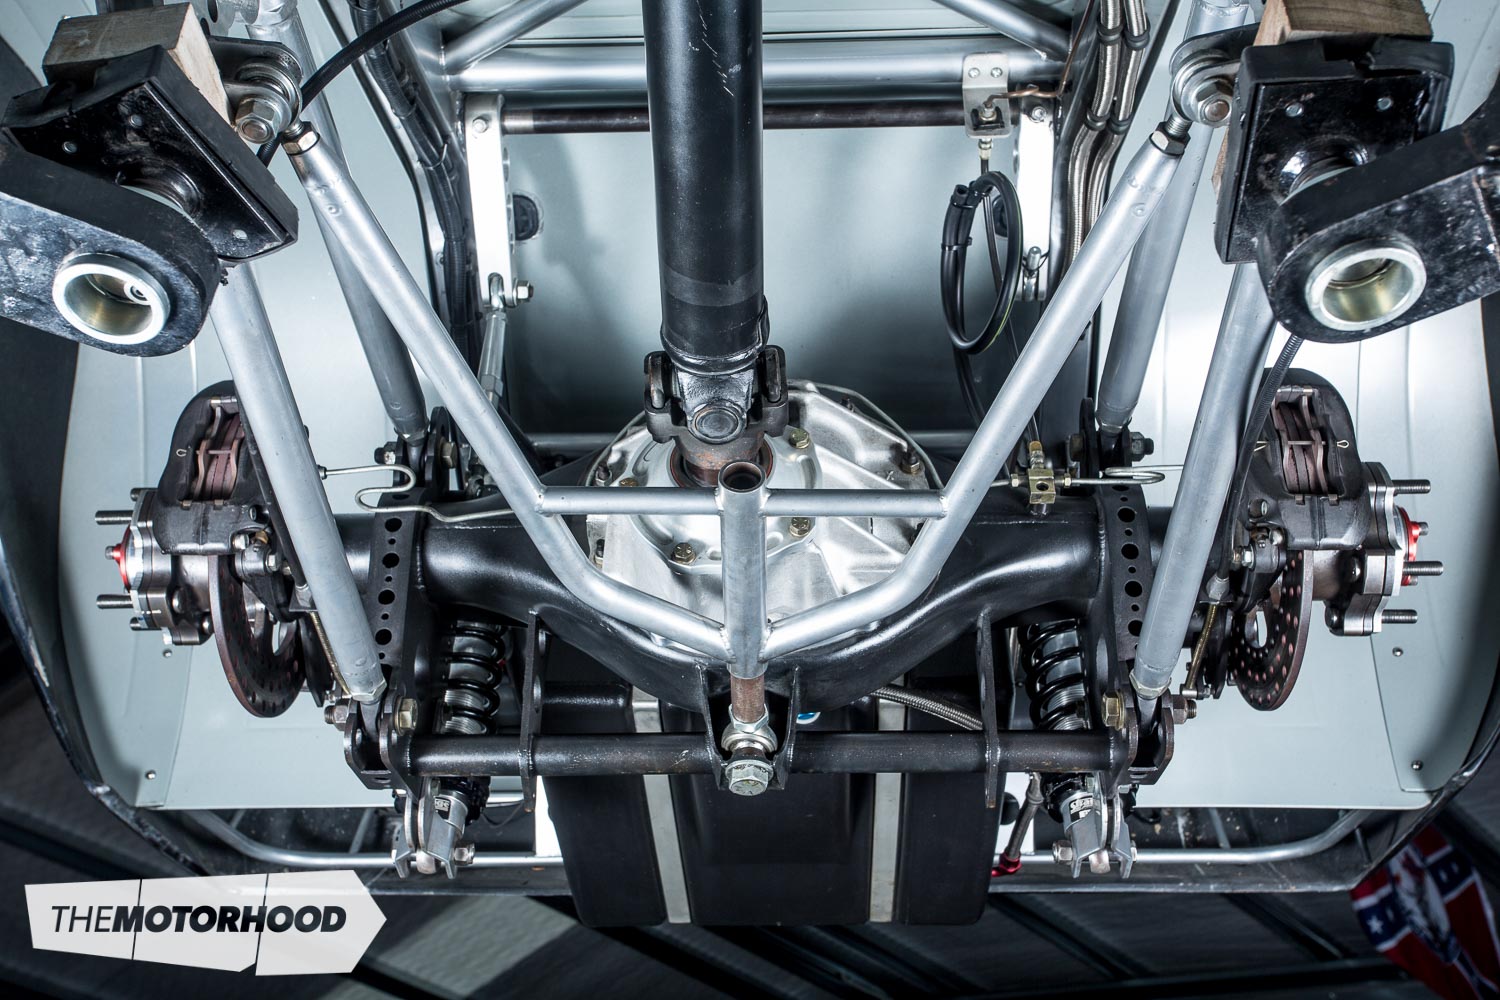
The four-link is probably the most common form of rear link, not only in modified road and race cars but also in some early factory live rear axles: think Holden HQs, Chev Chevelles, and the like. If you’re choosing a new set-up for your rear, there are better ones out there, but it always comes down to the application of the vehicle — circuit, drift, drag, or road — power output, and, of course, budget!
A lot of the time, it’s not just about chucking in some new brackets and arms. The diff housing set-up will need to be looked at, especially if more power has found its way into the front of the vehicle. Packaging can also play a role in the design and will depend not only on whether a full four-link will fit in the chassis you are working with but, if it’s a road car, also whether you still want to retain the rear seat. The location of chassis rails is important, and most applications will try to keep the arms just inside or outside of the rails — this gives a good anchor point for the forward mounting plates. Wheel size is another thing to consider when designing the set-up …
Finding the height of the CoG
There are a few techniques to working this out, but here we explain the easiest for those who ignored their maths teachers’ advice that trigonometry and Pythagorean theorem would come in handy in later life.
To find the height of the CoG, you will first need to calculate the CoG itself. Jack the car up so it is level, then place four axle stands on the sills — or chassis — as close to the car’s lengthways centre point as possible, keeping the stands about six inches apart. You will need a jack under the front to balance the car. If you lower the jack and the car begins to dip, jack it back up and move the two front axle stands forward until they support the weight and you can lower the jack.
The halfway point between the front and rear axle stands is the CoG. To find the height of the CoG, mark the CoG on the 1:1 drawing you made earlier, then draw a line following the plane of your engine crank. The point at which the two lines intersect is the height of the CoG.
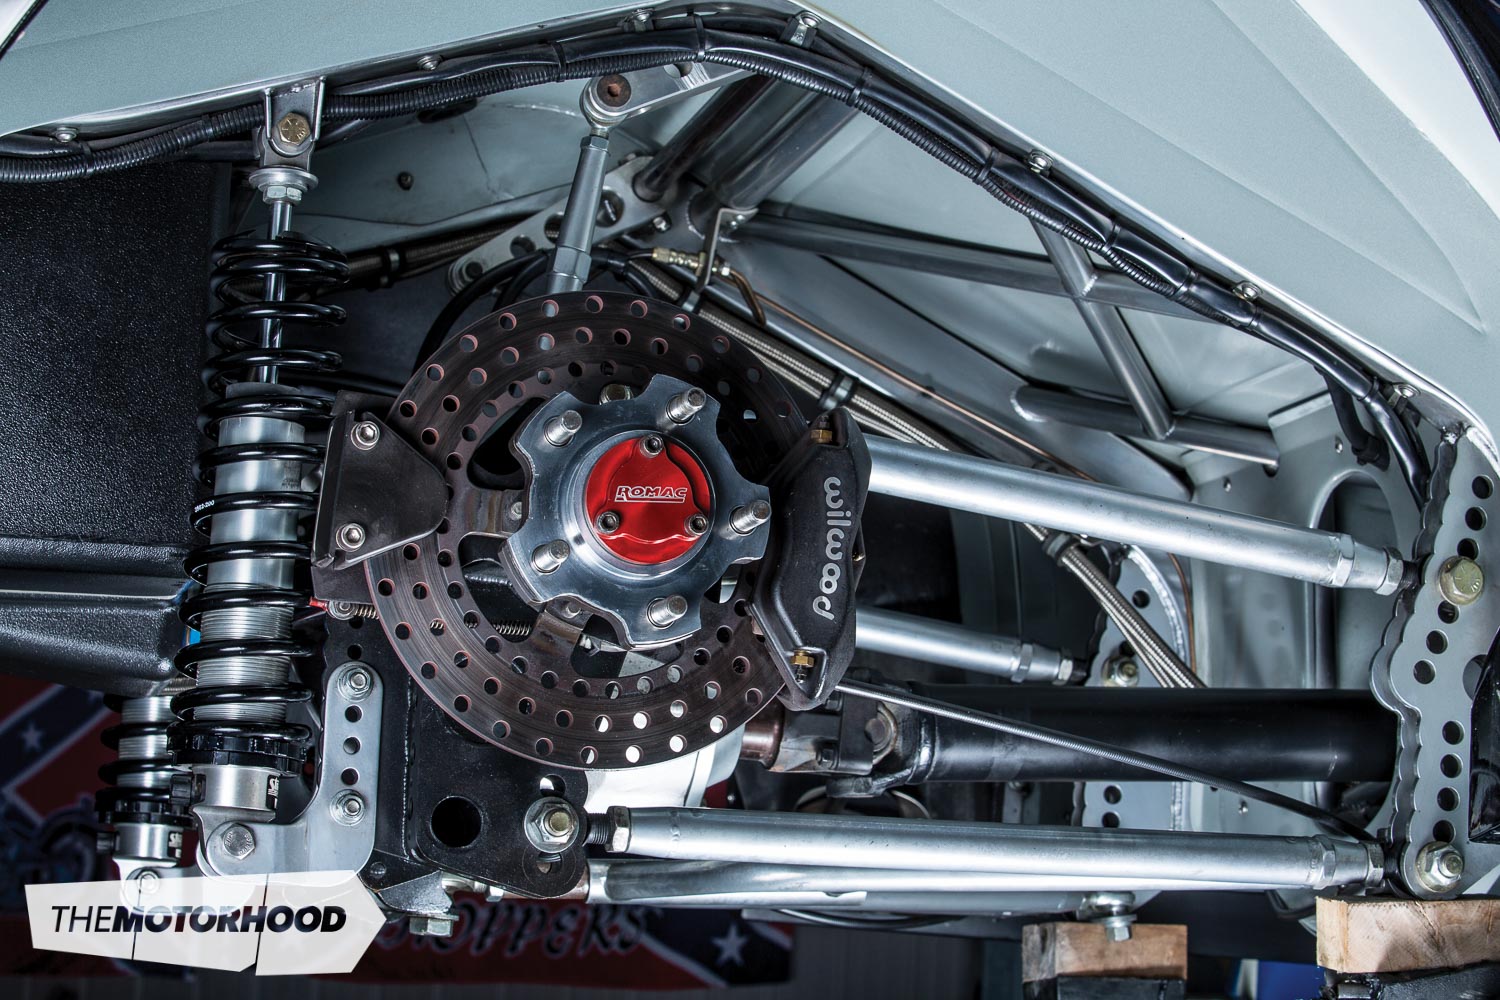
What joints should I use?
While the top of the line rod ends might provide you with the least flex, these are a race-only affair. If you’re planning on getting the project road legal, a Nolathane-type bush will need to be used. Ideally, you will want to use a threaded housing at each end of the ‘link’ to mimic the adjustability you would achieve with rod ends. Make sure you have one left hand and one right hand threaded, with locking nuts, so you can adjust while the link is fitted.
The size of the joint needs to be considered with things like loading. A ½-inch rod end with 5⁄8-inch thread is commonly used for general circuit application.

The brackets themselves
When making the brackets, keep in mind the loading that the car will experience, with regard to hard launches, cornering, etc. The size of the plate needs to be able to handle everything, and it’s always better to over engineer in this area. Five millimetres of steel is typically the minimum thickness, but, when dealing with drag cars, the thickness will be upwards of eight millimetres. On a road car, it would pay to check with your certifier.
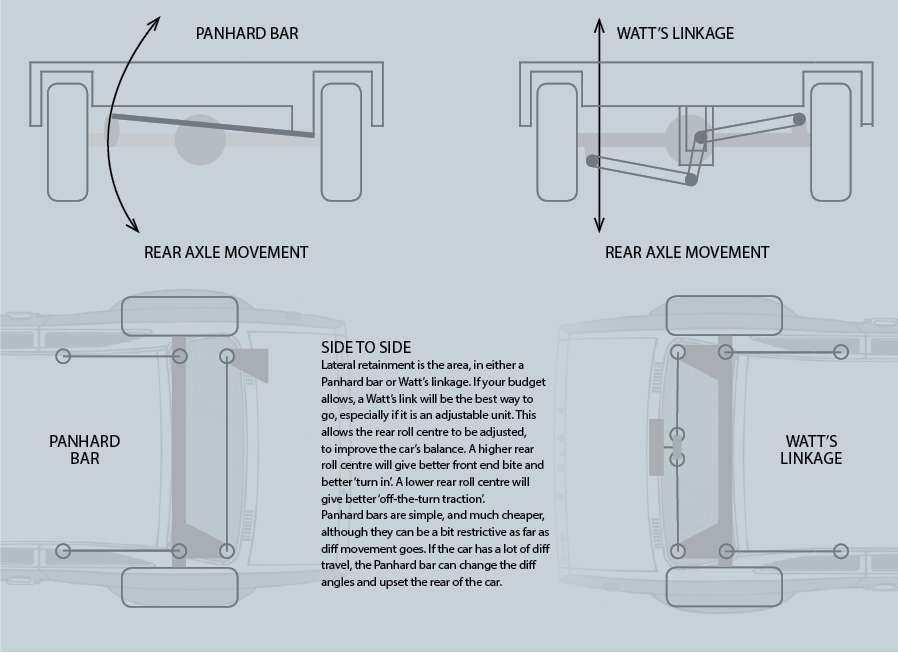
Side to side
Lateral retainment is the area, in either a Panhard bar or Watt’s linkage. If your budget allows, a Watt’s link will be the best way to go, especially if it is an adjustable unit. This allows the rear roll centre to be adjusted, to improve the car’s balance. A higher rear roll centre will give better front-end bite and better ‘turn in’. A lower rear roll centre will give better ‘off-the-turn traction’.
Panhard bars are simple, and much cheaper, although they can be a bit restrictive as far as diff movement goes. If the car has a lot of diff travel, the Panhard bar can change the diff angles and upset the rear of the car.
This article originally appeared in NZV8 Issue No. 127. You can pick up a print copy or a digital copy of the magazine below: