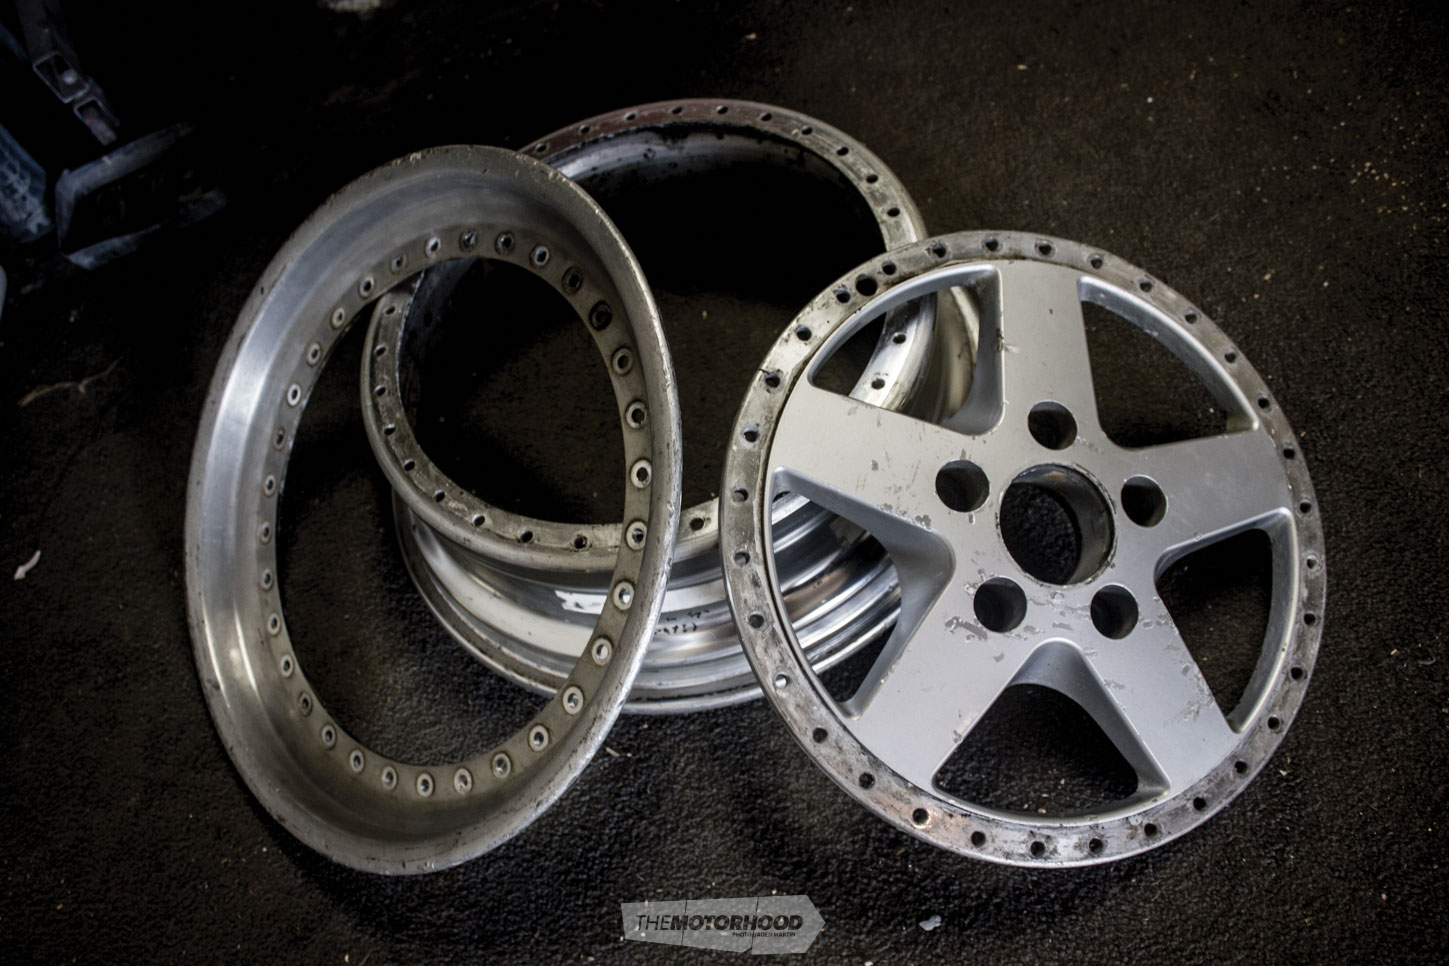
Congratulations, you’ve purchased a slick new set of three-piece wheels. But when they arrive, they aren’t quite the shining examples the seller described …
Welcome to the Weekend Workshop, a place where you can save some cash by getting your hands dirty. These tech guides aim to arm you with the necessary info and knowledge to get out there and give it a go yourself, with no professionals needed and for a price that won’t break the bank. This month, we delve into refurbishing three-piece wheels.
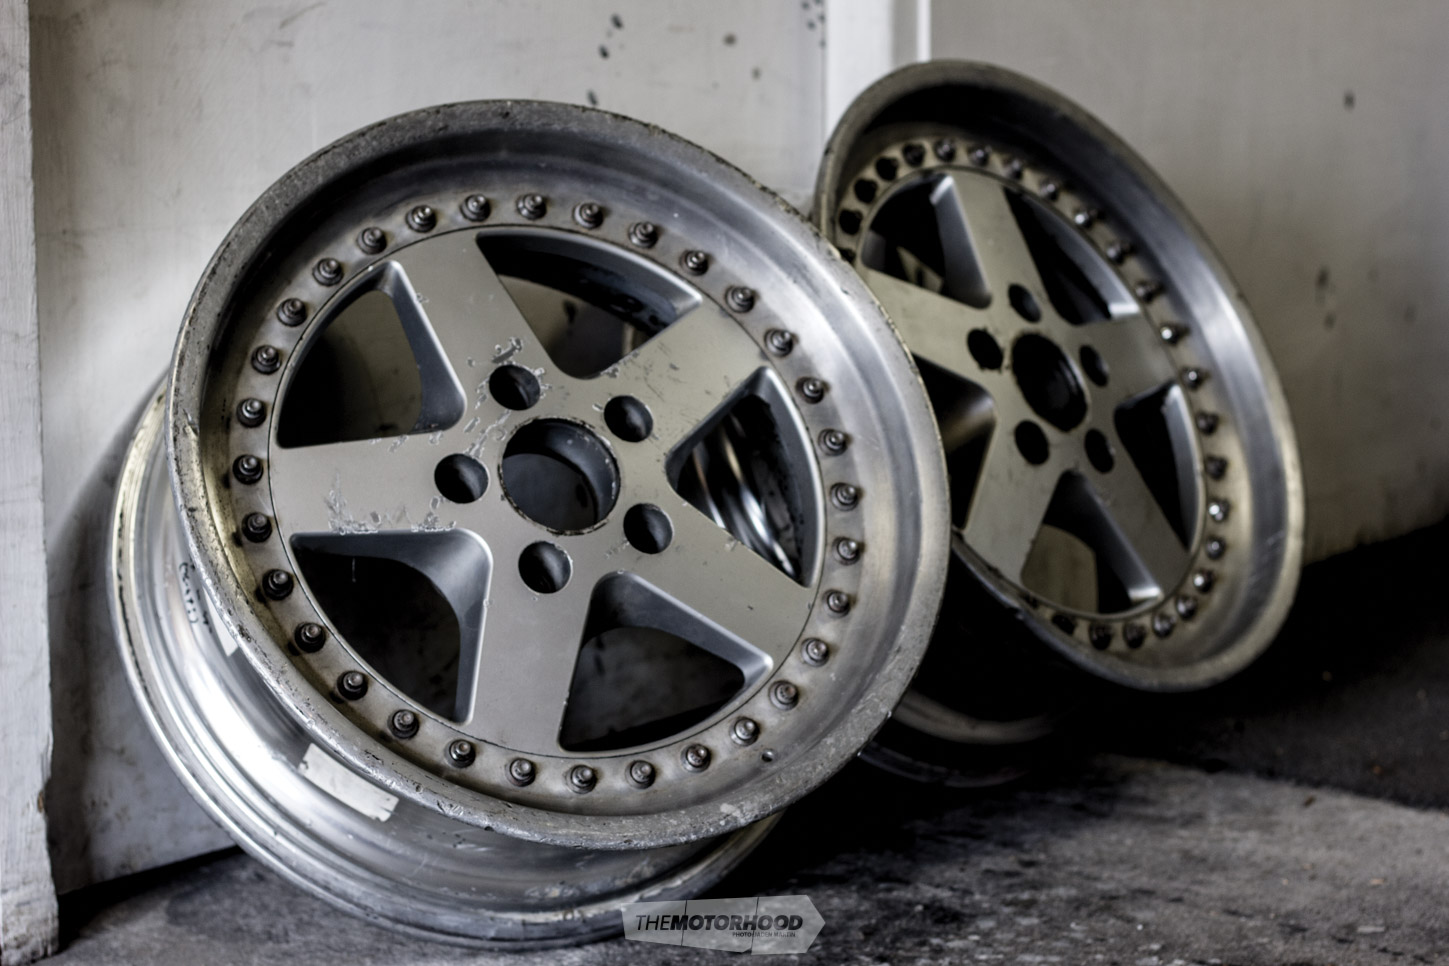
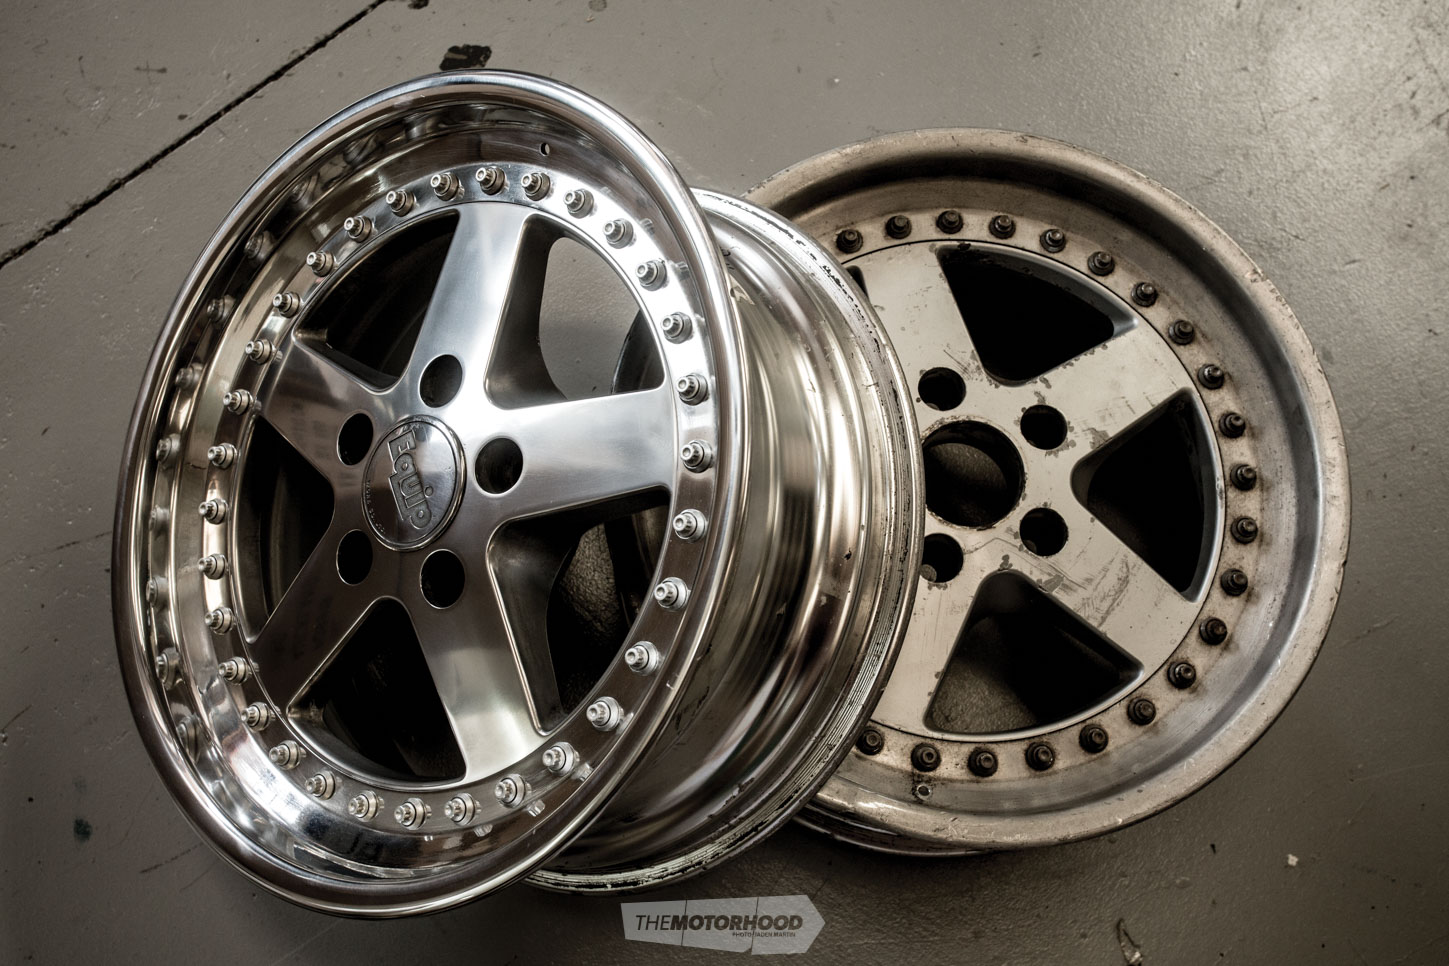
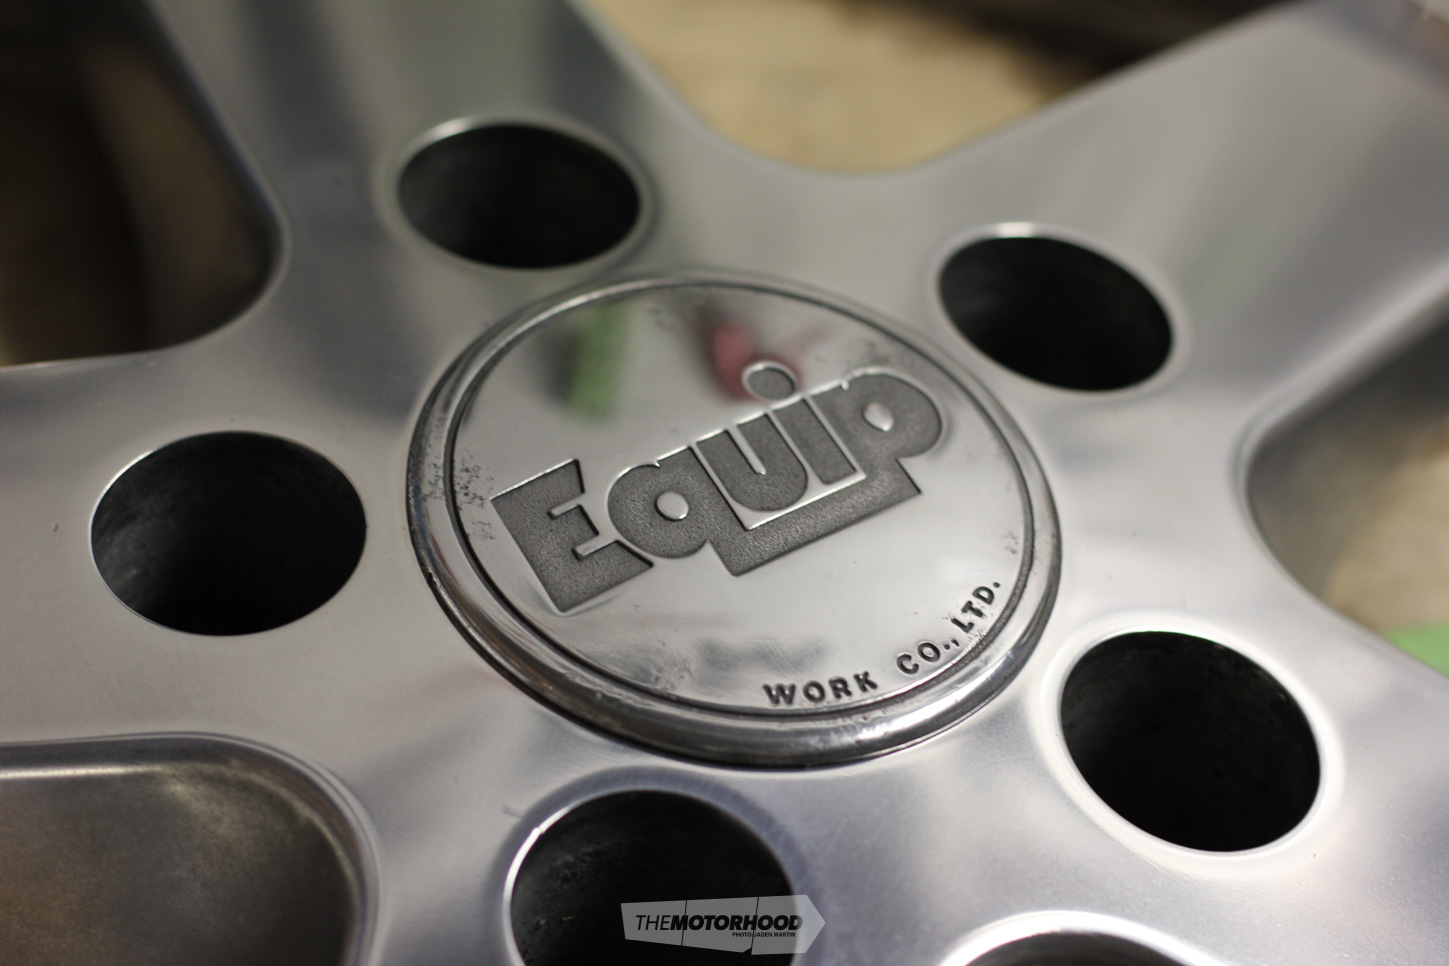
Congratulations, you’ve purchased a slick new set of three-piece wheels. But when they arrive, they aren’t quite the shining examples the seller described, and they are in dire need of some tender love and care to get them back on the train to e-fame. Since you’ve more than likely blown anywhere between $1K and $4K on buying them, taking them to the local refurb shop may be a bit harsh on the wallet — especially at this time of year. So, today, you’ll learn how to turn some kerbed-up, scratched and peeling rubbish-pile-fillers into straight-outta-the-manufacturer’s-showroom examples, thanks to a pair of Work Equip 05s that have been sitting in the shed waiting for their day for far too long.
Time required
Two days, depending on desired finish
Tools and materials
Ratchet, 8mm star socket, 12mm spanner, metal file, mallet, paint stripper, assortment of sandpaper (400-grit to 2000-grit), acid wash (optional), metal polish, clean rags, spray can (optional), silicone sealer, wax, rubber gloves
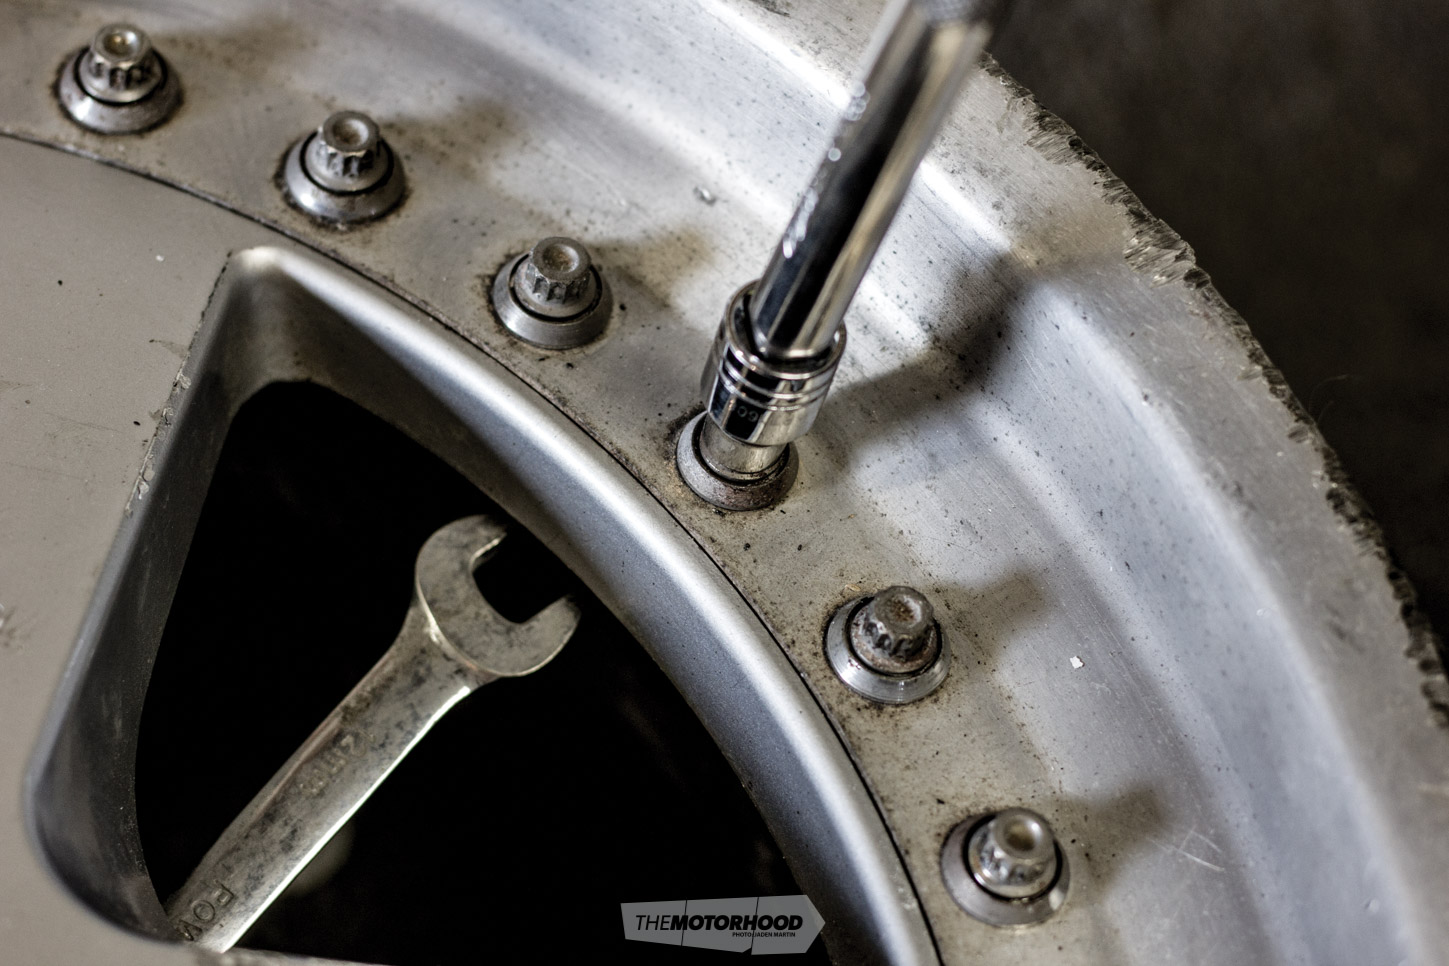
Step one — Unbolting
First things first, get the rubber off ASAP — the tyres aren’t any good to you right now and won’t allow you to split the wheels — trust us, we’ve tried. Next, you want to get the bolts off: grab the ratchet and socket set out of the toolbox, a couple of spanners to swing and some kind of storage container. Note: manufacturers use different-size bolts — in the case of the Works, it was a 12mm hex spanner for the nut and an 8mm star socket on the bolt head. Techniques may vary here, and how seized the bolts are will factor into it, too; however, in this circumstance, it was easy for us to apply pressure from the bolt-head side. Be careful doing this though, as too much force will cause the head to strip and ruin the look of your bolt.
Step two — Removing sealer
When you’ve got rid of the bolts and they are safely stored in a container where none can go astray — we recommend soaking them in degreaser while you continue — you can move onto breaking the seal. Most wheels will be sealed via a silicone bead run between the three sections’ meeting surfaces (outer barrel, face, and rear barrel), but others can be welded. If it’s the latter, unless you’re willing to try some nasty DIY techniques, take it to the closest engineering shop and have the guys lathe the weld out. Silicone, on the other hand, is easy — simply grab a Stanley knife and use it to slice where each surface meets to form a single piece of silicone that should simply pull out/off. Note: slicing at random will make things a lot harder, and more clean-up will be involved.
“If you’re having trouble separating everything, check that all silicone has been cut away cleanly and isn’t holding the surfaces together, then repeat.”
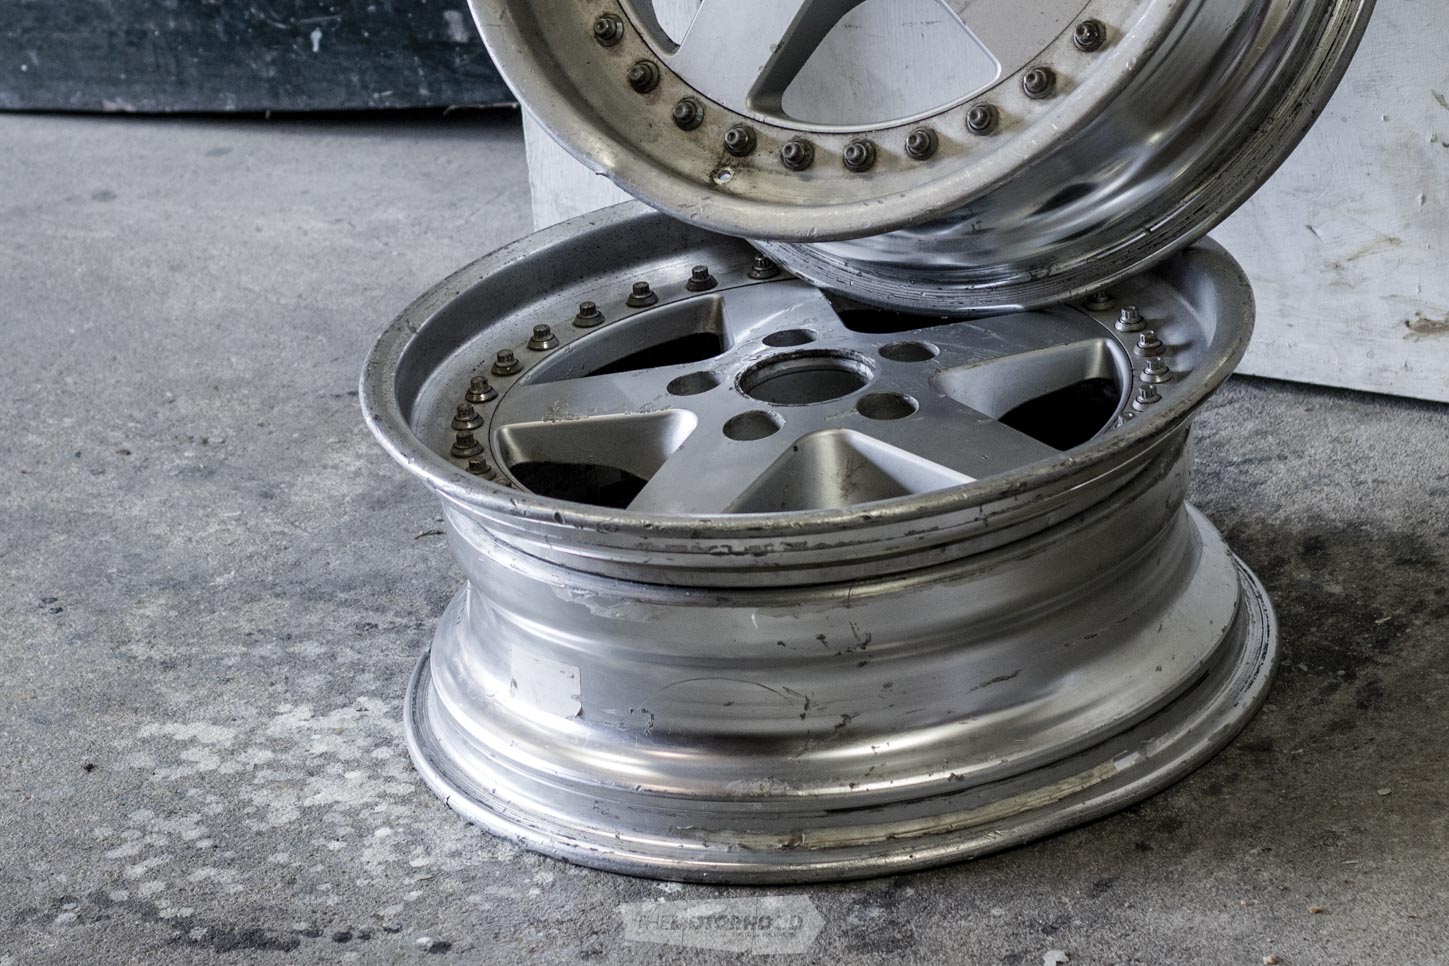
Step three — Splitting
Once everything holding the three sections together has been removed, each wheel should separate fairly easily. In case they are a bit harder to separate — if age has fused them together, as it did with the Works here — attempt to remove the rear barrel first by lightly tapping the outside edge away from the centre meeting point. Once you have got this unstuck, rest the outer barrel on two pieces of wood, allowing room for the face to drop down between, and to the face. If trouble persists, check that all silicone has been cut away and isn’t holding the surfaces together, then repeat.

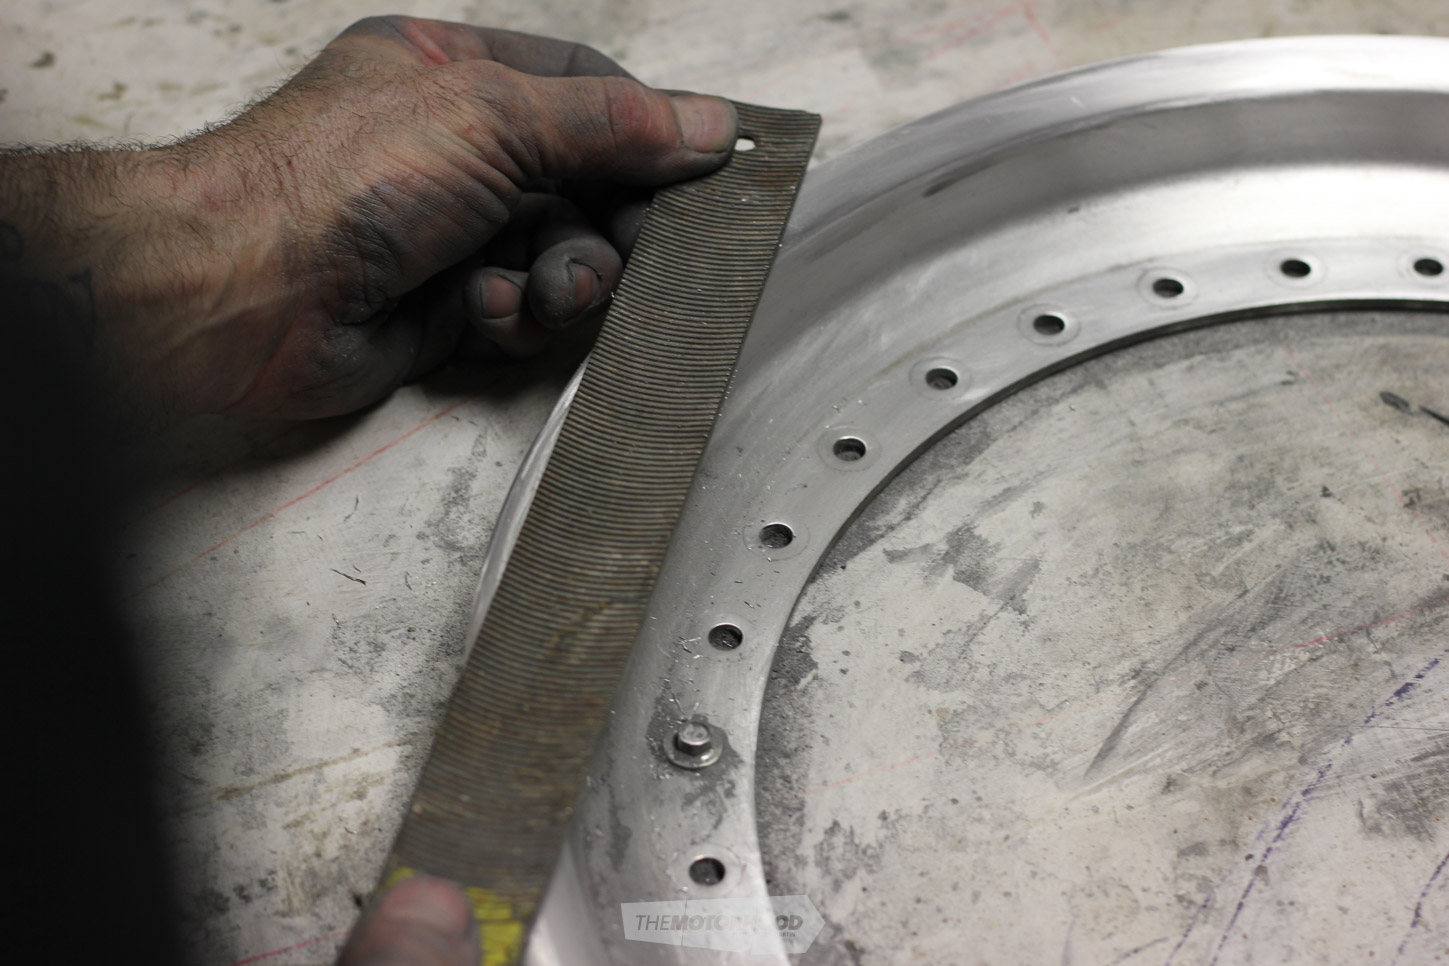
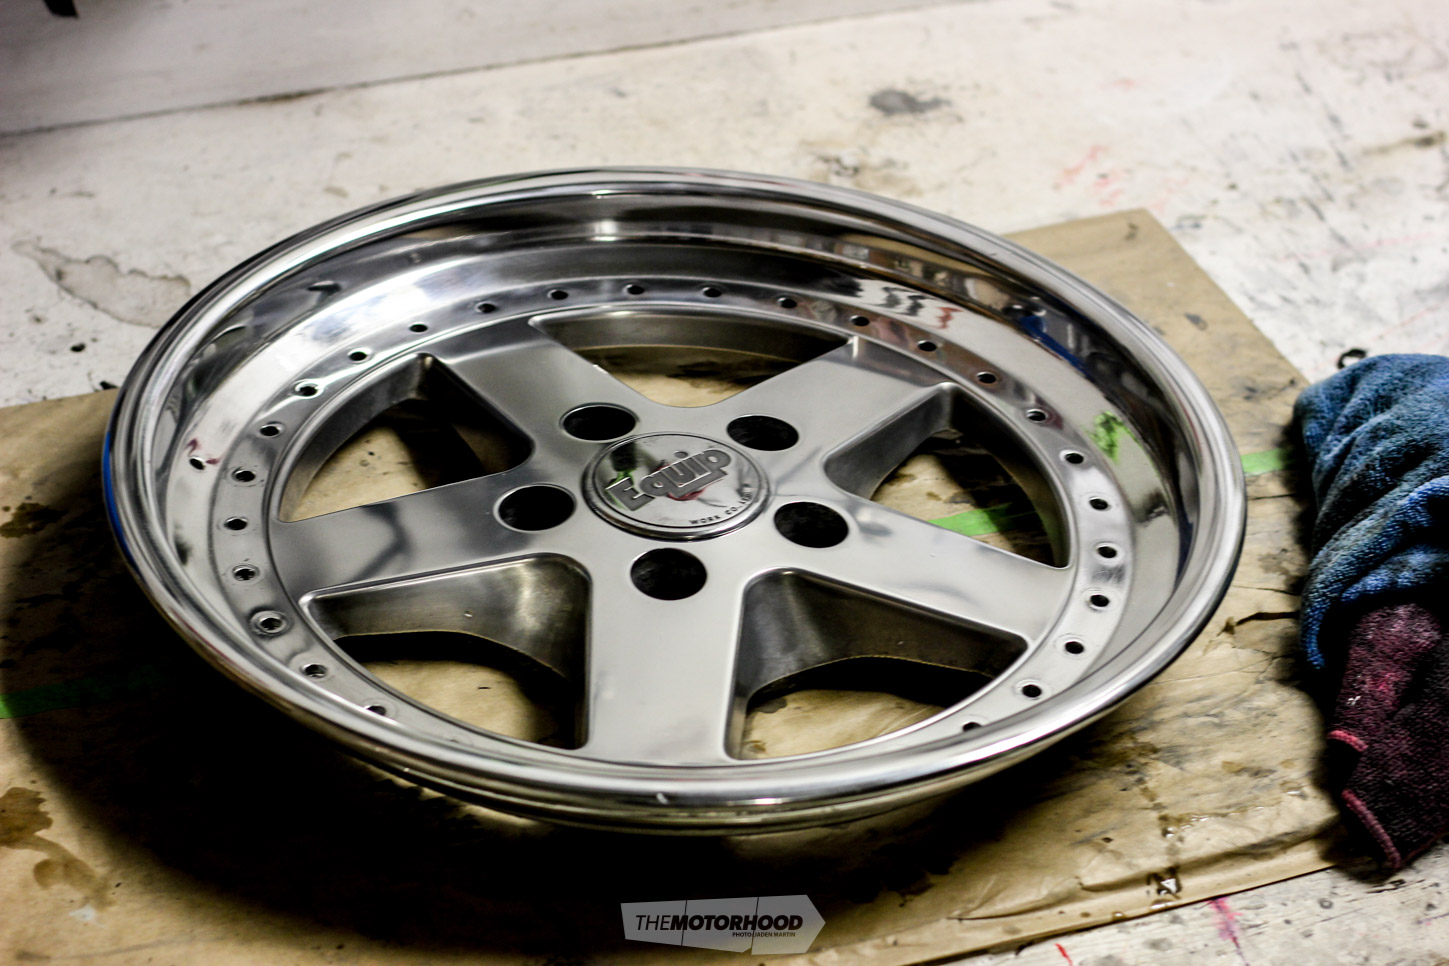
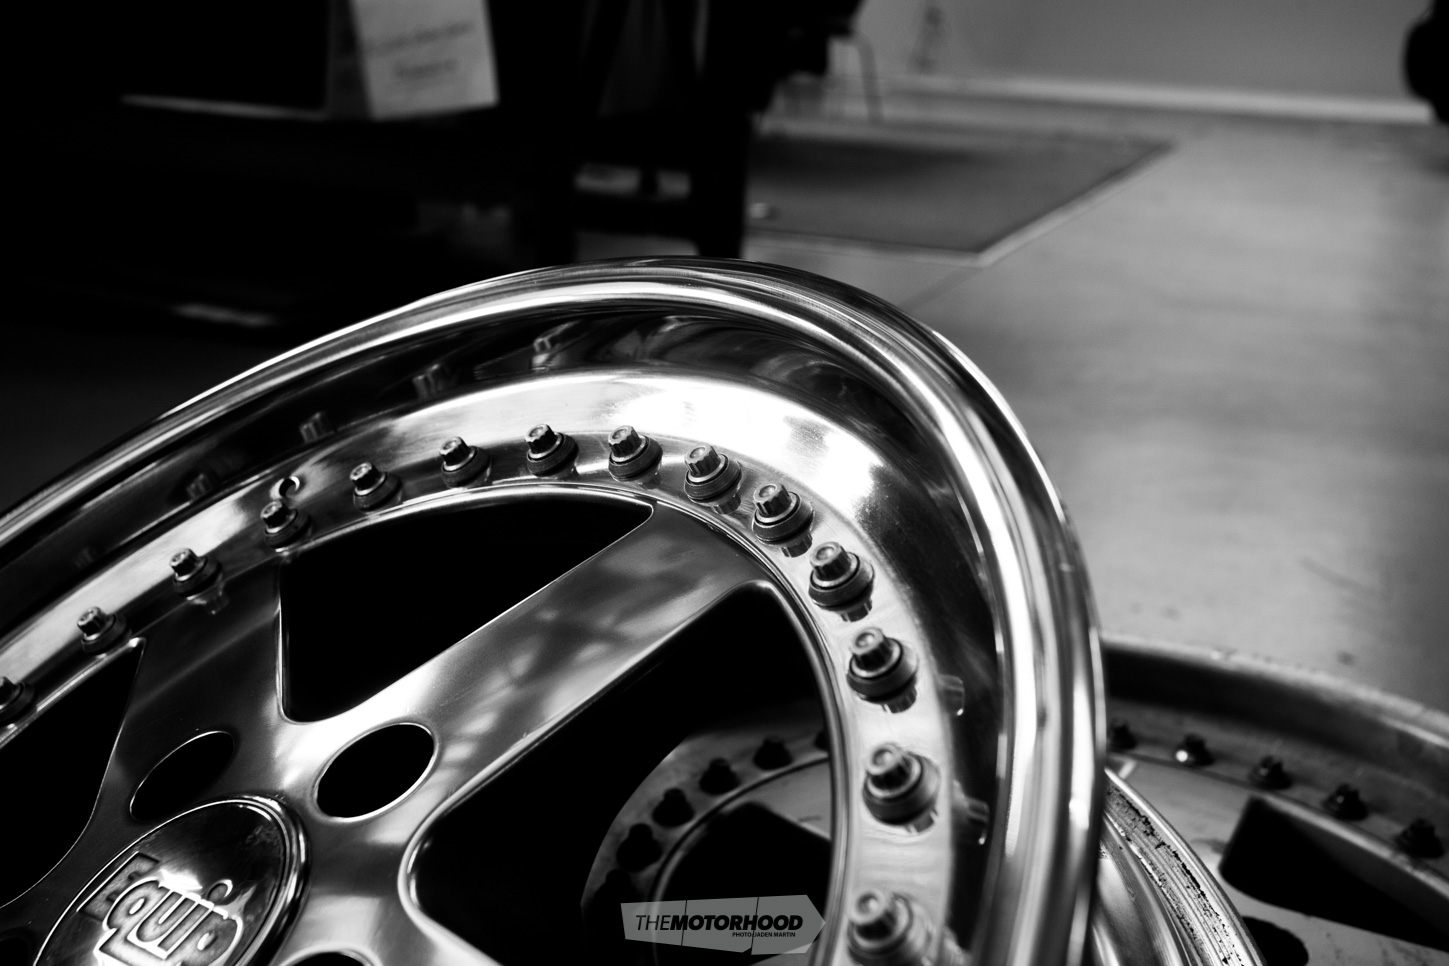
Step four — Outer barrel
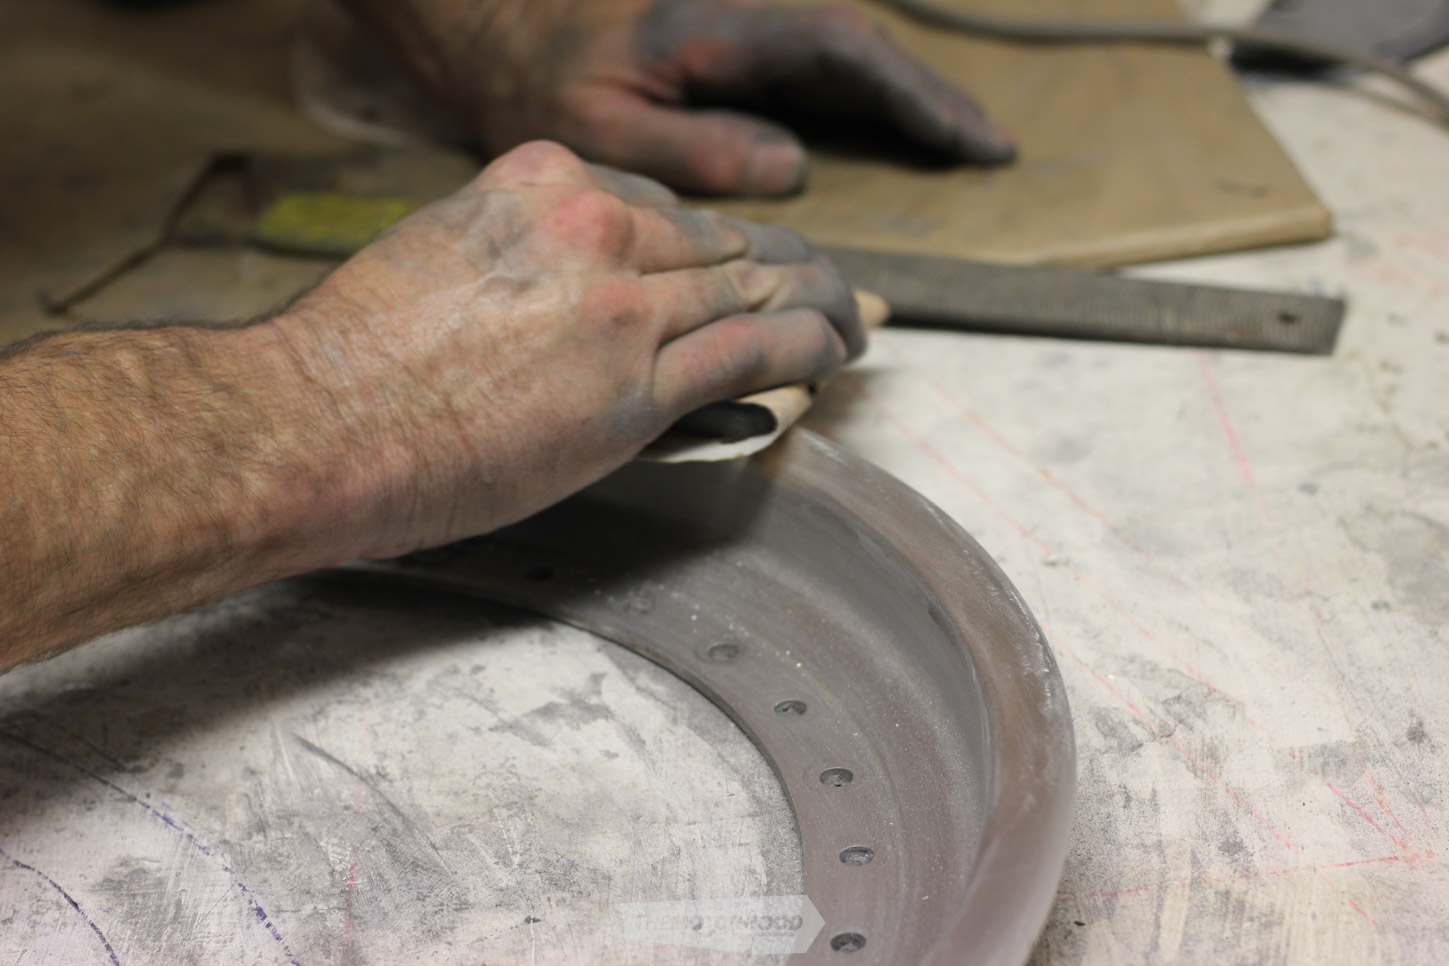
Your outer barrels are likely to be kerb rashed and dented. To fix this, you’ll need a metal file and mallet. Using the file as you would a piece of sandpaper, attack the kerb rash, making sure to work your angles to maintain a round edge — don’t file one spot until it’s flat and warps the shape of the barrel. It may take some practice to get the motion right, and if the dents are too big to file out, give them a tap to help push them back. Once things look a bit better, hit them with some 400-grit sandpaper and double your grit each until 2000-grit to create a smooth finish. This is especially important if you intend to polish-finish them — a polished finish can be achieved by using a metal polish (we found Autosol to be the most effective) and applying a bit of elbow grease to create the desired finish.
For a polished finish, follow the process detailed in step four .. hit them with some 400-grit sandpaper and double your grit each until 2000-grit to create a smooth finish.
Step five — Faces
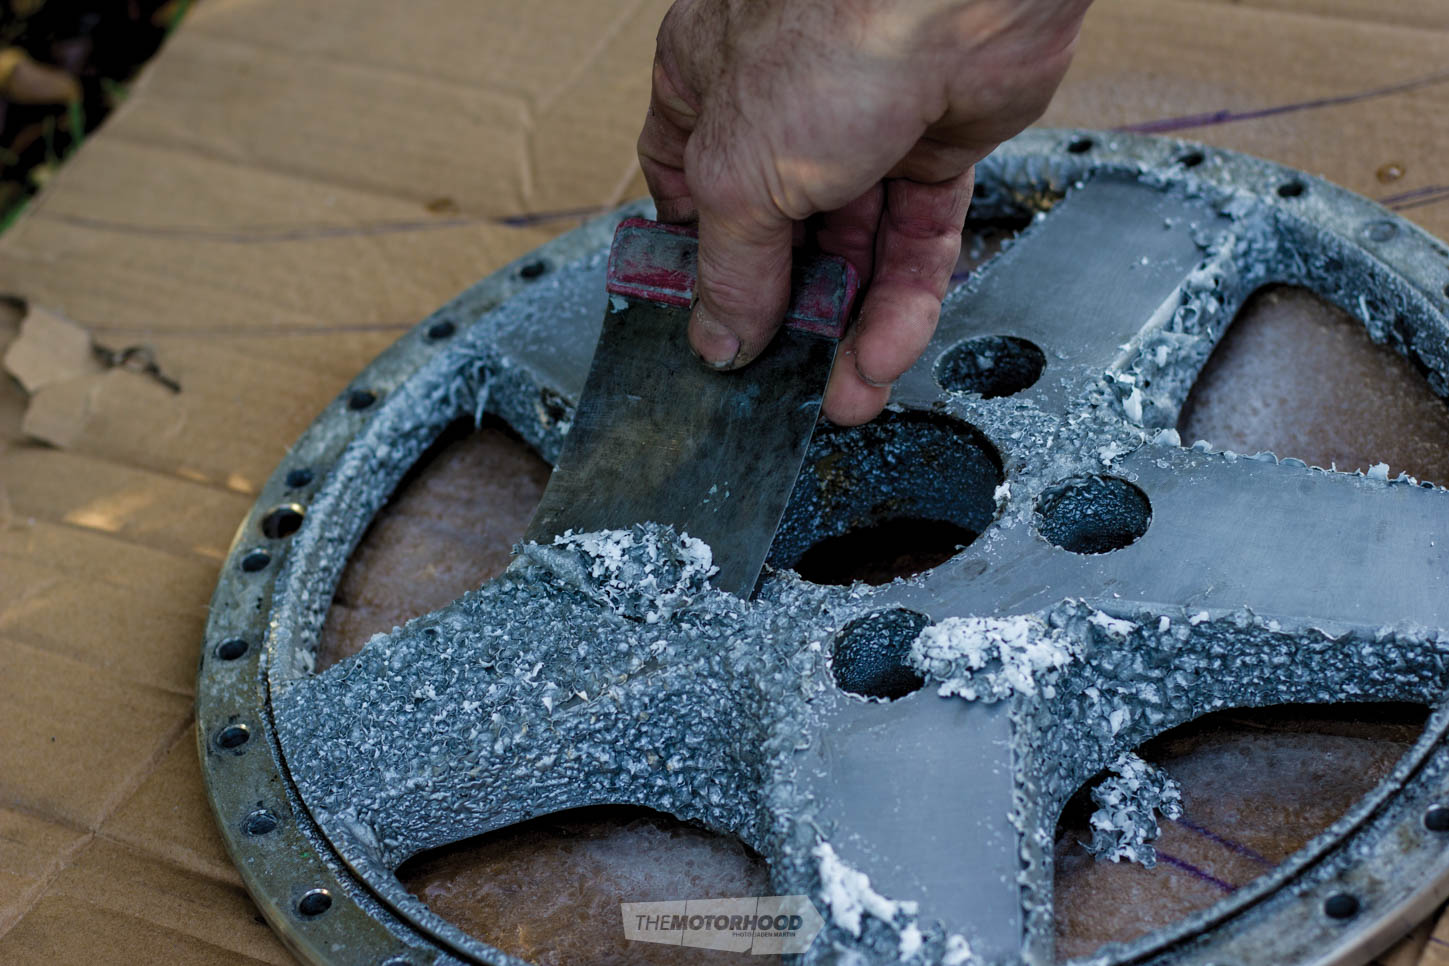
To remove powder coat and paint, pick up a strong paint stripper and spread sparingly over the face, then wait 30 minutes or until the coating bubbles up. If nothing happens, reapply and wrap with cling film to speed up the process. Once it’s stripped, you’ll be able to access the damage underneath. Removing flaking chrome is a bit trickier, and hinges on how bad the corrosion is. Try scuffing the affected areas back with medium-grit sandpaper to achieve a smooth finish that can later be polished out — if the flaking is beyond this, you’ll need to have the face acid dipped to remove all plating. For a polished finish, follow the process detailed in step four. If you intend to paint, give it a quick scuff, as the paint work will fill in fine scratches — lay a couple of coats of primer before applying the colour of your choice and finishing with a clear coat.
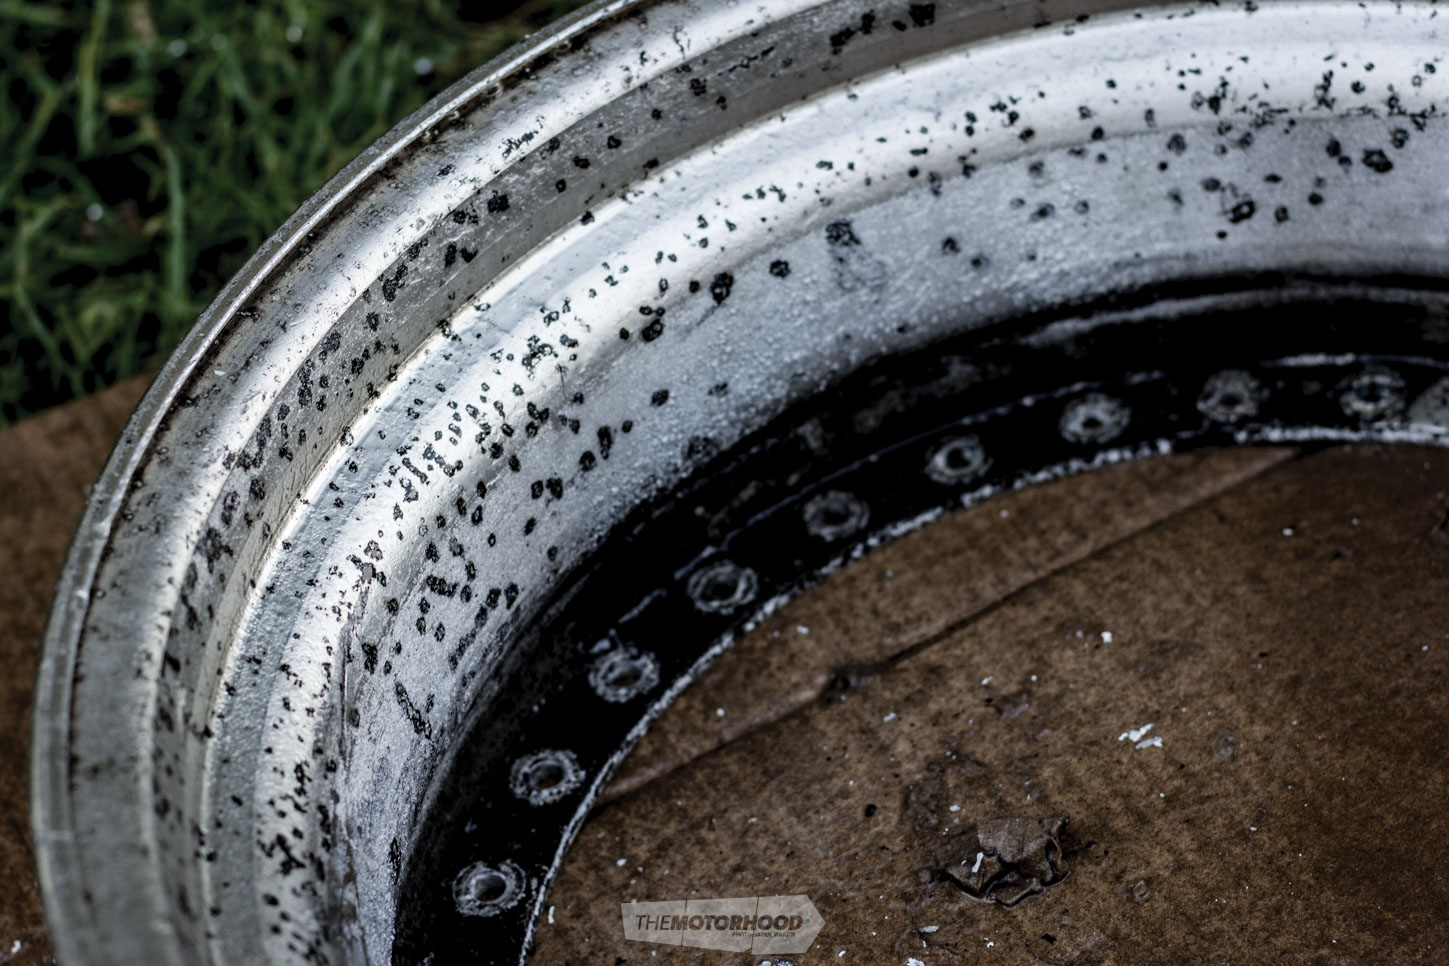
Step six — Rear barrels
Brake dust is your enemy, and the rear barrel is its turf. Over years of braking, the rear barrels end up caked in a combination of dirt, water, and brake dust. To remove all that crud, clean away any excess grime with soapy water, dry off with a rag, then sand back the brake dust with a medium- to fine-grit paper until you can see the original surface. To speed up the process, you can begin by acid washing the barrels then sand. For the perfect finish, you can repaint and clear the rear barrels to make maintenance easy.
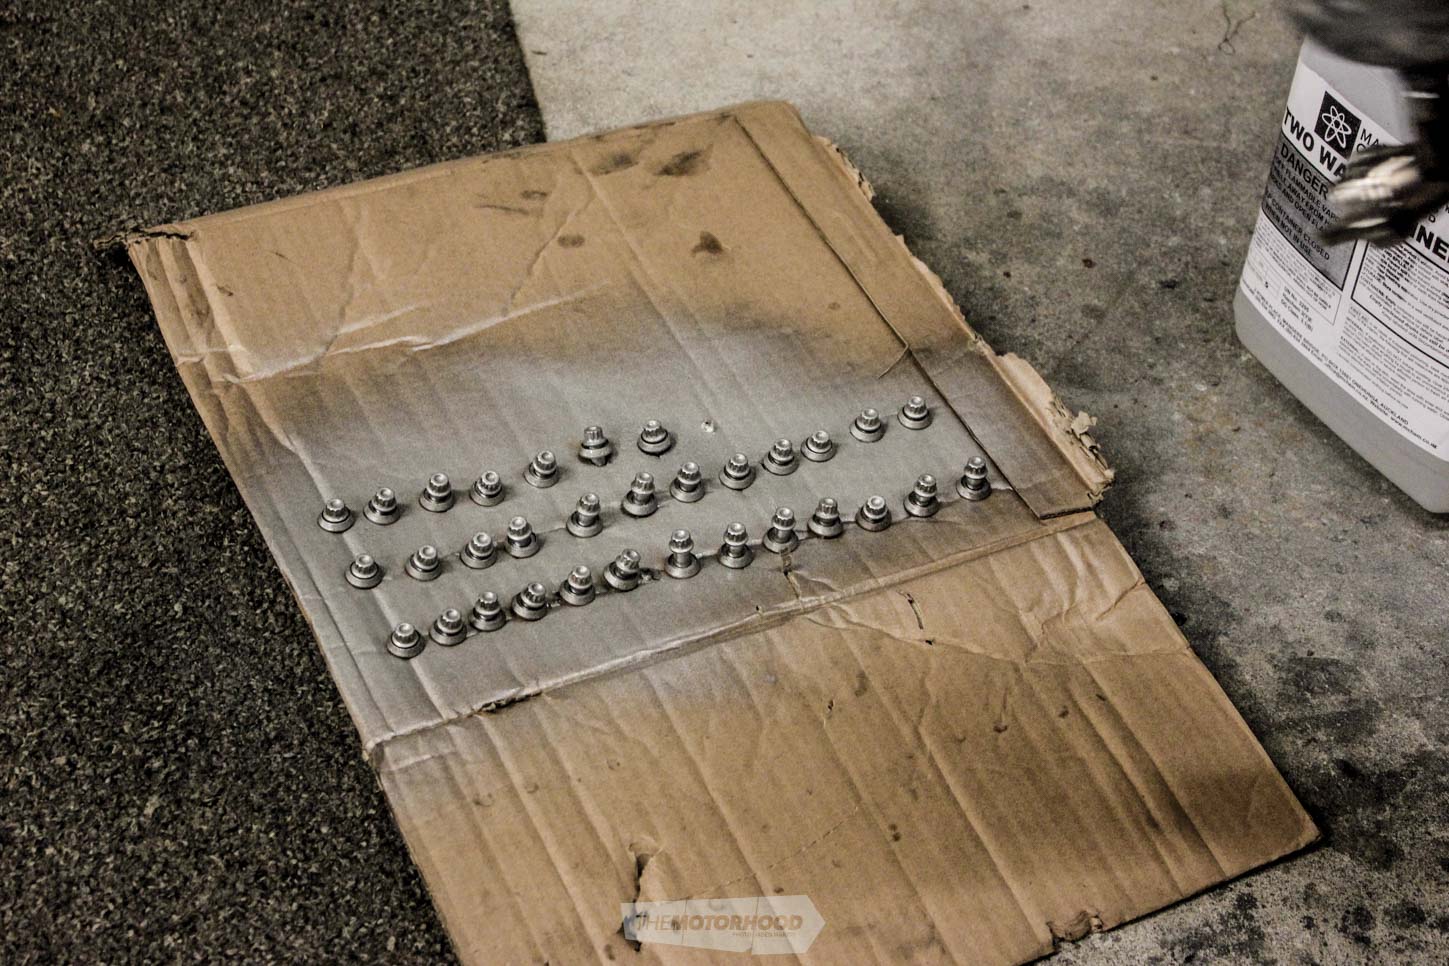
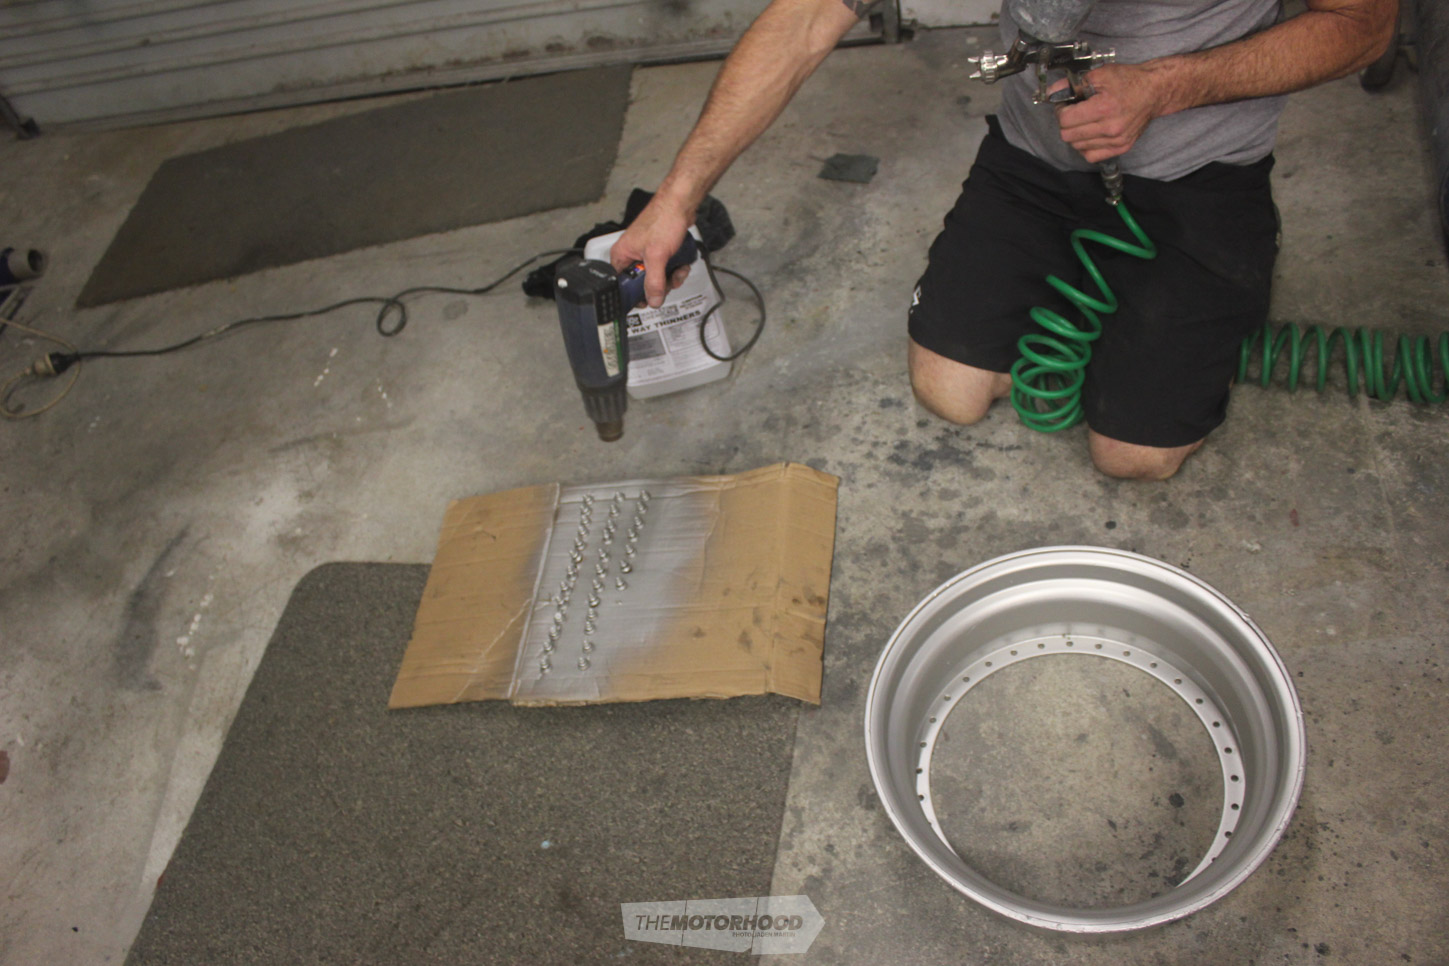
Step seven — Bolts
These can be a real pain in the arse in terms of time consumption — that’s why you chucked them in degreaser earlier on to help soften up whatever is likely to be coating them. In this case, the bolts were covered in what appeared to be spray-can paint, which peeled off easily after soaking. To scrub them up to an acceptable standard, you can either fine-brush them to remove all grime and then polish by hand, or line them up securely in a row then run a lick of paint over them — the alternative is to chuck them back in after a bit of spit shining with a rag.
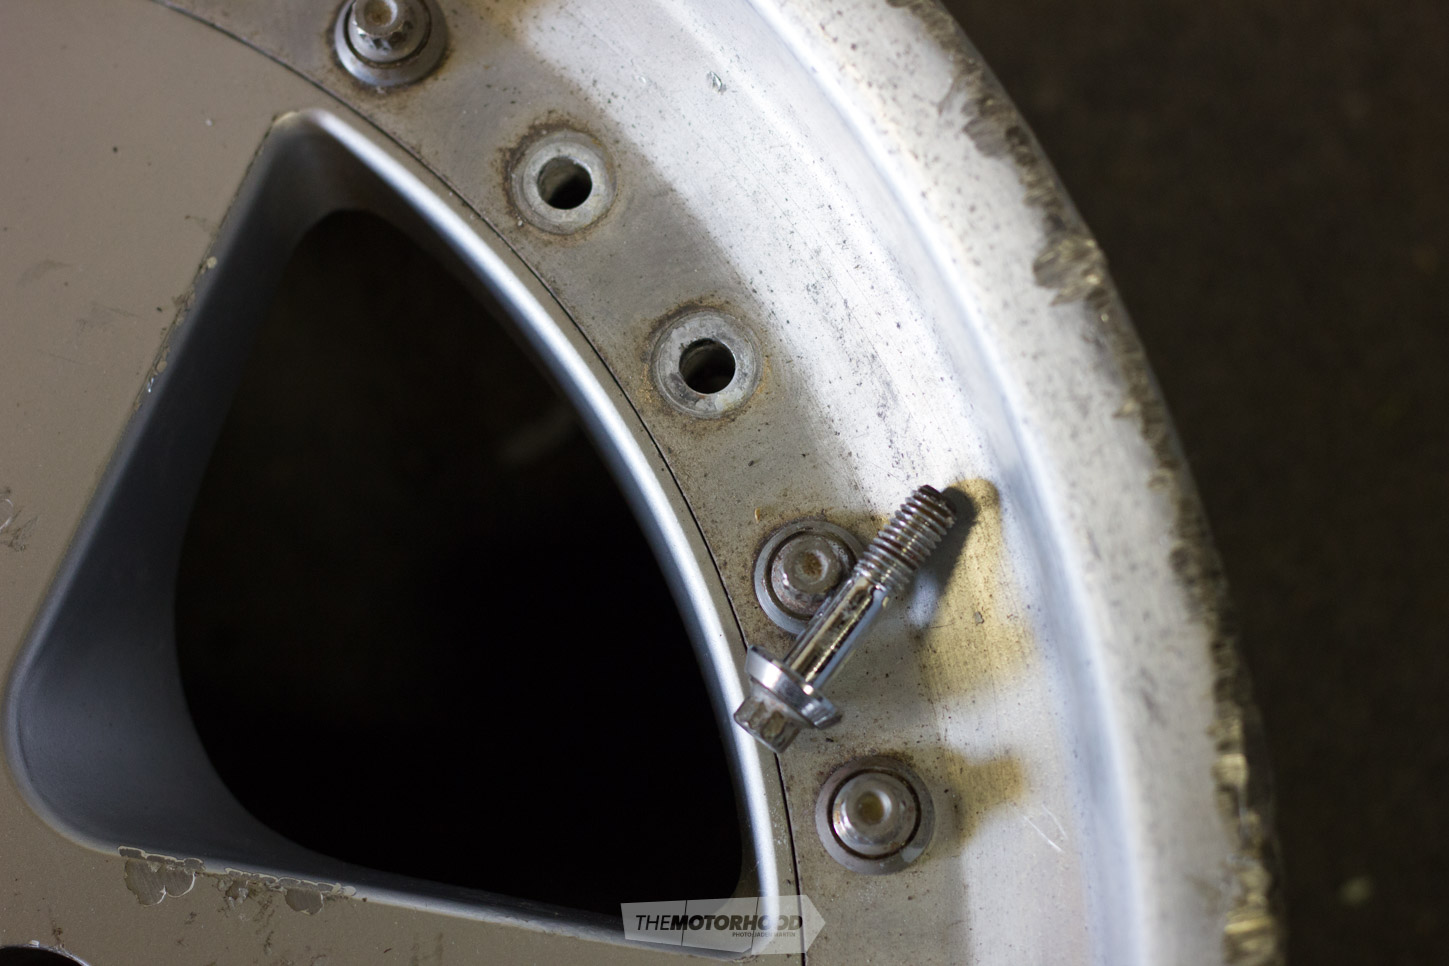
Step eight — Reassembly
Chuck on a pair of rubber gloves, or handle pieces with a clean rag to avoid dirtying the surface. Lay the rear barrel on the ground with the middle end facing up. Ensure that this is free of any contaminants on the meeting surface, and, if needed, give it a quick scuff with a light sandpaper to remove any traces of grime. Do the same with the front and back surfaces of the face before placing onto the rear barrel — take care to line up the valve stem, as some designs will need it to feed through a specific point on the face. Then fit the outer barrel in the same manner and locate all three sections together with a few bolts. Visually inspect that all the holes are lining up then feed bolts through, finger tightening each until complete. Torque each bolt in the same way you removed it, taking care not to apply force to the bolt head, as you will strip it.
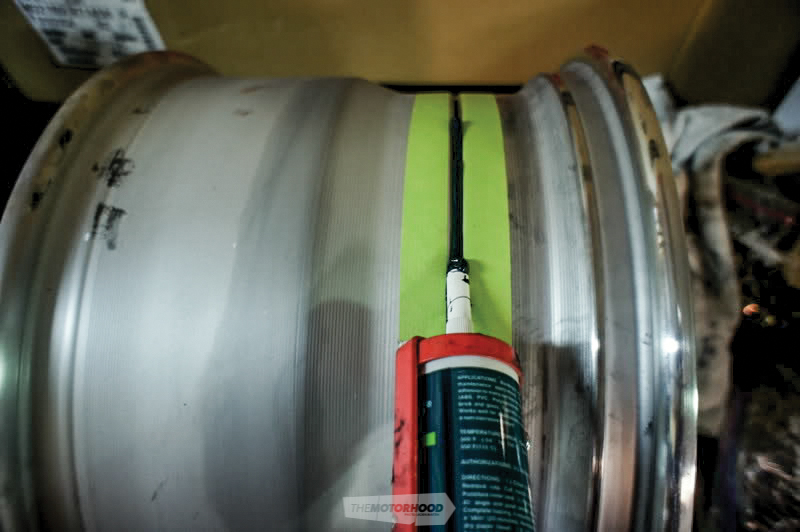
Step nine — Sealing
Arguably the most critical part of the refurb is resealing the three sections back together to ensure air doesn’t escape when they’re fitted with a tyre. This can be achieved by using regular bathroom sealer — there are products designed specifically for sealing wheels, but the bathroom equivalent hasn’t failed us yet.
Preparing the surface is important. Remove any loose silicone that may remain from the previous sealant, and use isopropyl alcohol for good measure. We recommend laying a line of tape along each side of where the bead will lie to create a clean finish. Begin by laying a smooth, consistent bead all the way around, and run your finger (in gloves) over the bead to press and spread the sealant into all the gaps. When still wet, remove the tape to clean the lines, and allow to sit overnight.
Protection is either a simple lick of clear coat — although this is known to dull the shine — or a regular polish and wax to prevent corrosion
Step 10 — Protection
After all your hard work, it would be a shame to see the wheels go back down the same road you have rescued them from because of poor protection. If you opted for the polished alloy finish, protection is either a simple lick of clear coat — although this is known to dull the shine — or a regular polish and wax to prevent corrosion. Painted surfaces are much easier to protect, as they will have the clear to finish the surface, although washing regularly and waxing is recommended to stop brake dust building up.
Happy refurbing!